How to Customize the My Account Page in WooCommerce
The My Account page is the central customer dashboard in a WooCommerce store. It is accessible to customers who are logged in and provides them with an overview of their account details, past orders, payment methods, and shipping and billing addresses. Customers can also edit their account details, view their order history, and download digital products from this page.
The “My Account Page” of your WooCommerce store is an essential part of your customer shopping workflow, and it should be designed to enhance your customer experience.
In this article, we will show you how to customize the My Account page on your website. Once you complete this article, you can completely change the look of the My Account page. You can change how the menu looks, add new pages and content on the page, and add custom links to the content.
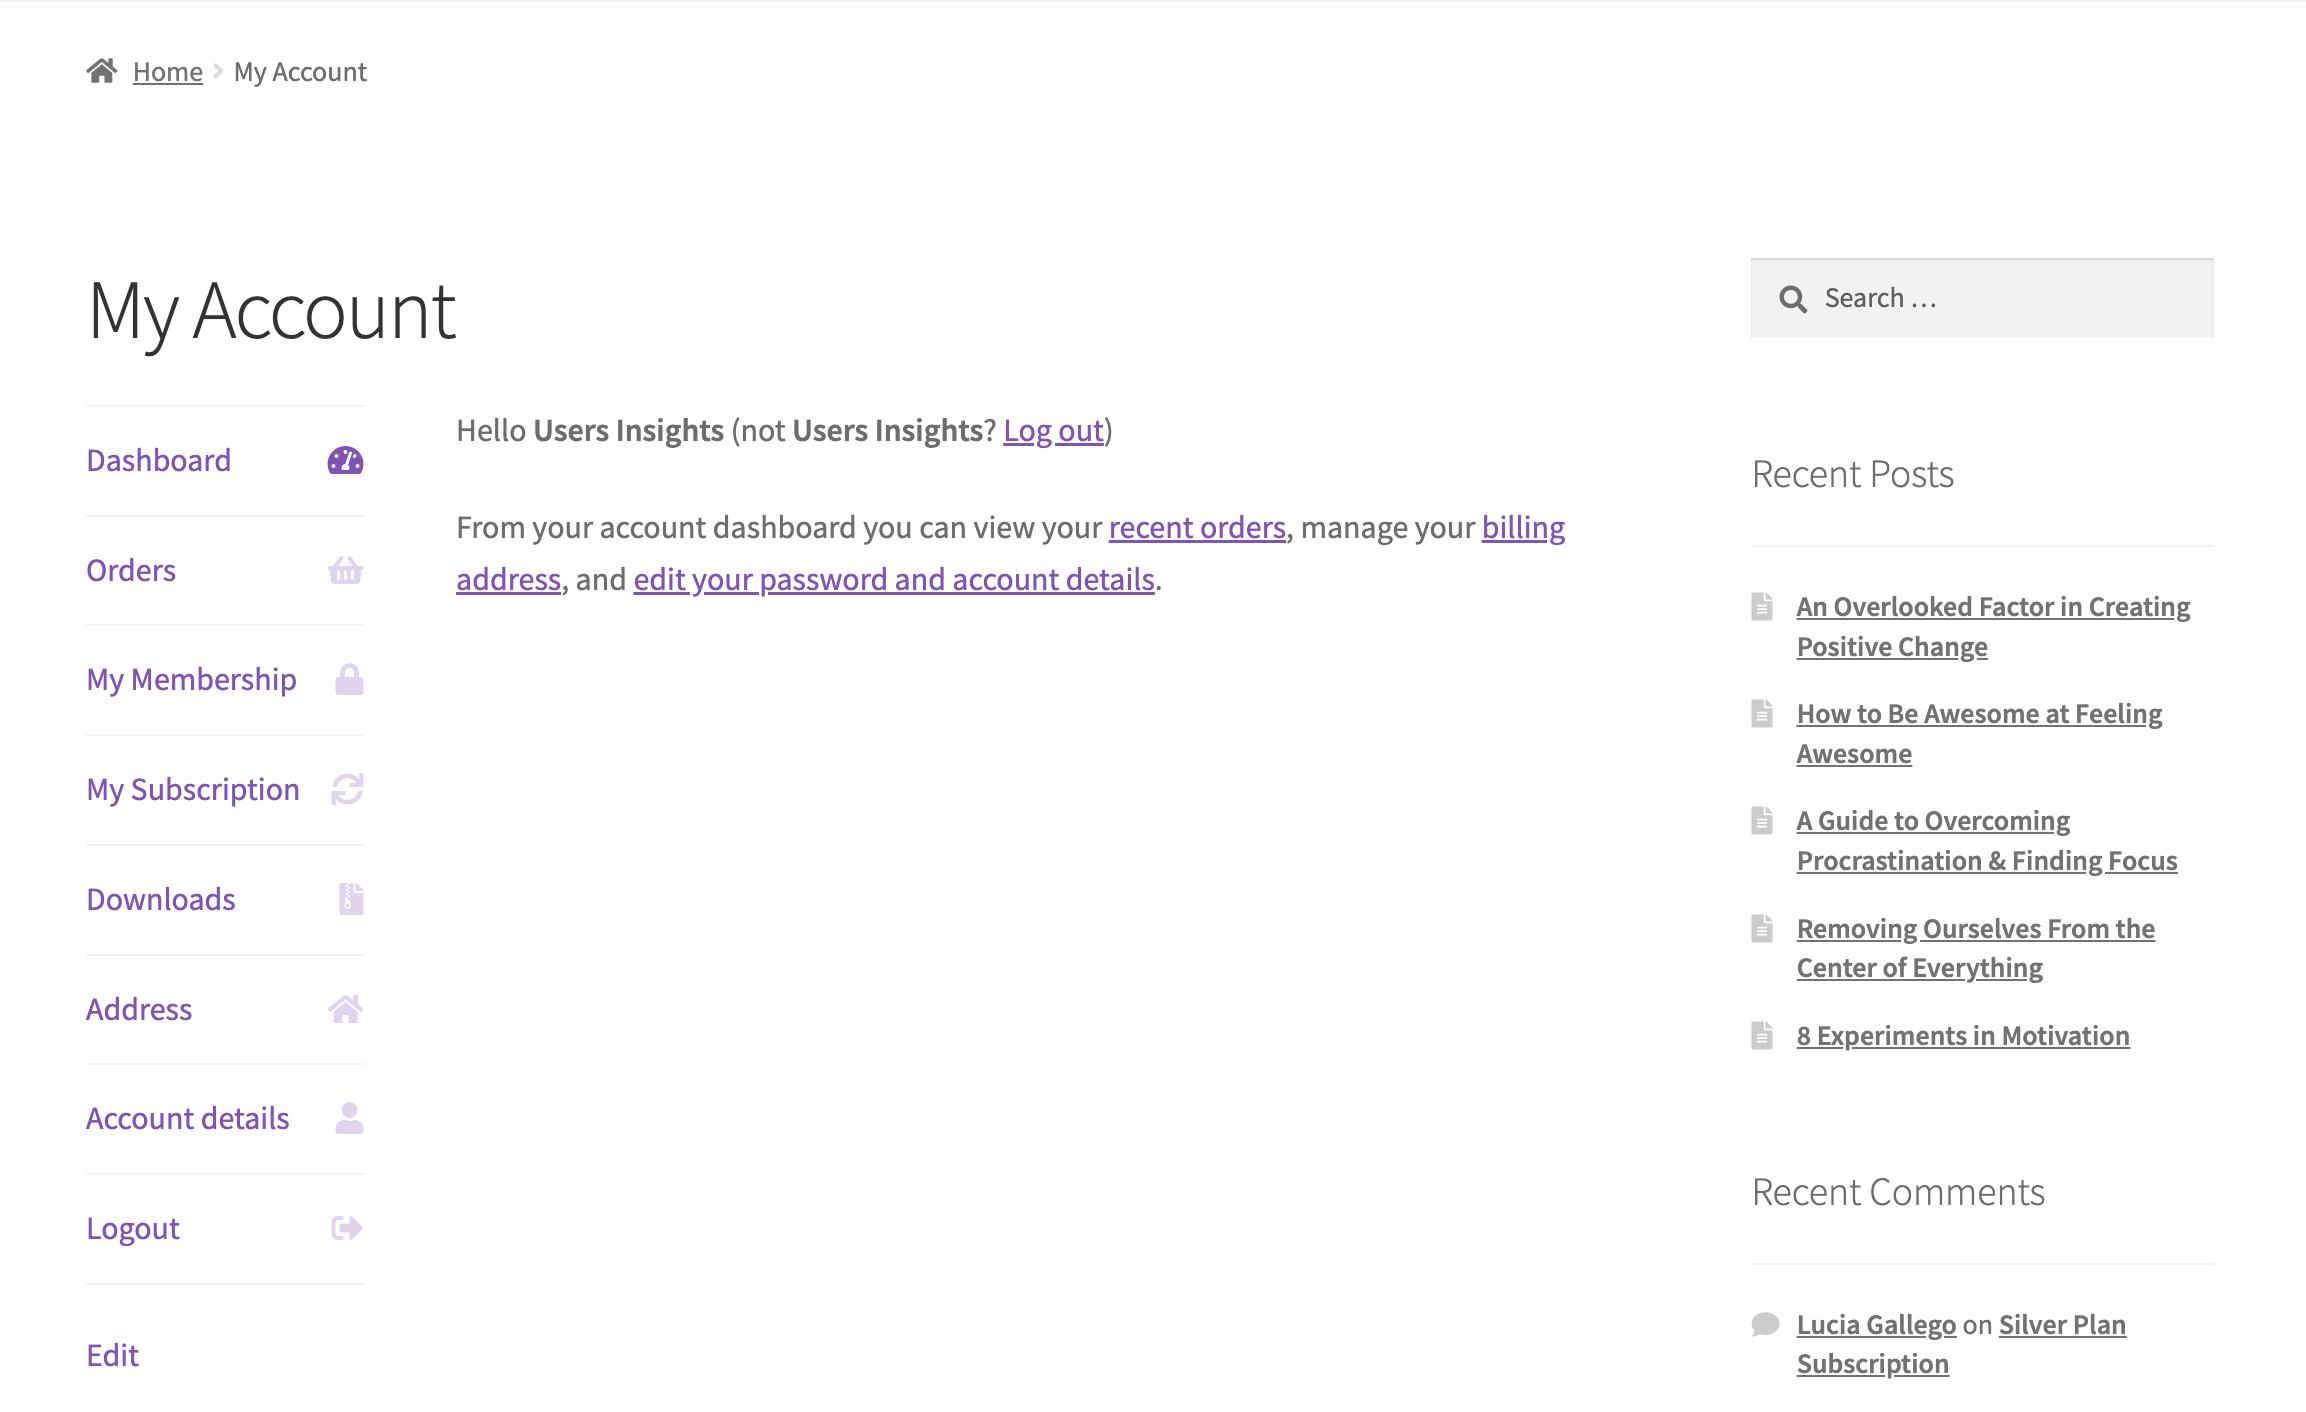
The WooCommerce account page of Users Insights plugin
The Importance of the WooCommerce My Account Page
The WooCommerce My Account page is one of the most important pages on your WooCommerce site. It’s the page where customers can manage their account details, view their order history, and track their order status. It’s also where they can contact you with questions or problems.
Making sure that your WooCommerce my account page is well-designed and easy to use is essential for providing a good customer experience.
Ensuring your WooCommerce my account page is well-designed and easy to use is essential for providing a good customer experience. A well-designed account dashboard will make it easy for customers to find the information they need, and account details should be displayed and easy to edit.
The [woocommerce_my_account] shortcode
The [woocommerce_my_account] shortcode displays the My Account page in a WooCommerce store. This page is accessible to logged-in customers and provides an overview of their account details, past orders, payment methods, and shipping and billing addresses. Customers can also edit their account details, view their order history, and download digital products from this page.
Where is My Account page in WooCommerce?
In WooCommerce, the “My Account” page is an actual WordPress page with the corresponding WooCommerce shortcode [woocommerce_my_account]. Any embedded WordPress page with this shortcode will render the default account management tabs and content. From here, you can see a list of recent orders, manage your shipping status, and edit your password and account details.

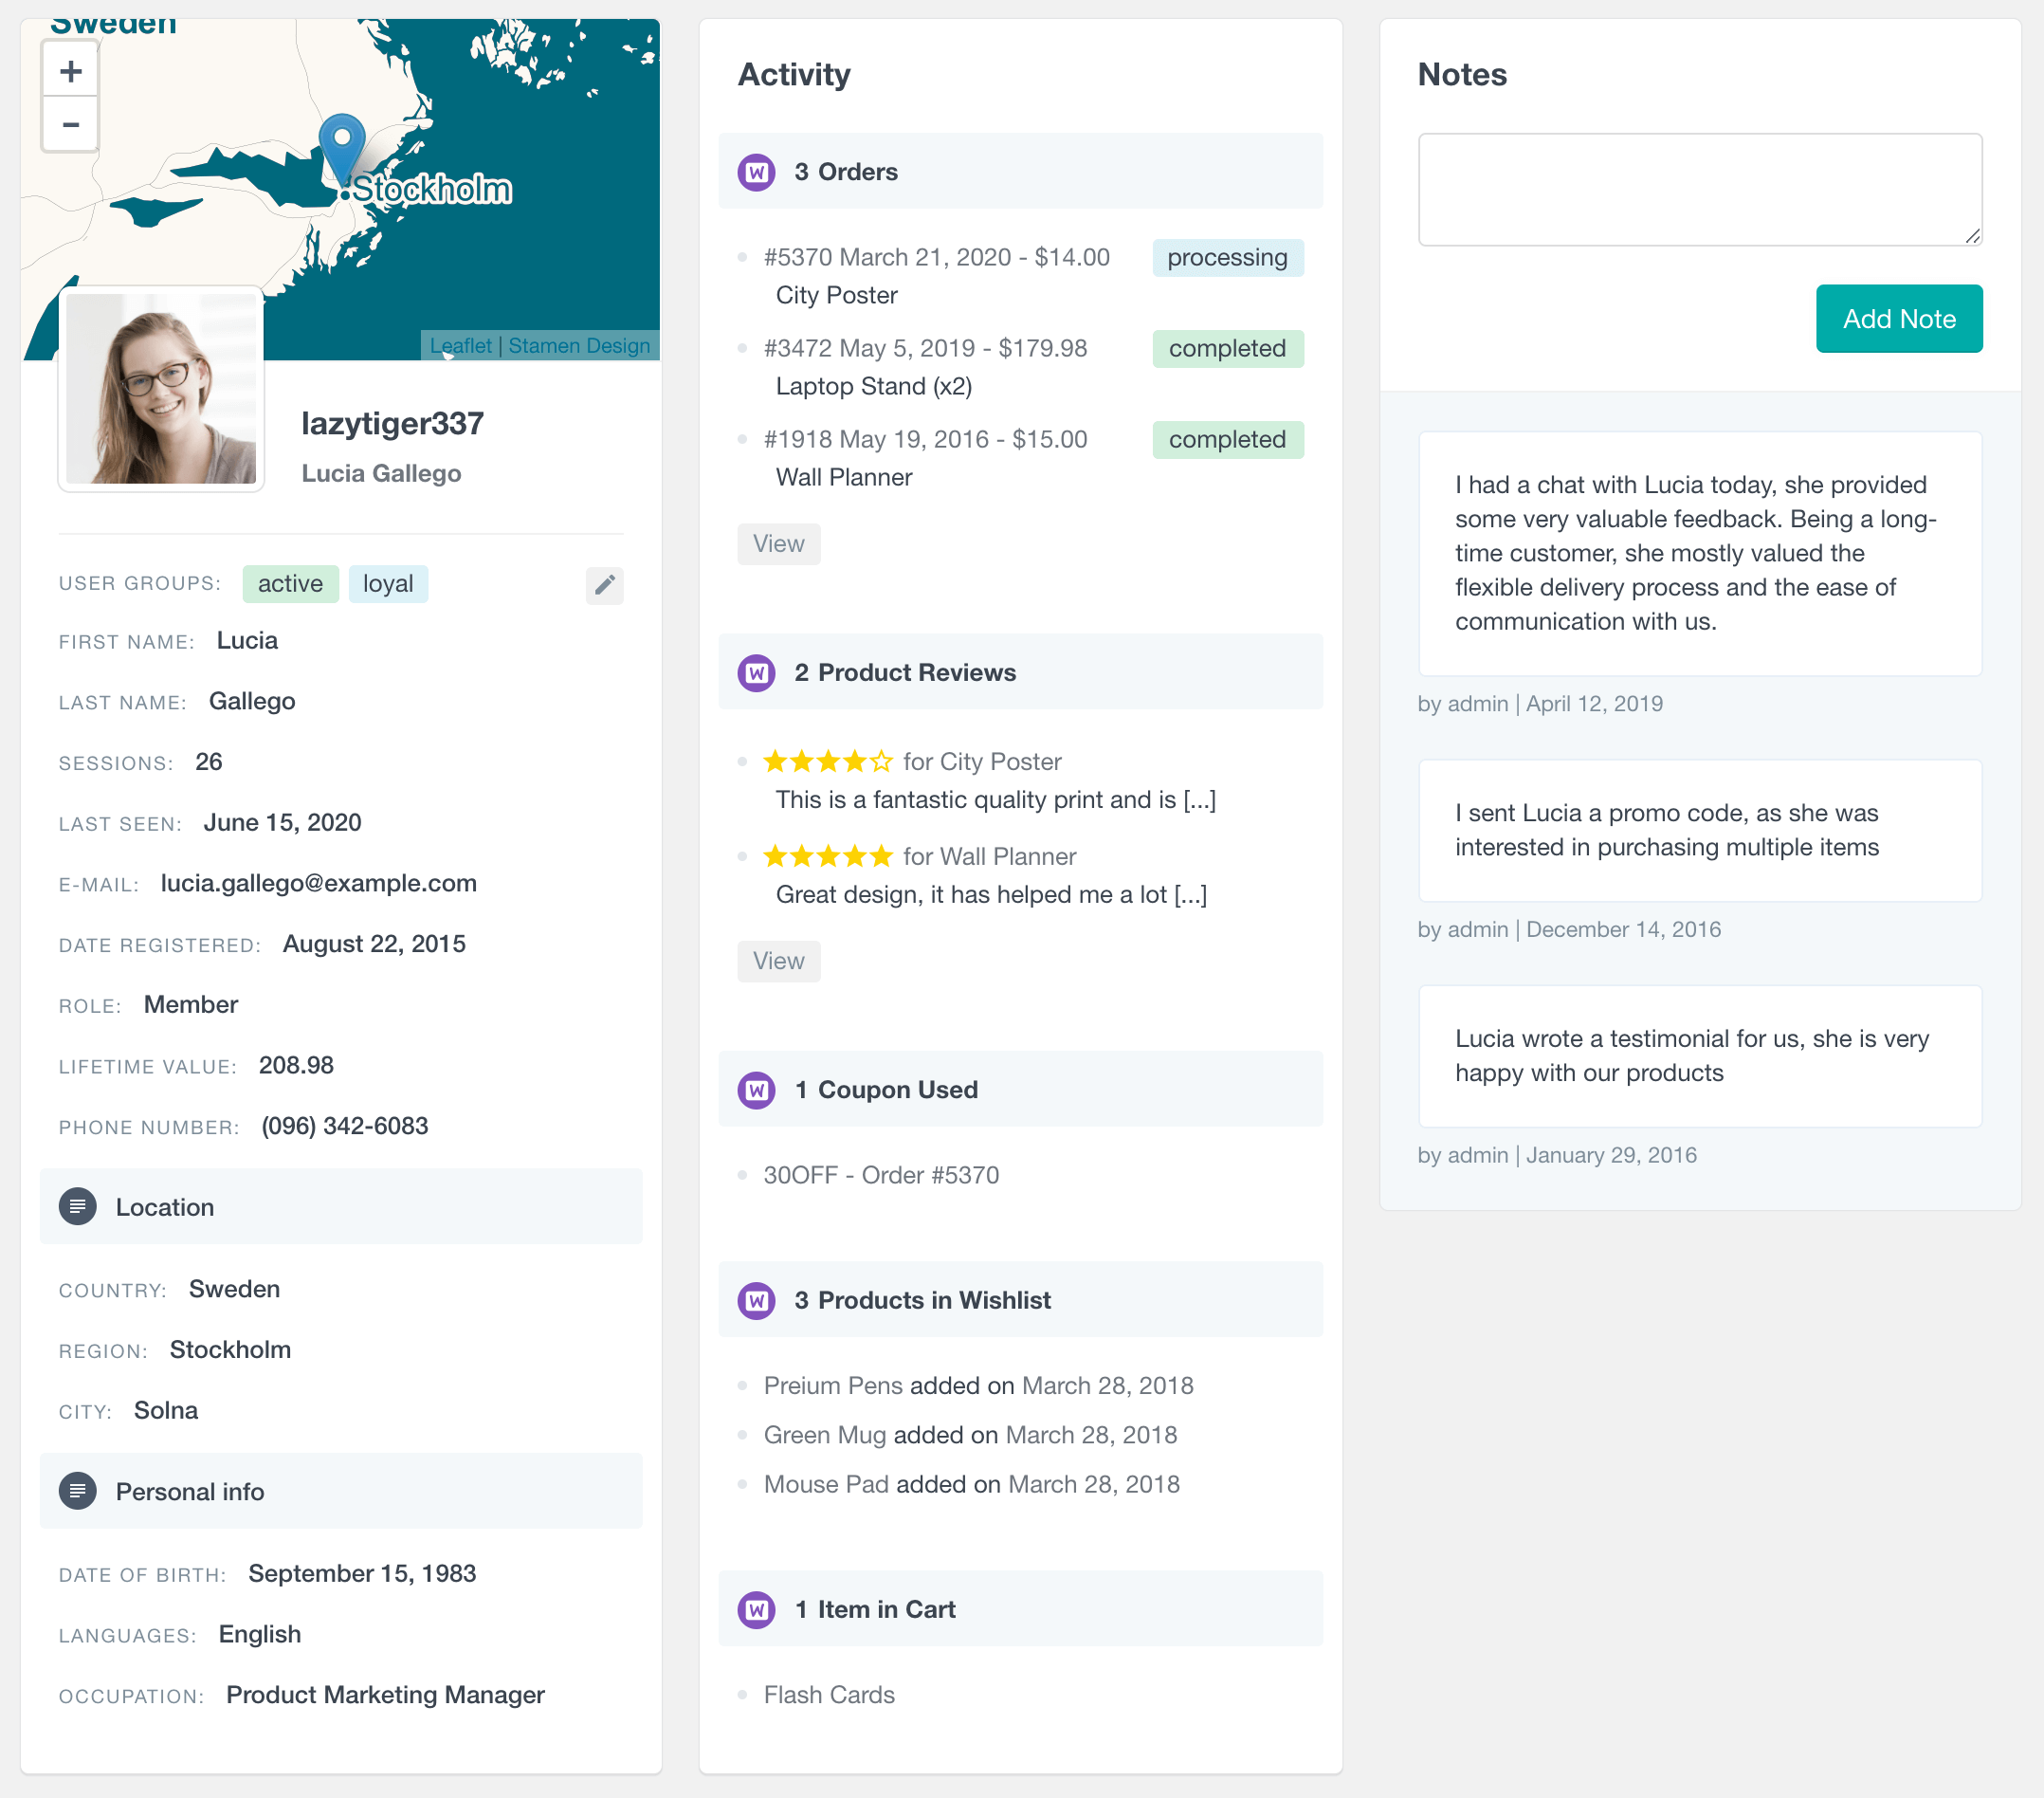
WooCommerce customer profiles packed with customer details
Why Customize the My Account Page in WooCommerce?
There are numerous reasons to customize the My Account page in WooCommerce. By customizing the WooCommerce My Account page, you can make it more user-friendly and informative for your customers. Additionally, adding crucial account details will help your customers manage their accounts more effectively. Customizing the account page can increase its value for both your business and your customers.
So, without further ado, let’s look at the My Account page.
Customize WooCommerce My Account
In the same manner as user registration, adding custom fields, and WooCommerce customer profile building, you can customize the My Account page by using plugins or coding the WordPress files. Since In this article, we are going to focus on the coding aspect of it. You can customize the page in the following ways.
How to edit the WooCommerce My Account page programmatically
To edit the WooCommerce My Account page programmatically, you can use a dedicated code snippets plugin, or you can add the custom code into the functions.php file of your child WordPress theme
Changing the menu order
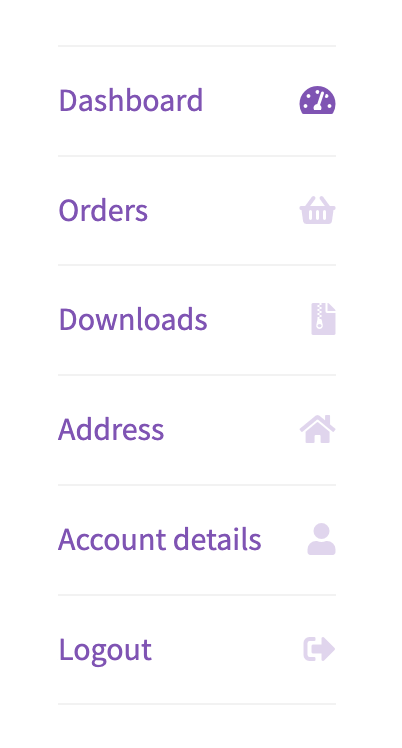
By default, the menu on the My Account page looks as follows.
To change the order of the account tabs in the menu, you can use the woocommerce_account_menu_items filter. This filter allows you to customize the account menu by modifying the items it displays. The items are passed to the filter as an array, with each key representing the unique ID of the menu item and the value representing the display title of the menu item. To reorder the tabs, you simply return the array of menu items in a different order. The following snippet illustrates how to use this hook. You can add this code to the functions.php file of your child theme.
function my_account_menu_order($menu_items){

    $reordered_items = array(
        'dashboard' => __('Dashboard', 'woocommerce'),
        'downloads' => __('Download', 'woocommerce'),
        'edit-address' => __('Addresses', 'woocommerce'),
        'edit-account' => __('Account Details', 'woocommerce'),
        'customer-logout' => __('Logout', 'woocommerce'),
        'orders' => __('Orders', 'woocommerce')
    );

    return $reordered_items;
}

add_filter('woocommerce_account_menu_items', 'my_account_menu_order');
As you can see in this example, we have moved the “Orders” tab to the end of the menu. Save the file and refresh the WooCommerce account page to see the modified result.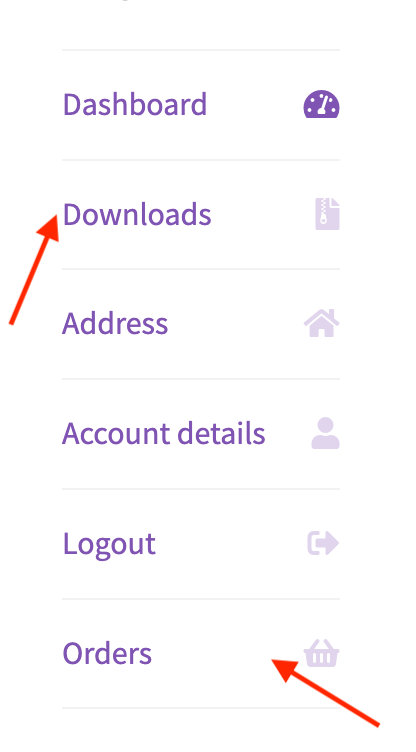
Changing the names of the tabs
Once again, we can use the woocommerce_account_menu_items filter to change the names of the account tabs. If you have used the code snippet above to reorder the items, you can specify the tab’s name directly in that snippet.
If you only need to change the tab names without reordering, you can update the menu item’s title using the specified key. In the example below, we have changed the name of the edit-account tab from “Account Details” to “Details”:
function my_account_rename_items($menu_items){

    if(isset($menu_items['edit-account'])){
        $menu_items['edit-account'] = __('Details', 'my_text_domain');
    }

    return $menu_items;
}

add_filter('woocommerce_account_menu_items', 'my_account_rename_items');
This produces the following output on the webpage: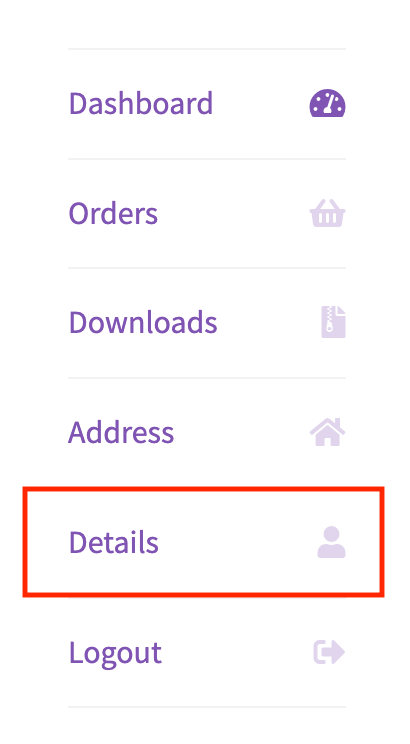
Changing the icons of the tabs
In this demonstration, we use the StoreFront theme to show screenshots. The theme uses font-awesome icons by default. Because of this, we will show you how you can change the icons of the tabs using font-awesome.
The icons of the tabs can be changed with a bit of custom CSS. You can add the custom CSS to your WordPress dashboard’s Appearance -> Customize -> Additional CSS section.
The CSS selector to which you can apply the icon depends on the corresponding menu item. For example, for the order item, you can use the following selector:
.woocommerce-MyAccount-navigation ul li.woocommerce-MyAccount-navigation-link–orders a::before
And here is an example of changing the “Orders” menu item icon to a shopping cart item:
.woocommerce-MyAccount-navigation ul li.woocommerce-MyAccount-navigation-link--orders a::before{
  content: "\f15c";
}
The icon can be changed by setting the corresponding unicode to the “content” attribute. You can find the font-awesome codes here.
The default value in the class mentioned above is “\f15c”. If we change it to “\f07a” the icon of the Orders tab will look like this:
![]()
Adding a new menu tab and content
To add a new tab to the menu, we will first need to create a custom endpoint.
What are endpoints in WooCommerce
Endpoints in WooCommerce are extra bits of the URL that show different content on the same page. For example adding an endpoint like ‘edit-account’ to the URL of a ‘my account’ page shows the edit account content instead of the default account overview. This allows for dynamic content without needing multiple pages and simplifies the site structure and user experience.
To add a new tab on the menu, you have to go through the following three steps.
-
Register an end-point
To add a new tab on the menu, you first need to create an account endpoint. It acts as the URL slug which comes after /my-account/. To add a new tab with the name My Loyalty, add the following endpoint in the functions.php file.
function my_account_new_endpoints() {
    add_rewrite_endpoint('loyalty', EP_PAGES);
}

add_action( 'init', 'my_account_new_endpoints' );
Now, go to the Settings > Permalinks page and click Save Changes (without applying any changes). Doing this flushes the permalinks and lets the website pick up on the new endpoint created.
-
Add the end-point content
Now, add the following content to the functions.php.
function my_loyalty_endpoint_content() {
    get_template_part('my-account-loyalty');
}

add_action('woocommerce_account_loyalty_endpoint', 'my_loyalty_endpoint_content');
Once you do this, create a new php file with the name my-account-loyalty.php in the root directory of your child theme. This is where you can insert the custom code/content of your new account page. For example:
<h2>Our loyalty program</h2>

<?php

// your custom code goes here
You can alternatively directly render the content from the my_loyalty_endpoint_content() function, instead of creating a separate file.
-
Add the tab to the menu
Once you create the file, add the tab to the menu as shown below.
function my_account_rename_items($menu_items){
    $menu_items['loyalty'] = __('My Loyalty', 'my_text_domain');
    return $menu_items;
}

add_filter('woocommerce_account_menu_items', 'my_account_rename_items');
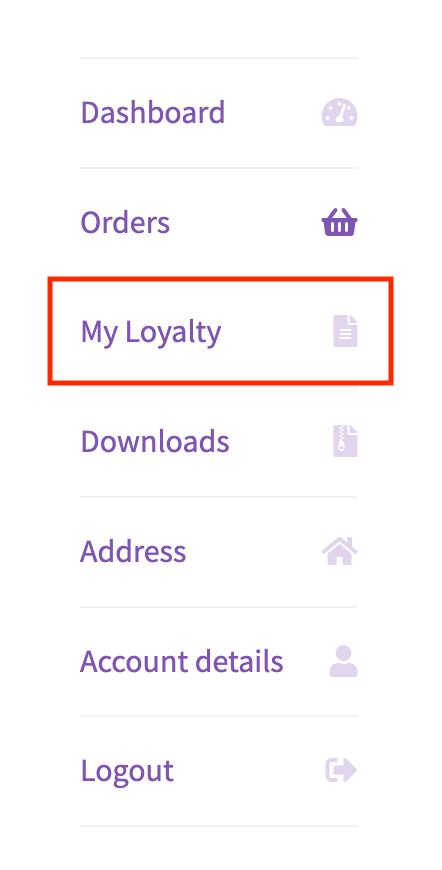
Doing this adds the tab to the menu.
Adding an icon to the tab
Finally, you might need to add an icon. In the icons.css file, search for the class which contains the icon of the newly created tab and add a code for the content.
After this, you can see the following changes in the menu bar of the my account page.
Adding custom content to the existing tabs
Sometimes, the default content on the WooCommerce account page might not be enough. You may need to add some text of your own to personalize your website. To demonstrate how you can change the content of the pages, we will take an example of the WooCommerce dashboard page.
We’ll need to create a woocommerce folder in your child’s theme. Then, we’ll add the necessary files that we would like to overwrite. We need to make sure to maintain the default WooCommerce file structure.
You can overwrite a default WooCommerce template file just by creating a file with the same name and path in the woocommerce folder of your child theme. You can find the list of all WooCommerce template files in the woocommerce/templates folder of the WooCommerce plugin.
For example, if you need to overwrite the dashboard template that is located in the WooCommerce plugin at the following path:
woocommerce/templates/myaccount/dashboard.php
You would need to create a file in your child theme with the following path:
woocommerce/myaccount/dashboard.php
After this, copy the default WooCommerce template content in your template file. You can do this by downloading the dashboard page template from the WooCommerce GitHub repo for your specific version or copying it from your WordPress installation plugins directory. Once you do this, you can customize the template code.
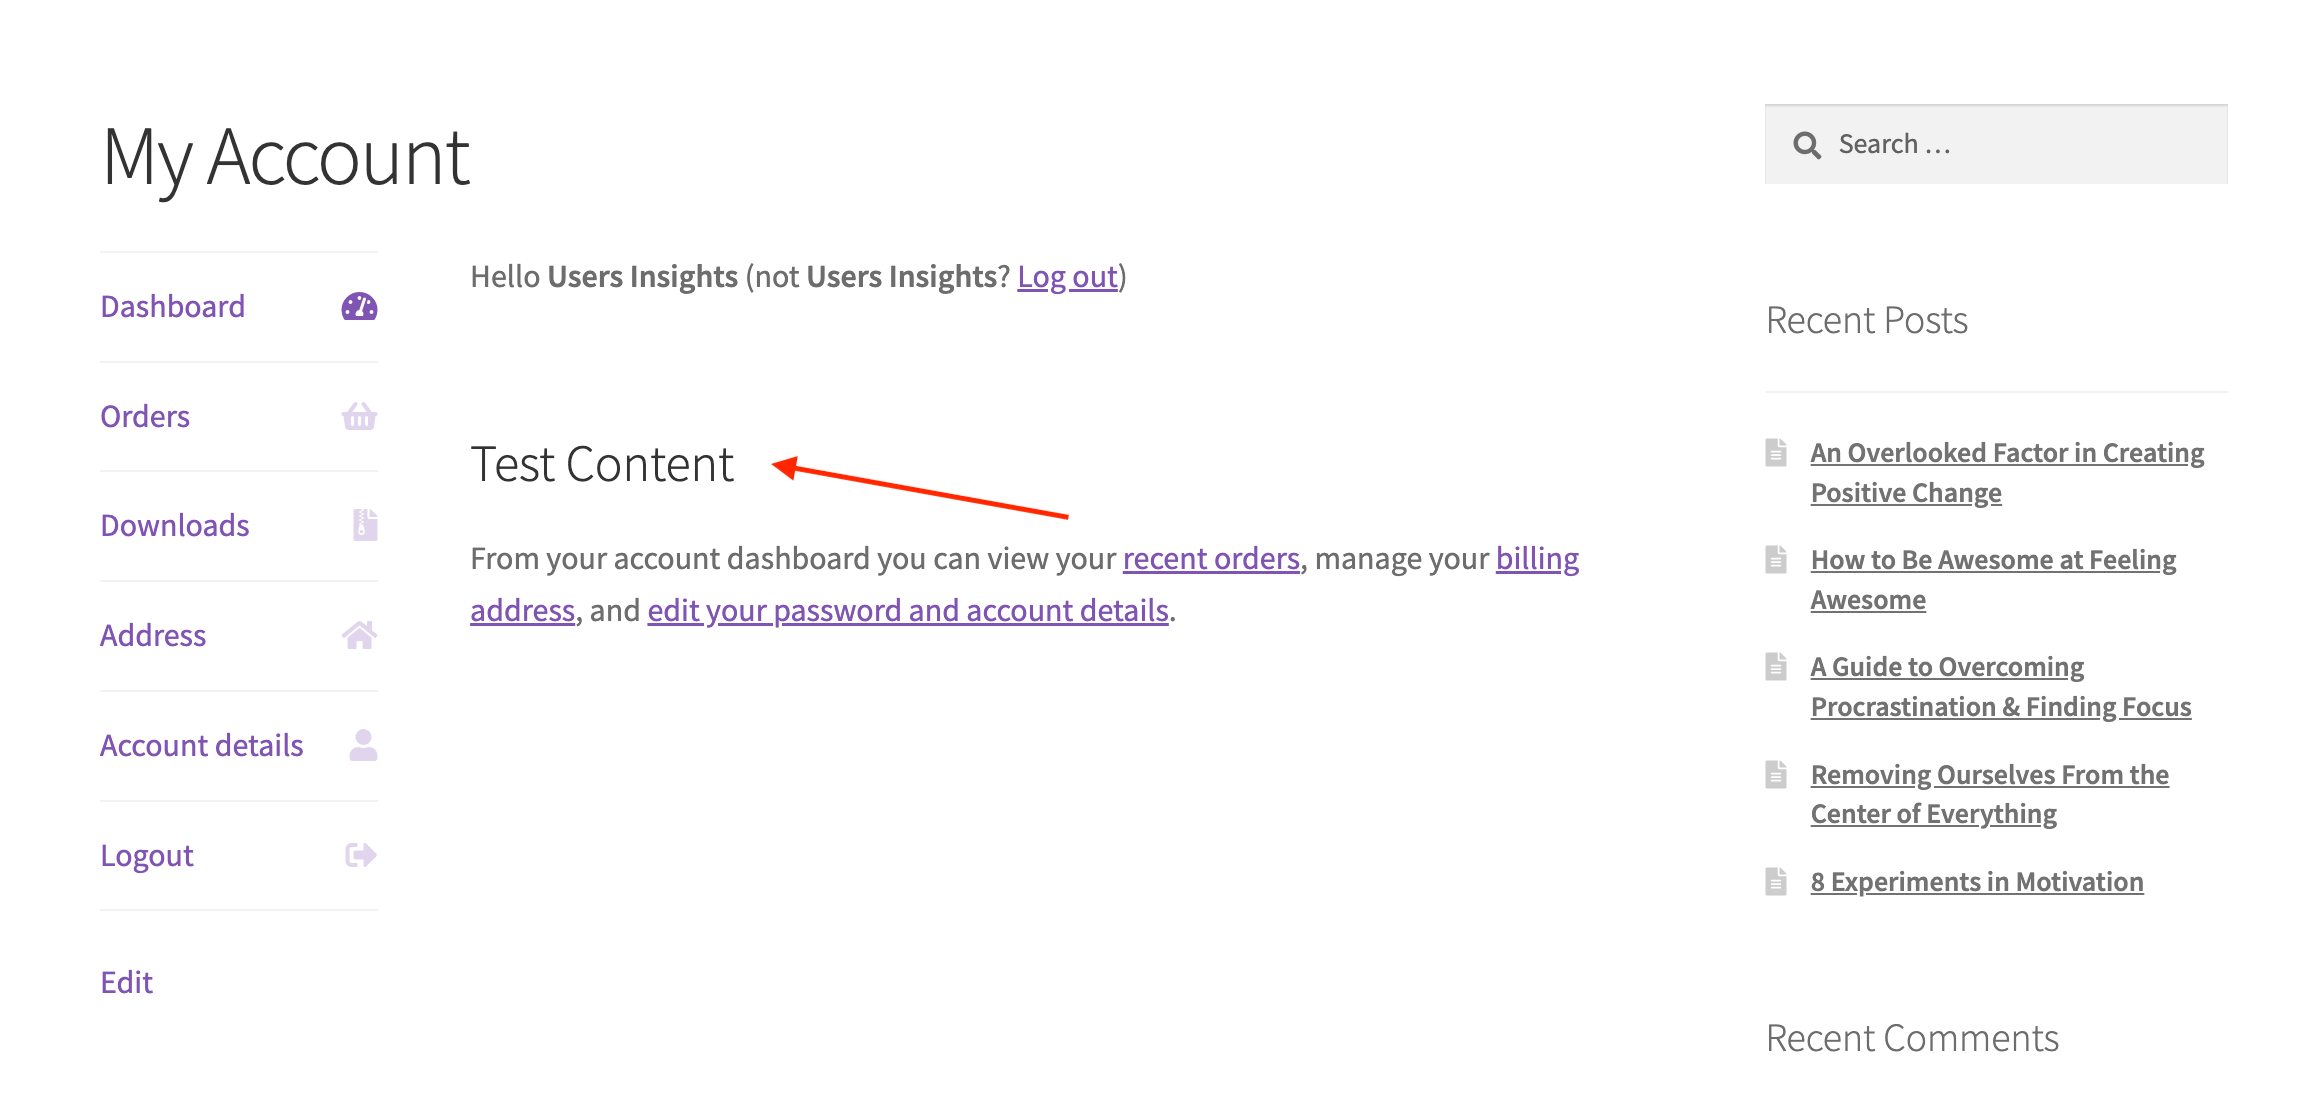
In the example below, we have added the line <h3>Test Content</h3> in the dashboard.php file:
Before and After Menu Hooks
In WordPress, hooks are features that let you change or add the code without changing the core files. The Before and After menu hooks in WooCommerce let you add any text or HTML code just below or just after the menu. It specifically adds the content either before or after the <nav> element.
Use the following code in the functions.php file to add content before the menu.
add_action('woocommerce_before_account_navigation', 'before_content');
function before_content(){
  echo 'Content added before the menu';
}
Similarly, use the following code to add content after the menu.
add_action('woocommerce_before_account_navigation', 'after_content');
function after_content(){
  ?>
  <h2>Content added before the menu</h2>
  <?php
}
Once you do this, your menu looks similar to the following.
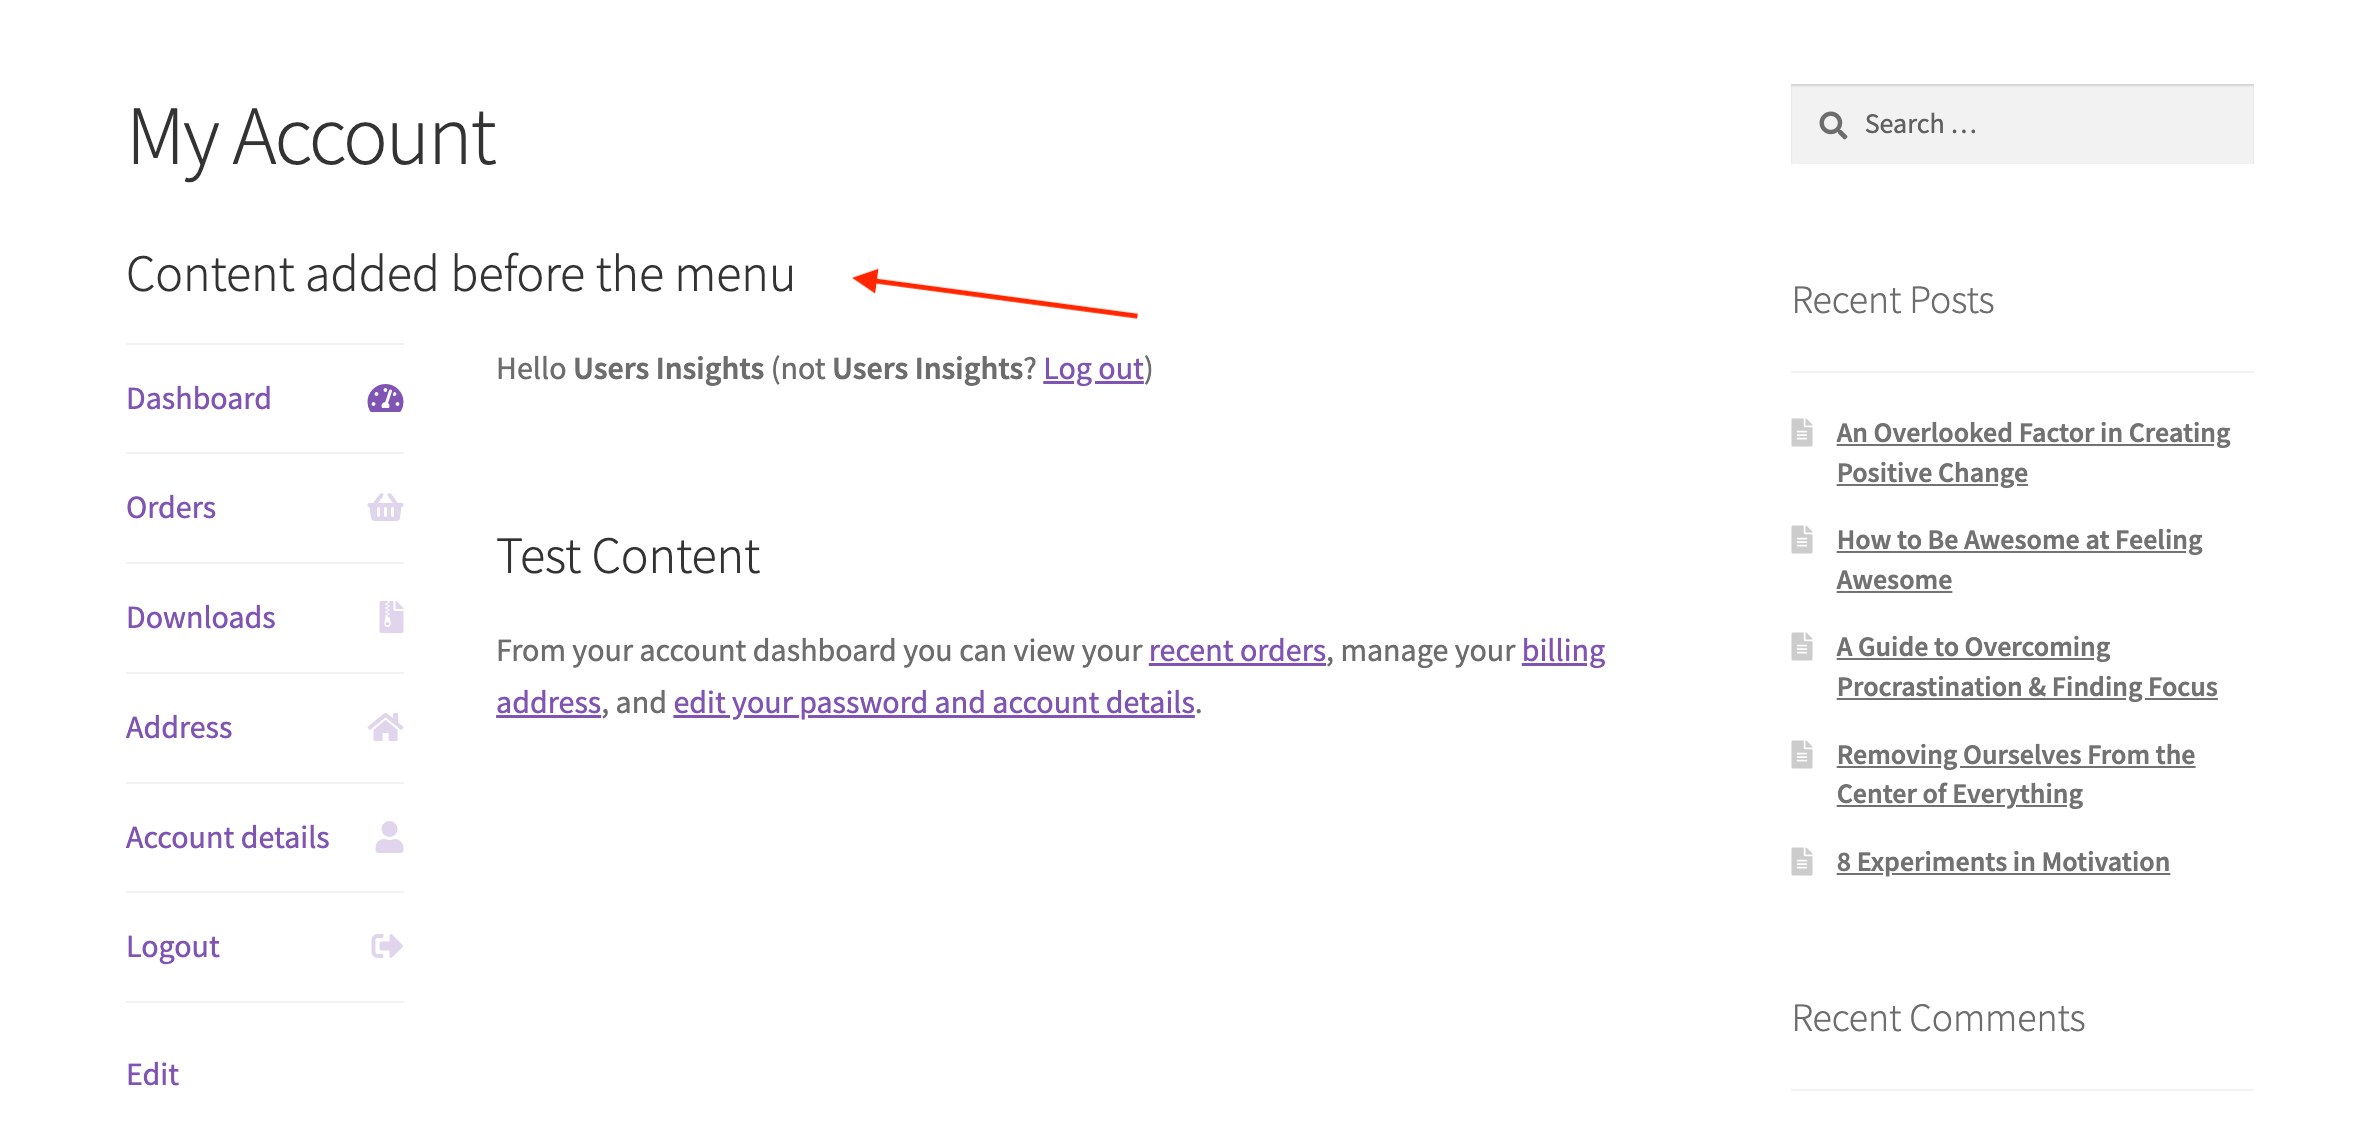
However, in most cases, the my account <nav> element has a float:left CSS property. Because of this, you need to carefully check how your menu looks after adding the code and make adjustments accordingly.
How to get WooCommerce My account page link
If you need to link to the my account page from a different section of your WooCOmmerce store or you want to include it in your email template, you can get the WooCommerce my-account URL as below
<a href="<?php echo get_permalink( get_option('woocommerce_myaccount_page_id') ); ?>" title="<?php _e('My Account',''); ?>"><?php _e('My Account',''); ?></a>
How to Use a Plugin to Customize Your WooCommerce My Account Page
If you want to customize your WooCommerce My Account page, use a dedicated account page plugin. There are many plugins available that can help you customize your WooCommerce My Account page.
In this article, we showed you how to customize the My Account page in WooCommerce programmatically. However, if you don’t want to write and edit code, you can also use a plugin to customize your WooCommerce My Account page.
Multiple free and paid WooCommerce plugins allow you to customize your WooCommerce My Account page. Some of the more popular plugins are:
-
WooCommerce – Customize My Account For WooCommerce
-
YITH – WooCommerce Customize My Account Page
-
IconicWP – WooCommerce Account Pages
-
Codecanyon – WooCommerce Custom My Account Pages
First, you need to install and activate the WooCommerce plugin. For more details, see the corresponding step-by-step guide created by each plugin developer.
Conclusion
Customizing your WooCommerce My Account page is crucial for providing a seamless and personalized shopping experience. In this article, we introduced you to the my account page of the WooCommerce plugin and went through the ways in which the page can be customized. We also showed you some specific examples on how you can use the customization techniques to enhance your website.
We hope you had fun learning and see you again next time.