How to export your WooCommerce customer addresses
This article covers how you can export your customer address data that WooCommerce stores in your WordPress database. We’ll also glance over some other methods of customizing the export and exporting only specific address data. Finally, we’ll see how you can use Users Insights to search and filter this information and what you can do with it.
Exporting WooCommerce customer’s shipping and billing addresses
There are many reasons why you might want to export your WooCommerce customer’s addresses. Maybe you’re switching eCommerce platforms, or you’re moving to a self-hosted WooCommerce site. Whatever the reason, it’s relatively easy to do with the right tools and plugins.
Plugins usually store a lot of data to make their functions work. WooCommerce is no exception and it saves a lot of useful information about your users/customers. For example, you have the user’s billing and shipping information at hand by default as well as some other data that is saved, such as the company name.

Our goal for today is to understand how you can use Users Insights to export and analyze your customer’s address data. You’ll also find out how to use this information to improve your internal processes.
The main topics we’ll discuss are:
- Custom fields stored in WooCommerce
- Mapping custom fields for Users Insights
- Exporting the WooCommerce customer address
- Find orders by each location
- Analyze shipping, billing, and geolocation differences
So let’s get started!
Custom fields stored in WooCommerce
Once a user registers via the WooCommerce interface or places an order, some data is stored as WordPress user meta. The custom fields that we are going to work with are:
- Address ( billing_address_1 , billing_address_2 , shipping_address_1 , shipping_address_2 )
- City ( billing_city , shipping_city )
- State ( billing_state , shipping_state )
- Country ( billing_country , shipping_country )
- Postcode ( billing_postcode , shipping_postcode )
You can see that for each field there are at least two keys. That’s because WooCommerce stores the billing and shipping information separately. This may come in handy in case you want to look into the differences between them.
Therefore, we have all the keys listed, we need to tell Users Insights that we want to work with these fields. But first, we have to map these custom fields.
Mapping custom fields for Users Insights
Update: Users Insights now supports the WooCommerce Billing country, Billing state, and Billing city fields out of the box. If these are the fields that you need to export, they will be automatically available upon the activation of the WooCommerce module. In this case, no field mapping will be needed, so feel free to jump to the next section. For more information, head over to the WooCommerce module page.
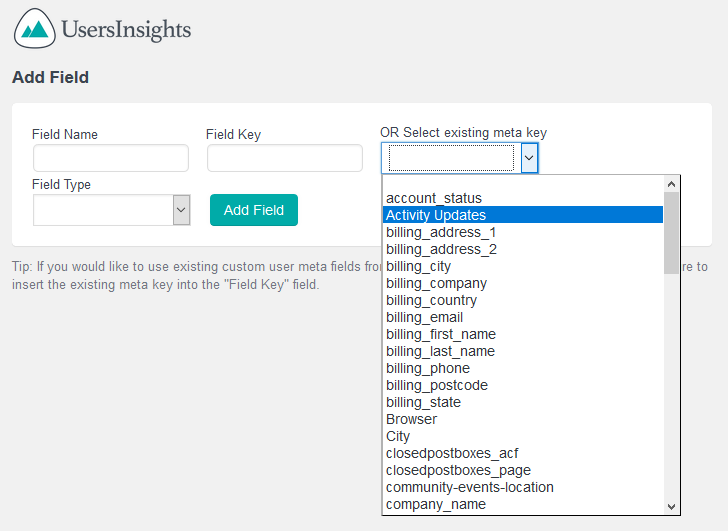
To map your custom fields, you need to go to Users Insights > Custom Fields. In there you can add the Name and key so you can use them when filtering and exporting your data.
The “key” needs to be exactly the same key used by WooCommerce (or any other plugin you are mapping). Thus, to avoid typos we’ll use the Extended CRM For Users Insights plugin that you can download for free.
This plugin will add a select field for the keys, so you can just scroll through all current keys for your custom fields and just select one of them. Now let’s map them all:
In our example, we are going to mainly use the billing_country and billing_city fields mapped to a “Country” and “City” field names correspondingly.
Exporting the WooCommerce customer address
Now that we have all custom fields mapped we can filter users and export customers with these fields. But for this we will first decide and choose what data to include in our export file.
Configuring what WooCommerce Customer columns to export
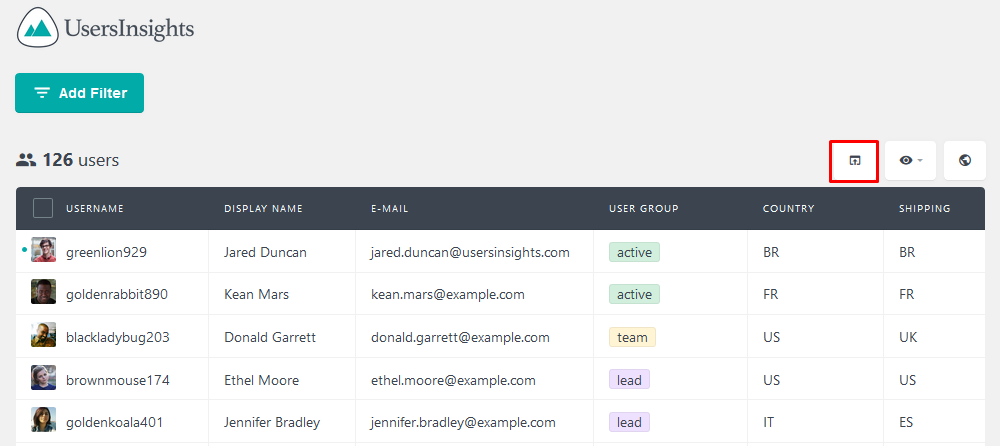
In the second step of configuring your WooCommerce Customer Export, you will need to select which custom fields (or regular fields) you would like to include in the exported file. The Users Insights users table comes with a lot of default fields that can be exported, but the plugin also allows you to add and remove custom fields to the export file. This could be anything from the customer’s shipping address to metadata about their purchase history. Once you have decided which fields to include, click on the “Eye” button at the right menu of the page to select which fields you would like to include.
Let’s make the country and city field visible, from the “Toggle Columns” section.
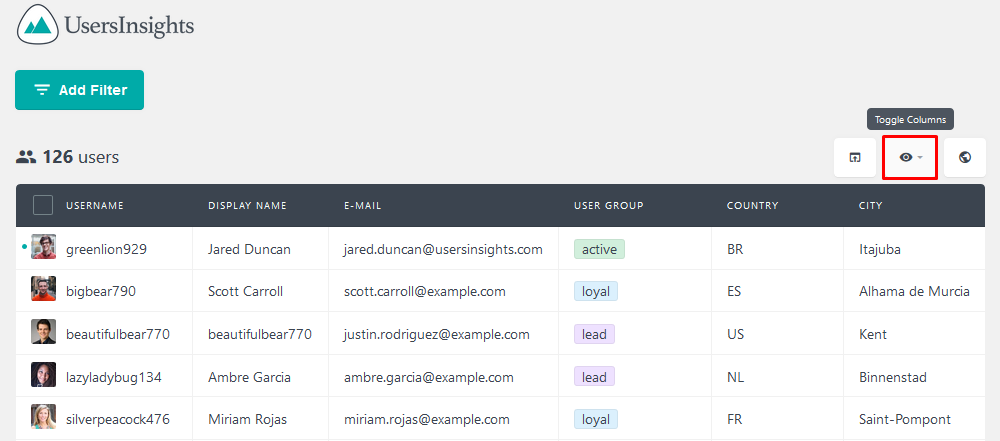
If you export your users as they are now you’ll get in your result the shipping country and city, alongside your users.
You can do the same for all your fields, such as the shipping country and city. In this way, you can not only know more about your users but also perform some advanced filtering and matching. This is possible either with Users Insights or by using some external software such as Excel to process your data.
Let’s see some examples.
Find orders by each location
Depending on the size of your store you may want to figure out which locations are the most profitable. Therefore we’ll look into two different metrics that can help you. We’ll see the number of orders by location and the lifetime value by each location.
To get your number of orders for each location you need to make the orders column visible. After this, just filter the users by each of the locations you know you have customers in. You can do that for countries, cities, states, and postcodes. You can even aggregate multiple places, in case they are too small compared to others.

Then export this data and sum up the entire orders column. In this way, you’ll have both the number of customers per location and also their total order number.
As for the lifetime value, make sure that visible when exporting your users per location:
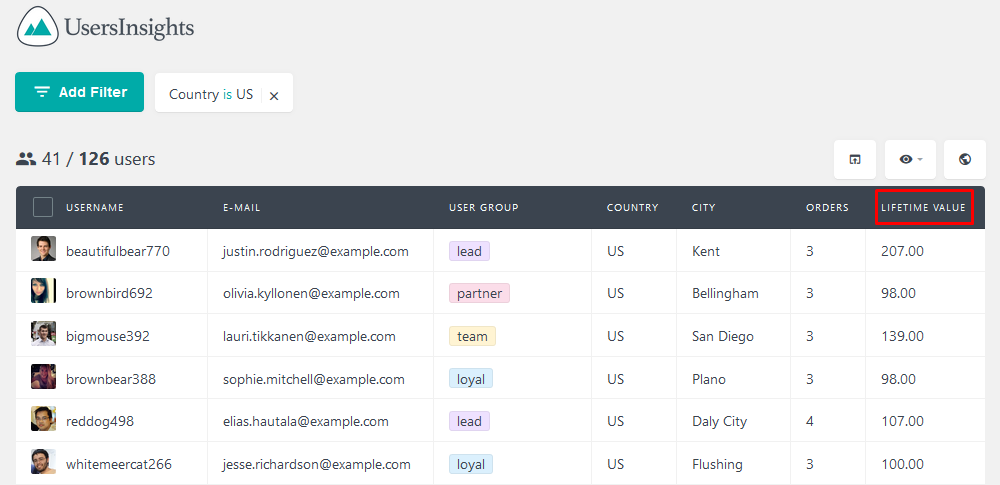
Now you just need to repeat the process and add all lifetime values for each location.
Here is a short video that demonstrates the process of creating a custom export in WooCommerce in more detail:
Analyze shipping, billing, and geolocation differences
The billing address and shipping address are sometimes different. It is important to know who is buying and where the product needs to be delivered. These fields will help determine where to focus marketing (billing) and logistics (shipping).
If you want to spice up, even more, your analysis you may include the geolocation data. In this way you’ll know where the customer is buying from, the billing location, and the shipping location. To make our example simpler we’ll just analyze the shipping and billing differences.
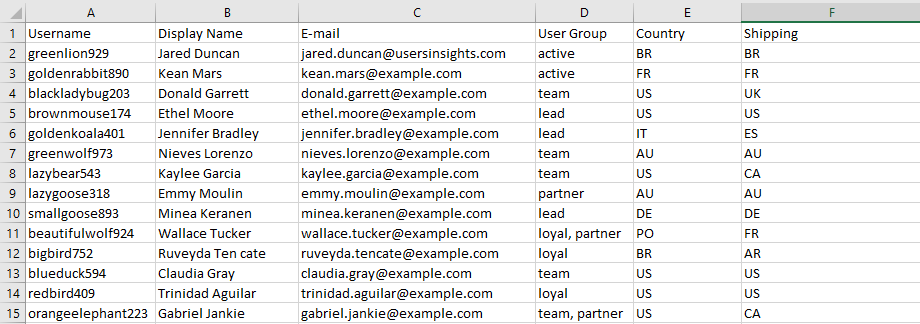
There are many ways to manipulate this data, but the first step is exporting your users with these fields visible. You just need to click the export button so you’ll have this data as a CSV file.
This is what our sample data looks like in Excel.
The next step is comparing these two. We’ll use the excel function IF. This function will run a certain task if a condition is true, and another (or no task) if it is false. Let’s create a new column and add this rule
=IF(D2 = E2, ‘’, ‘1’)
Our rule is going to add a 1 if the values of the cells D2 and E2 are different, and no data at all if they are the same. These are the cells where we have the shipping and billing data. That formula allows you to quickly see which users have different addresses. You can also quickly see the total amount of users with different addresses by using the SUM.IF function
=SUMIF(F2:F200, 1)
This rule is going to search through cells F2 to F200 and increment the result if the value encountered in these cells is 1.
Conclusion
Today we looked into the basics of exporting your WooCommerce customer address. We also saw some different ways you can filter and export this information.
By the end of the day, you should be able to understand your customers and that should help you in the decision-making process. All the tips included in this guide can also be used for other custom fields, such as company, phone, and shipping method. This is just the starting point of gathering useful information from your data.
We hope you enjoyed it and see you next time!