This guide includes some basic information that you can use to install, use and update the Users Insights plugin. We do have more advanced techniques explained in our posts and answers articles so stay tuned for these!
Downloading the plugin
Right after your purchase, you’ll get a receipt email that you can use to download the plugin:
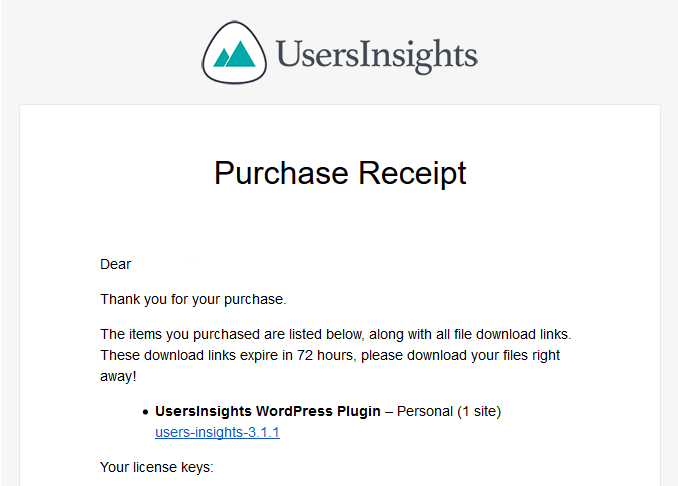
You’ll notice that this link will expire after 72 hours. If you need to download the plugin files after that period you can login into your account.
Also in that email, you can see the license key, which will be used for your plugin activation.
Installing the plugin from the WordPress Dashboard
Before you start, please note that Users Insights requires PHP version 5.3 or higher.
You can install the Users Insights plugin via your WordPress admin dashboard. This can be done under WordPress Dashboard > Plugins > Add new.

In this section you can upload the zip file that you have downloaded from your email or the “Account” section on our site.
Installing the plugin via FTP
Another option is installing the plugin via FTP. You’ll need to extract the plugin files in the wp-content/plugins folder of your remote server. You can do that using a software to connect to your FTP such as FileZilla.
Activating the plugin
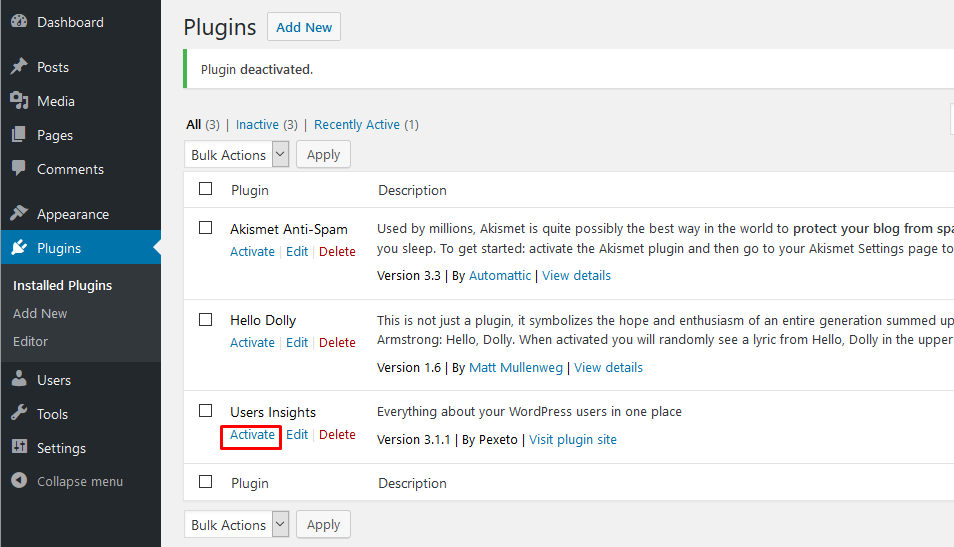
After uploading the plugin you should be able to see it in your plugins list, under WordPress > Plugins. You can activate it by clicking the activate button:
Activating updates and geolocation
In order to receive automatic updates and for the geolocation API to work, you need to activate your plugin with a valid license key. You can check your license key in the email you’ve used to download the plugin or on our site, under the Account > My purchases section:
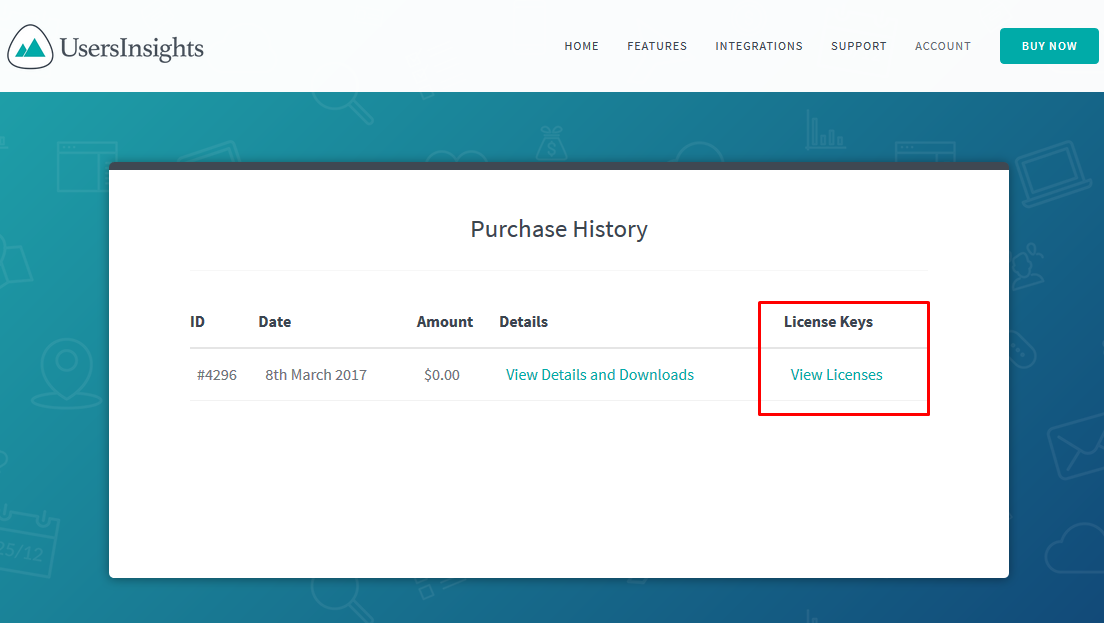
You can click the “extend license” or “manage sites” and you’ll see the license key.
Then copy that key and paste it on your site, under WordPress Dashboard > Users Insights > Settings > Users Insights License > Settings section.
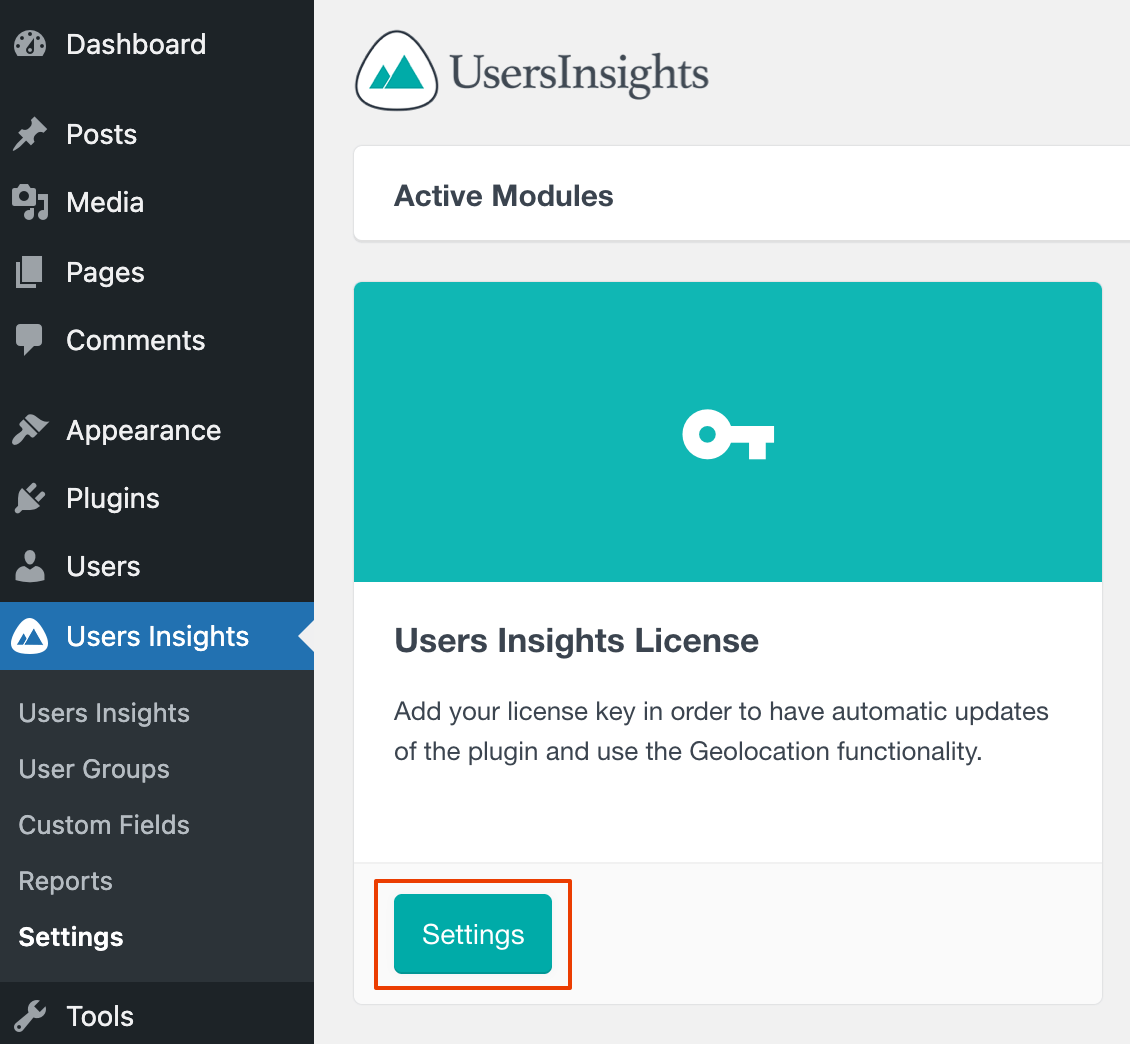
How the modules work (activate/deactivate)
After registering your product you’ll be able to enable and disable modules, such as the geolocation, device detection and so on. You can manage all modules under Users Insights > Settings and each module has more details about it available once you click the “learn more” button.

How to use the filters
You’ll use filters to better understand all the collected data about your users. This is done under WordPress Dashboard > Users Insights > Add filter.
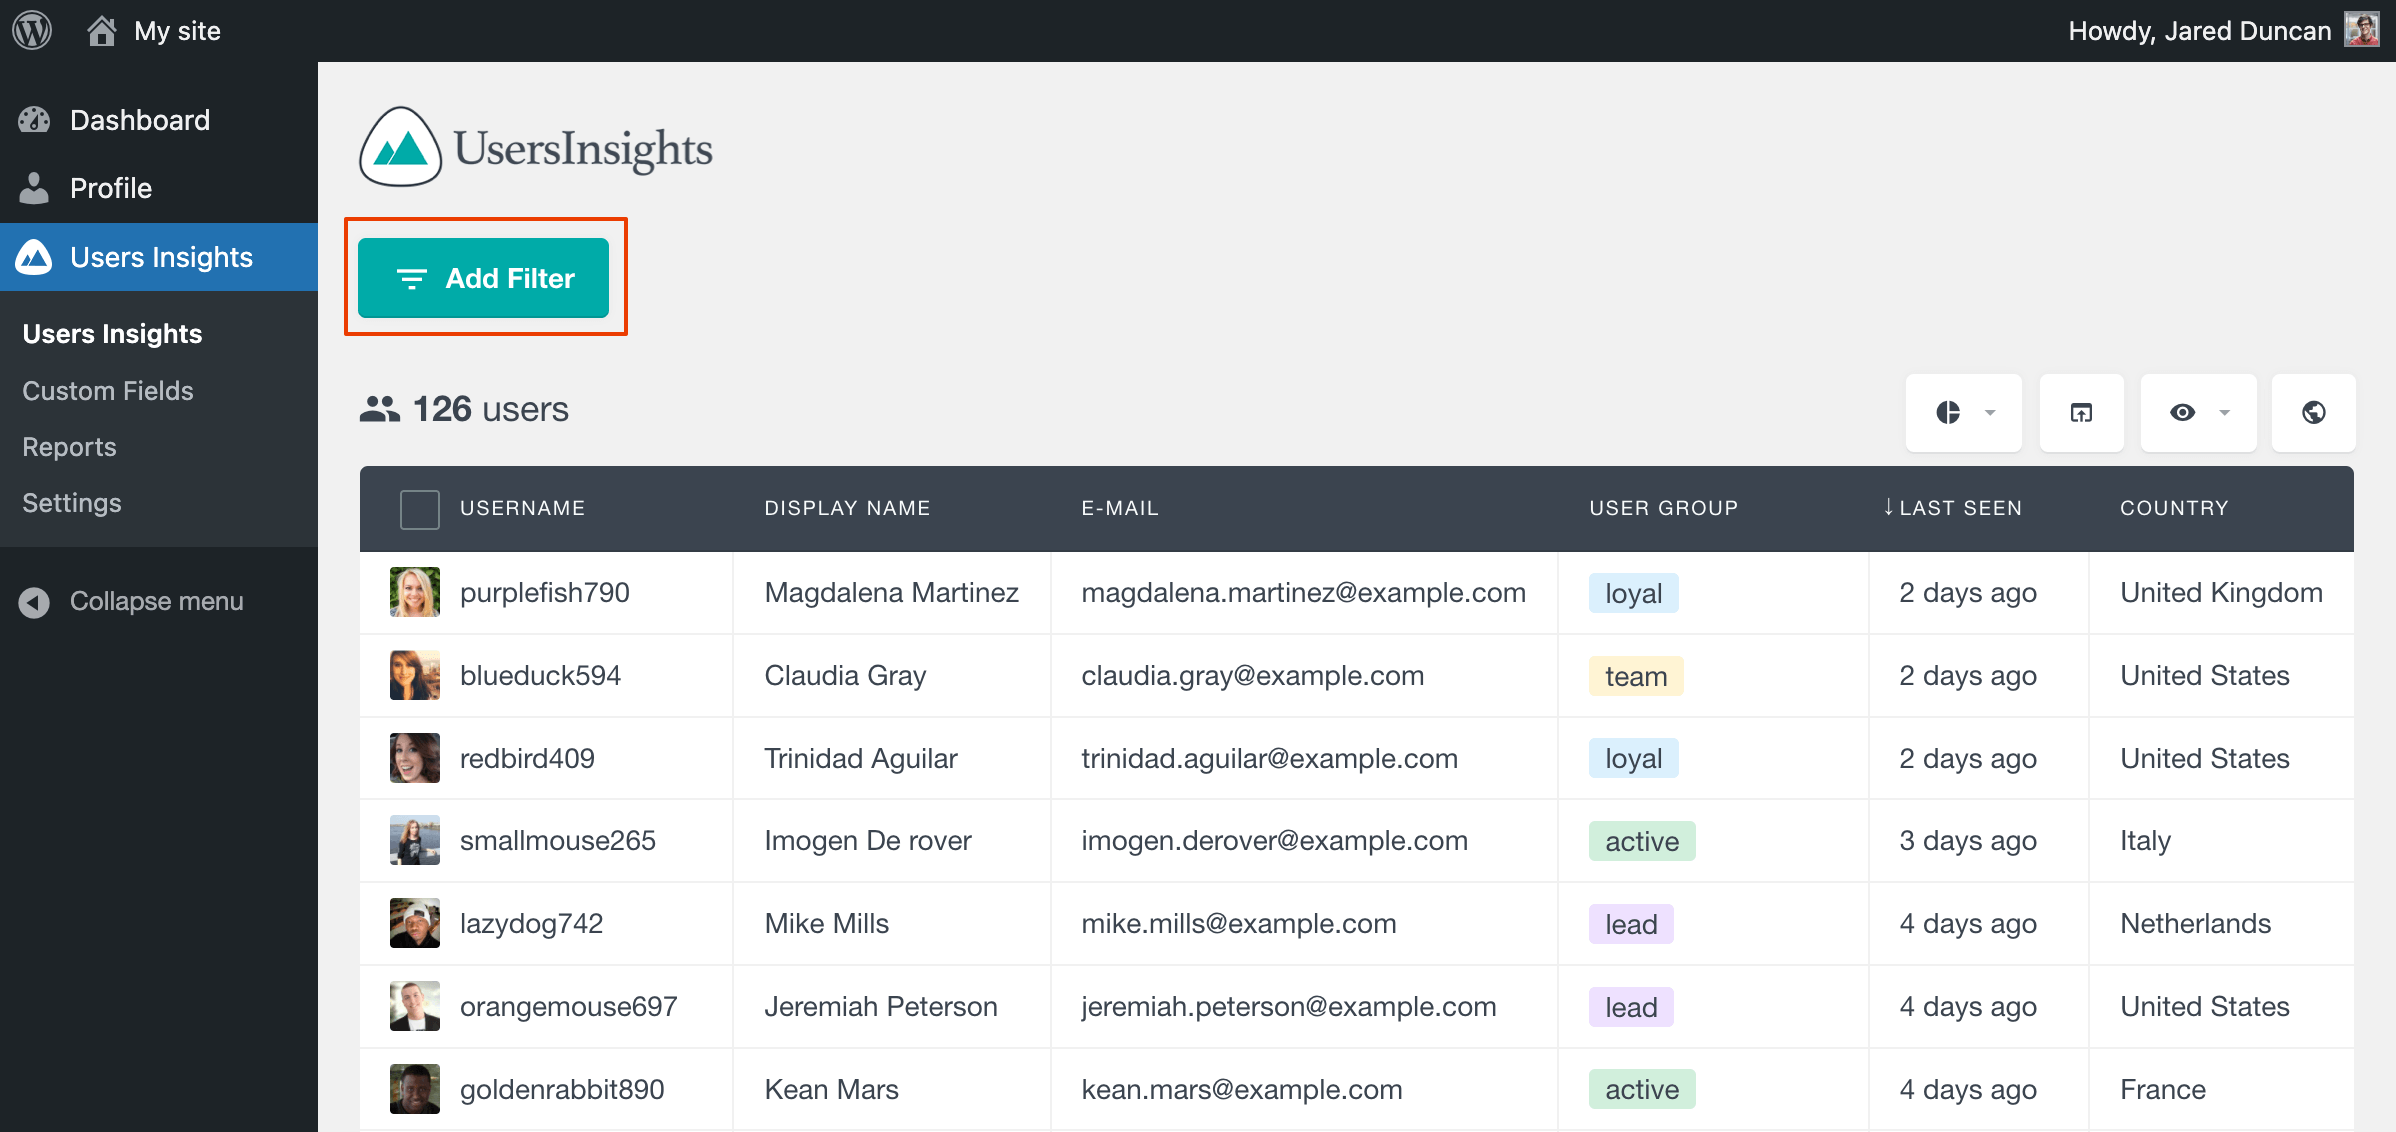
The first thing you’ll select is the column that you are using to filter. Then after you select the column you can select the filtering method, which depends on your column type. For each of the data types, some comparison methods are available.
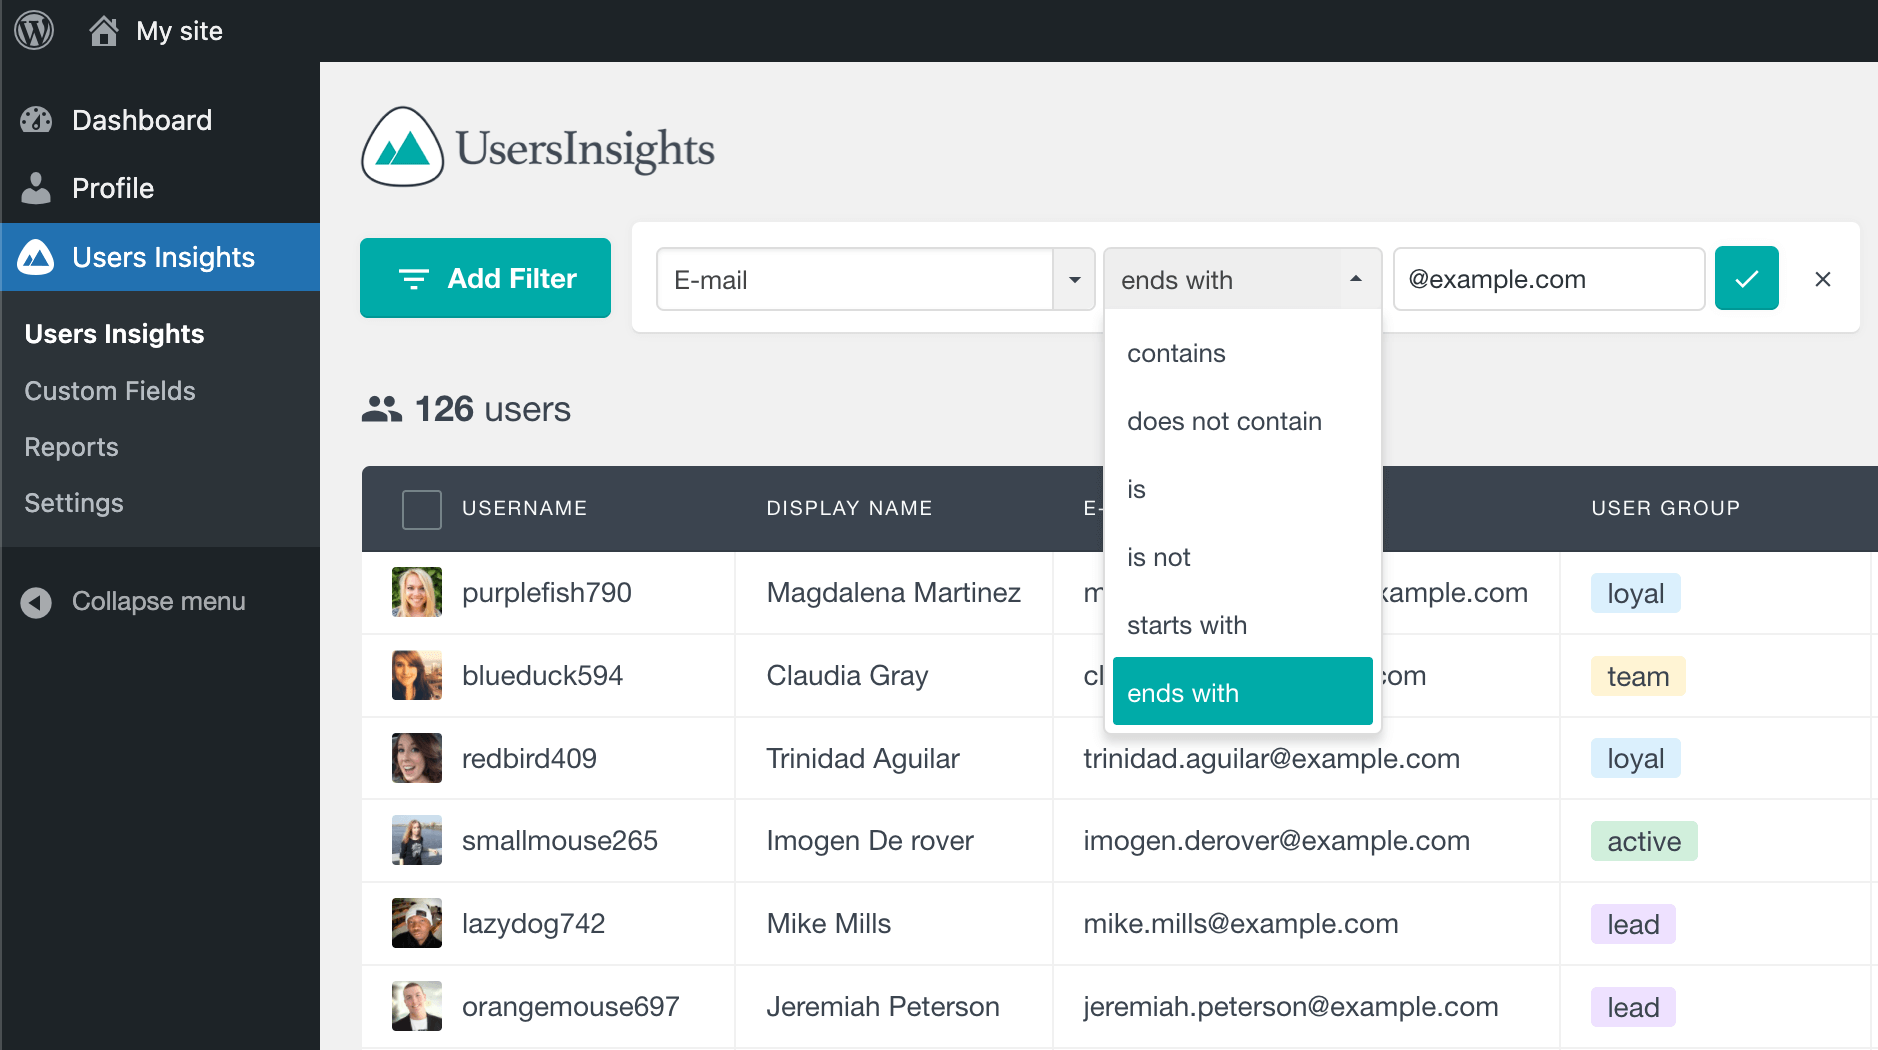
For example, you can select all user emails that end with @example.com to see how many users you’ve got from that domain in particular:
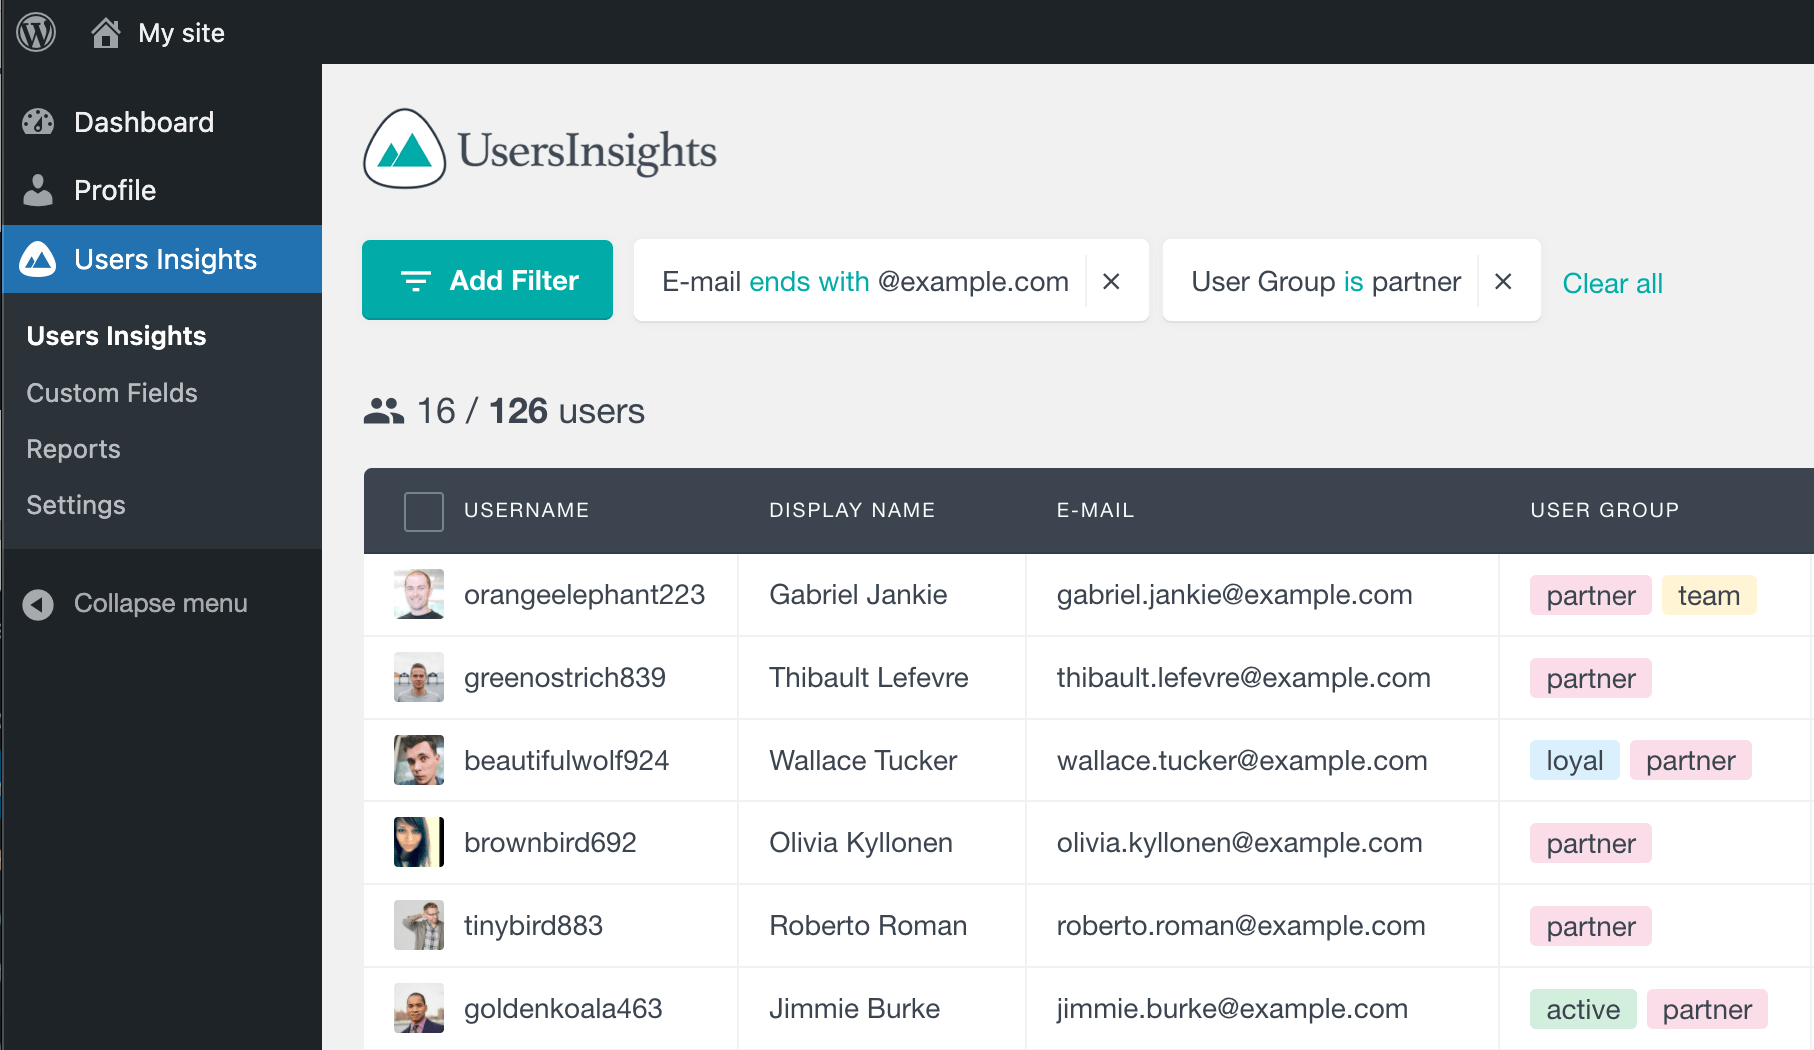
You can easily edit the filter by clicking it. Also once you have a set of results you can refine it further using a completely different filter. In our example I’ve set 2 filters, one for the email and the second one for the user group:
Additionally, after all the filtering options are applied, you can export the filtered user list by using the export button:
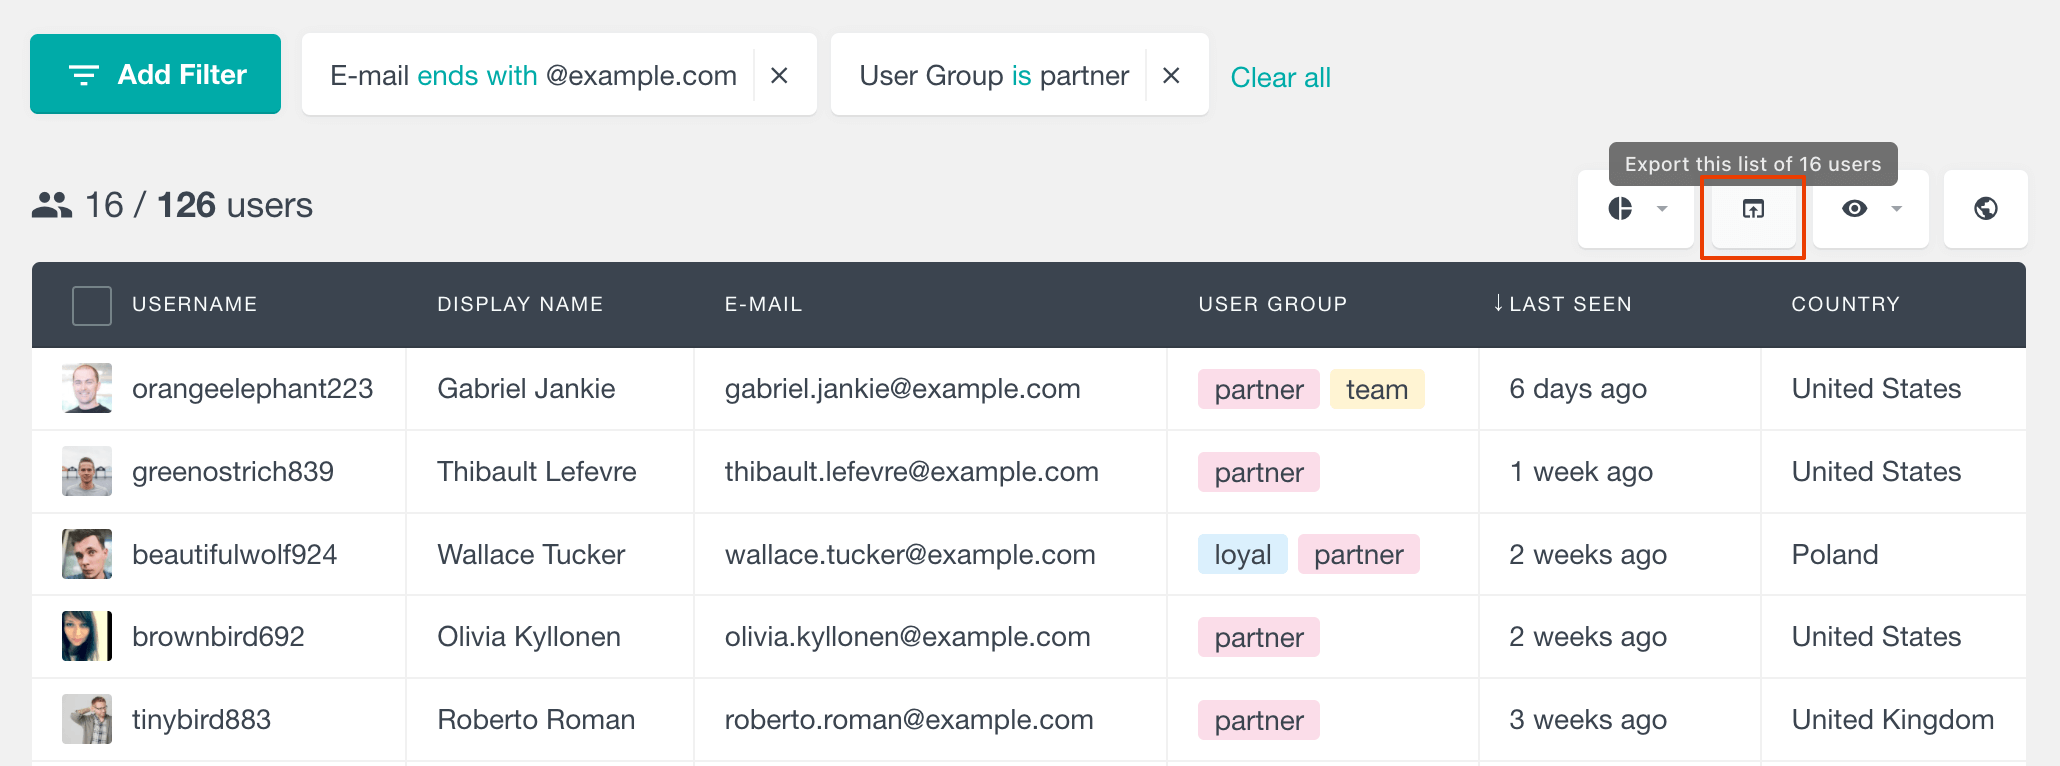
This allows you to work with your data in other software from something as simple as a mailing list to complex data mining tools.
How to use the table column options
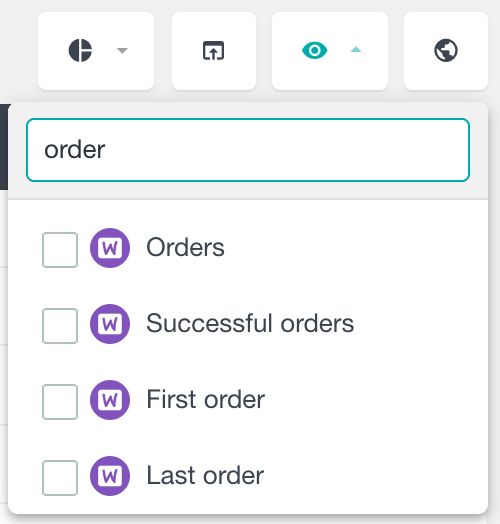
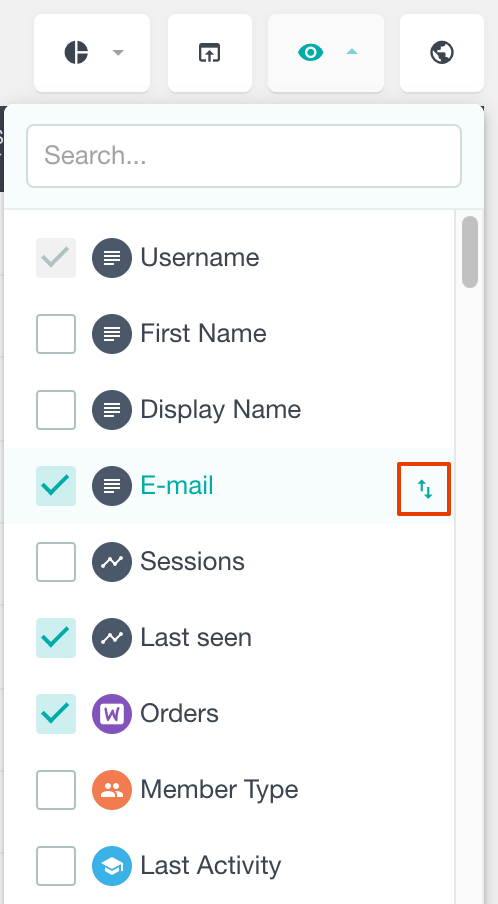
Sometimes too much data can be bad for your analysis. In these cases you can easy toggle the visibility of your columns using the “Toggle Columns” button:

If you have a high number of fields, you can also use the search option to easily locate a field to show/hide on the table:
In this same section you can also re-order your columns using the drag and drop interface that is built-in into that section. To see the drag and drop button for each item, just place your mouse cursor over it. Please note that drag and drop cannot be performed in search results, so make sure that the search field is cleared before performing reordering:
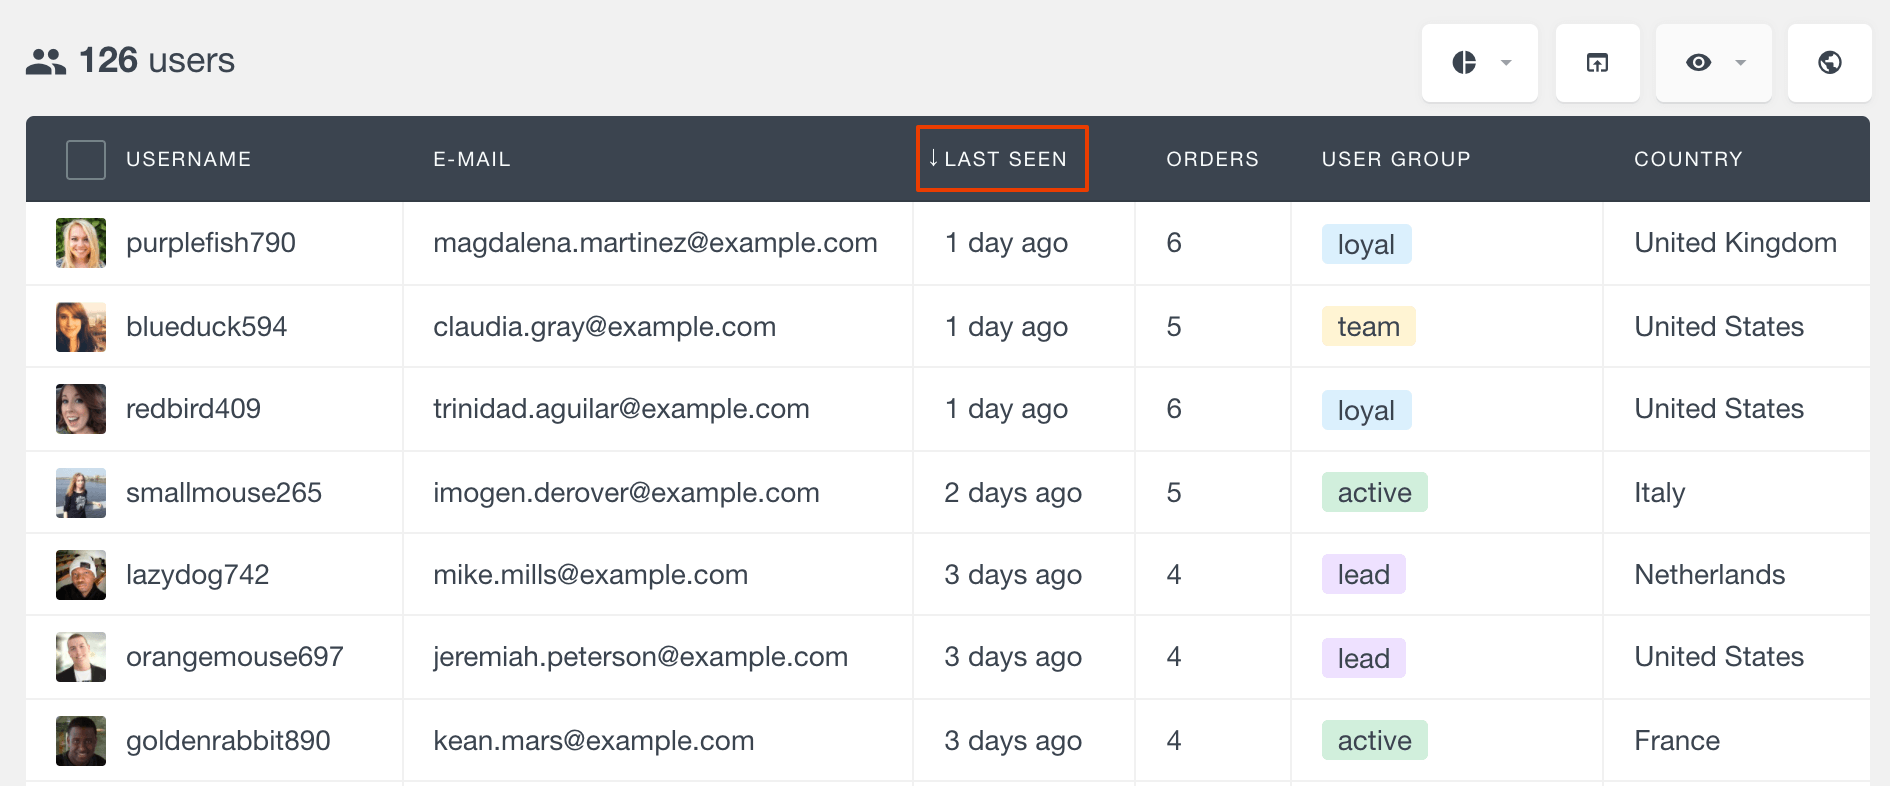
Another good option to better understand your data is the sort by option. You can click the column heading and that will make your table to be ordered by that element. You can click again to revert the order in the same column and the little arrow icon shows which is the current order applied: