ACF user registration and data segmentation
In this article, we are going to show you how you can use the ACF Pro plugin to create custom user registration forms. We are also going to see how you can use the Users Insights plugin to map and read the ACF user fields. This will allow you to better understand your users, and it will give you a solid basis for the decision-making process.
Most business owners know that all the information you can gather about your customers is valuable. But the basic user registration in WordPress allows no custom data. The only thing you are guaranteed to know about a user is their username and email. Everything else is optional and very well hidden in the user profile, under the WordPress admin dashboard. So, all these precious bits of information are completely lost once your user signup leaving no custom data.
This is why it’s important to have a custom registration form for your WordPress site. By having a custom registration form, you can make sure you are gathering all the information you need from your users. This way, you can have a complete picture of your customer base and use this information to better serve them.
The Advanced Custom Fields (ACF) plugin allows you to easily create sets of custom fields for your WordPress-related data. Usually, it is used for posts and categories, but today you’ll see how it also does a great job in storing user data. We are also going to use the Users Insights plugin, which will help you filter and make sense of all this information.
Therefore, our topics for today are:
- A brief overview of ACF Pro
- Adding ACF fields to the user registration form
- Reading plain text fields with Users Insights
- Using opt-ins and multiple options
- Relational data about posts, categories, and other users
So let’s get right into it!

A brief Overview of ACF Pro
The Advanced Custom Fields plugin has a free and a Pro version. The Pro version is more robust in terms of options and extensions and has a lot of functions for developers. But you still can do a lot of things with the free version if you are on a tight budget. We have an article showing how to create a custom user profile page to edit user information. And that is done just with the free version.
Anyway, our article today will use the Pro version only. That’s because it requires no custom code to add fields to the user registration page. But that is just a tiny fraction of what this plugin can do.
If you’ve ever created custom fields for a post or page you’d greatly appreciate the work behind it. It’s a lot of work to create something as simple as a single field in your posts. And it’s all seamless when using ACF Pro.
The ACF Pro plugins also let you limit where your field groups will appear. You can limit to certain posts/pages, to all of them, based on their category, and so on.
Let’s see some hand on examples now.
Adding ACF fields to the user registration form
Adding custom fields to the WordPress user registration form can be a great way to collect extra information from your users during the registration process. This can be especially useful if you want to collect information that is not typically collected during registration, such as a username or extra fields of information.
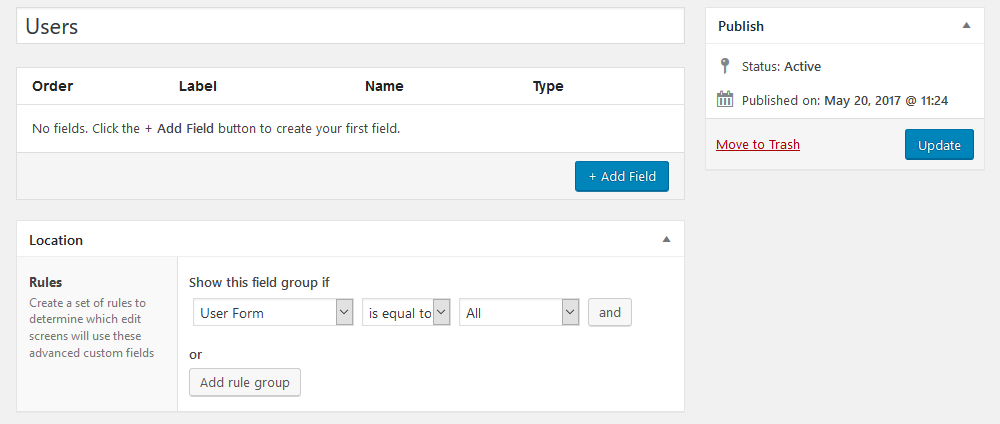
You can make the ACF fields available in the User Registration form by configuring the Rules for the field group. All you need to do is select the “Show this field group if: User Form is equal to All” option in the “Location > Rules” section. Here is a basic example:
Let’s imagine a simple scenario, for example, if you want to collect plain text data from your users. Here are some examples:
- Job title
- Company name
- Industry
- Social media profiles (Twitter, Facebook..)
- Title (Mr, Mrs, Miss…)
- Secondary email
These are all simple examples, but you probably know others from your use cases. These are all fields that can have plenty of answers but they are valuable for you nonetheless.
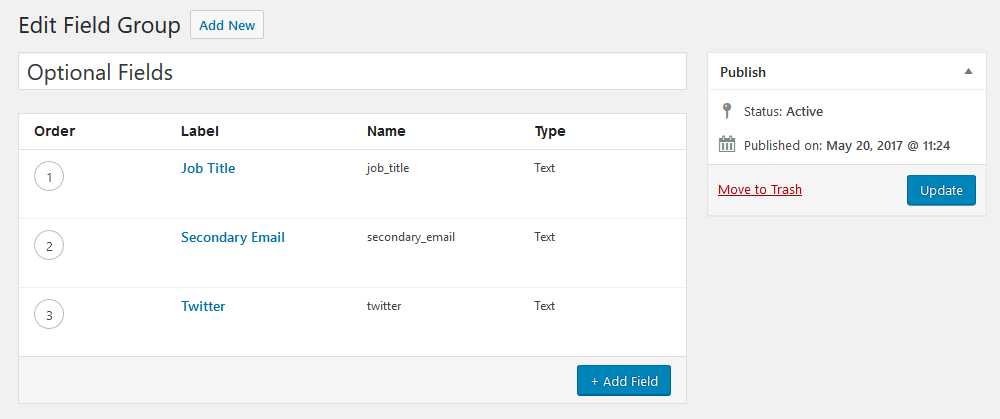
In order to create ACF fields, we are going to create a field group. Field groups can be created from the WordPress Dashboard, under the “ACF” tab. Once you have created a field group, you can then add fields to it. To create these fields, go to your Fields Group edit screen and then click “+Add Field”. Fill in your data, just make sure you recall the “Field Name”, as we’ll need this information in a bit. This is our sample data:
And this is what the user registration form looks like, after adding these fields:

Reading plain text fields with Users Insights
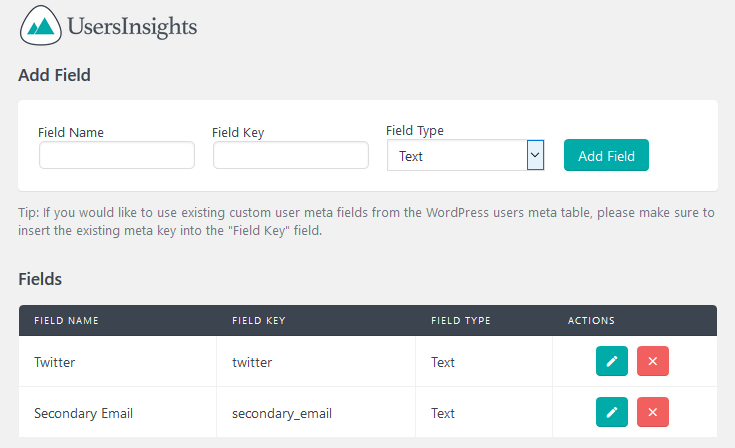
After adding these fields you’ll need to read this data with Users Insights. To do that you’ll need to map your custom fields, so Users Insights will understand that there are some new fields to load. You can do that under Users Insights > Custom Fields.
Remember the Field Name you’ve added for your fields? Well, this time you’ll add it as a Field Key. You can add anything you want in the Field name, as this is just the label for it. In our example this is what our Custom Fields mapping looks like:
And that’s it. The data is now available in the Users Insights table and filters, making it easy to search your users based on it. You can also export your ACF user fields:
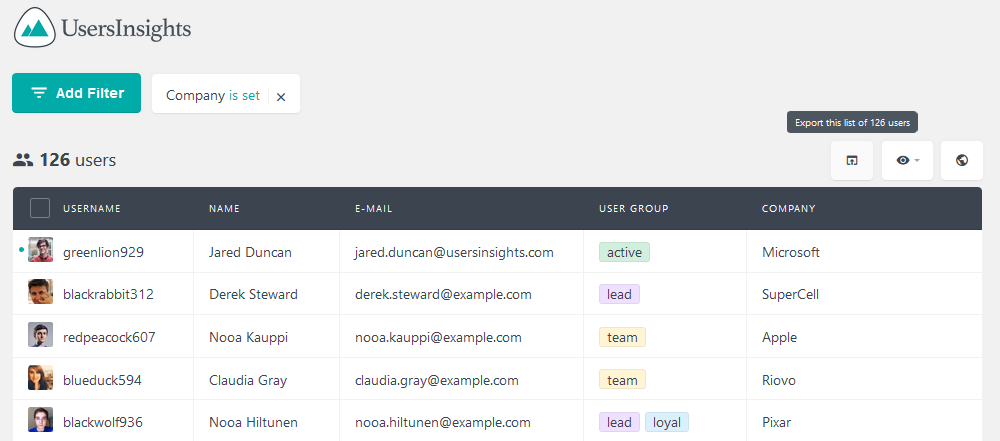
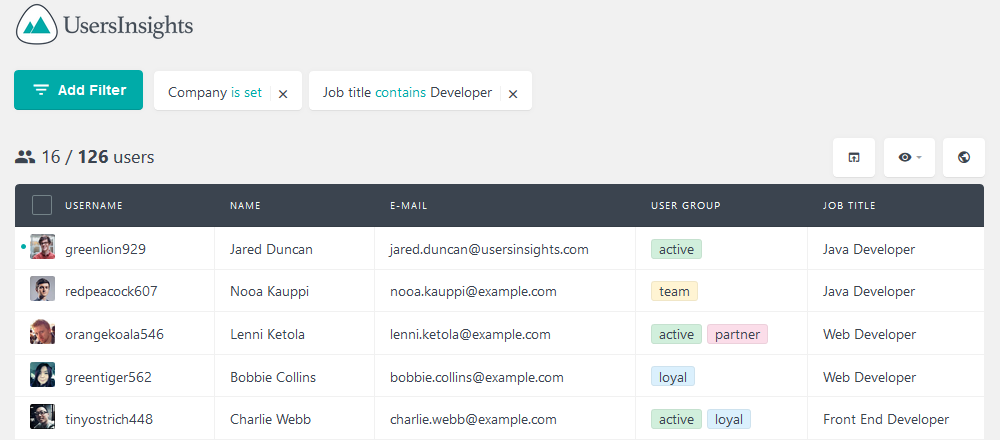
With this in mind, you can, for example, search for all users of a certain Company, or that have a certain Job title:
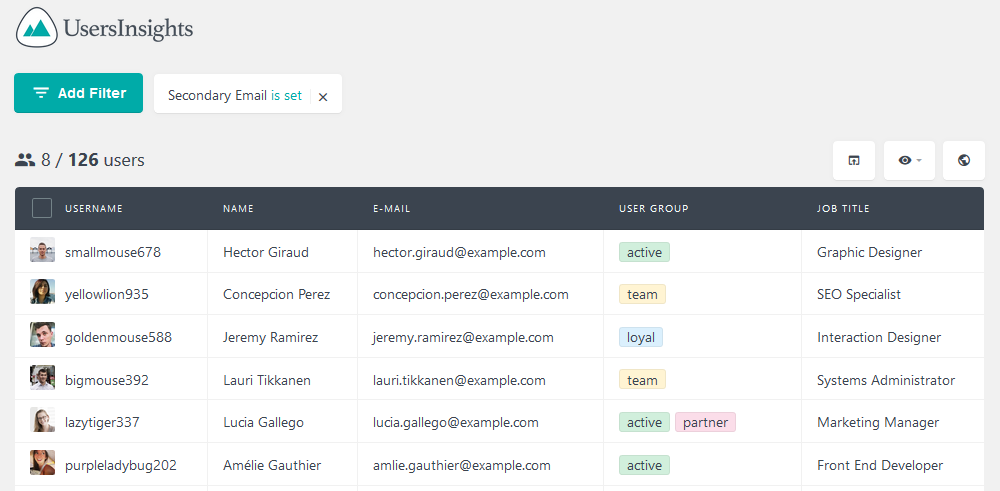
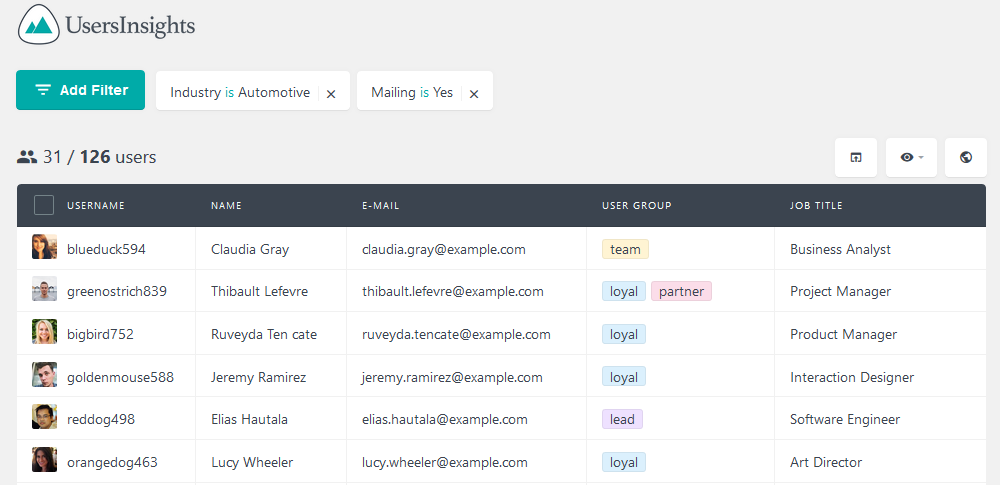
You could also search for all users who have a secondary email, and add that one to your mailing list if they have opted in:
Gathering all this data is great, but sometimes we need to limit the available options when adding them. If you use text fields they can add anything they want, but if you limit their options, your job will be much easier when searching for this data.
Let’s see how you can do that in the next section.
Using opt-ins and multiple options
Adding selects, radios or checkboxes is a good idea if the data you want has a limited set of options. For example, a text field for company size may not be as valuable for you as a field with the employee’s number range. Same for annual revenue or even simple things such as the customer’s Industry.
You might also need to collect simple Yes / No answers, such as mailing list opt-ins. And maybe you need to add date pickers (date of birth).
These are all different field formats that ACF Pro supports, and that will make your life much easier when reading this data with Users Insights.
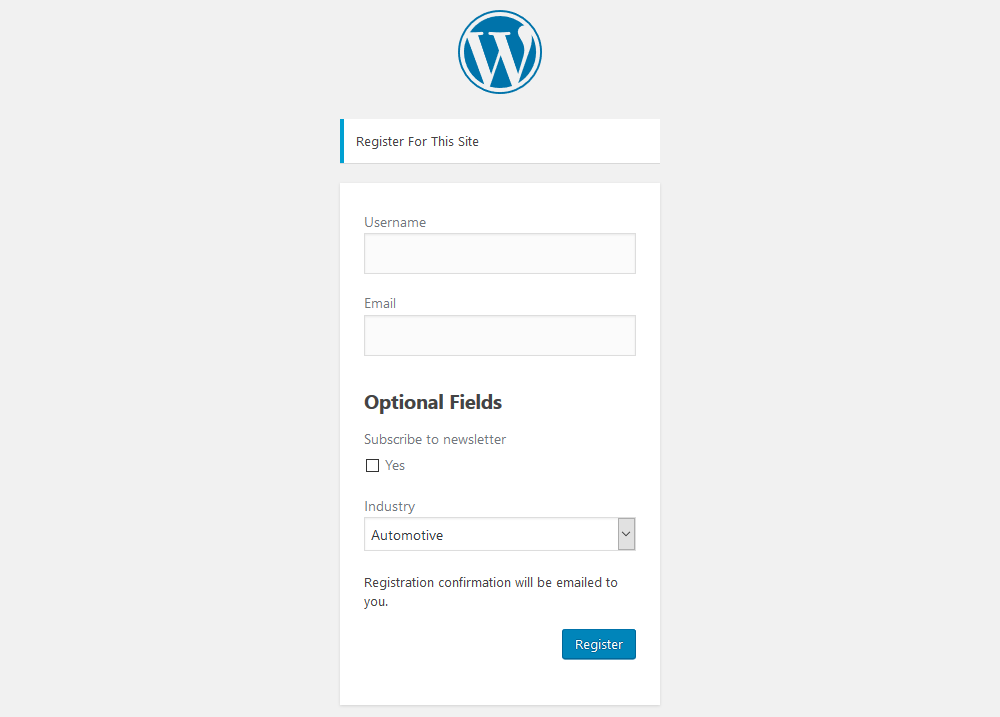
Here is a simple example of the registration form with Mailing and Industry fields:
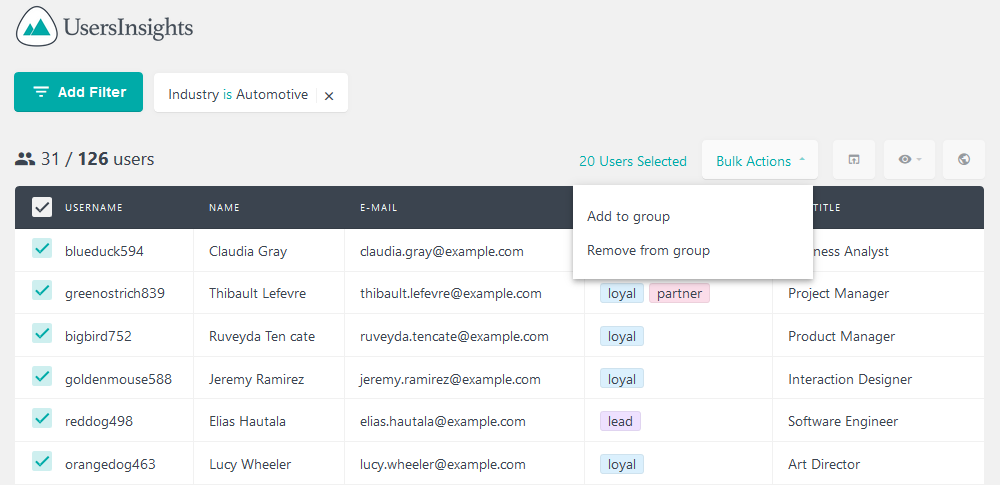
Now it’s much easier to filter all users from a certain industry (for example automotive) and add them all to a user group in bulk.
You could also segregate your newsletter by industry so it’ll be more relevant to your customers. This allows you to greatly increase your results with them, as segmented groups are far easier to reach. It can be done with a simple filter of users who have opted in for a mailing list AND are from group/industry X.
The key value here is targeting. When you are speaking to a smaller audience you can address their problems directly. For example, the problems you solve for a company with 50 or fewer employees are probably different from what you can do for a company with 5,000 employees.
Another good option to analyze your data is to combine these filters with your order’s data. For example, if you have WooCommerce and the WooCommerce module active you can see the number of orders per industry.
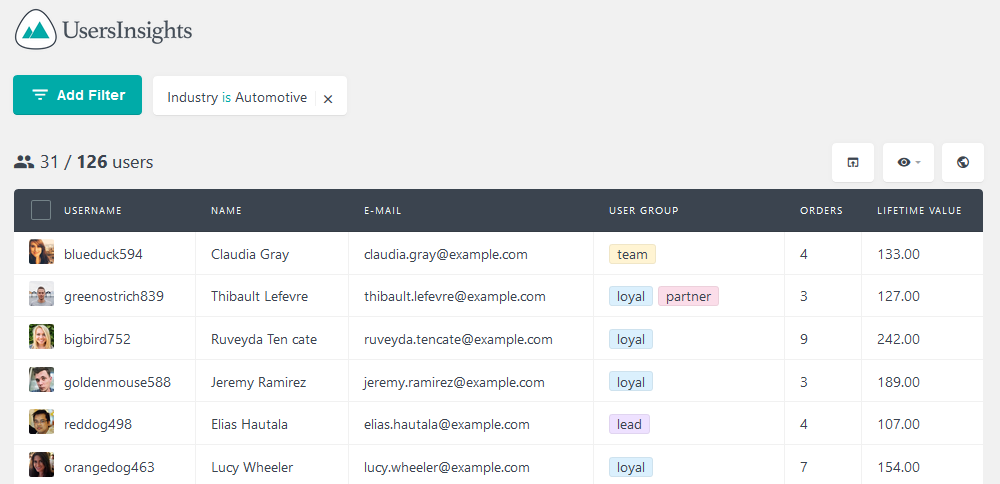
Taking a step further you could use the customer lifetime value metric, and segment them by industry or company size. This allows you to find the most profitable customer segments so you can focus your marketing efforts on them.
Relational data about posts, categories, and other users
Finally, it’s also possible to add custom fields for your users that is related to other data you have in WordPress. You could use posts, Custom Post Types, Categories, Custom taxonomies, etc. These are all options that you have by default in ACF Pro.
Here are a few examples of some data you could store:
- Have store locations as a Custom Post Type and add a field for preferred store
- Allow users to add themselves to a Users Insights group in the registration form (using_group taxonomy)
- Create a field for the categories of interest and load all your WooCommerce product categories
After you add your fields and map them to Users Insights, you’ll only see the element’s ID. That’s normal and the correct way to do it. For example, if you only load the title and later discover that you need to change your Store location name, all your old data would be gone. Therefore, storing only the ID will allow you to always have up-to-date attributes.
But now we need to load the title of these elements, otherwise, you won’t be able to make sense of them when filtering these with Users Insights. If you don’t do this, all you will see is the ID of that element. We have another article on how to convert your user meta fields into a readable format, but we’ll show you an example here.
Let’s say you allow your users to add store locations to their profiles, and you’ve mapped that field with the key “store-location”. To load the title of your stores instead of the ID we need some PHP code. We can use this snippet in your theme functions or a child theme functions file to load the title for that element:
function stores_titles($data){

  if( ! empty ( $data->store_location ) ) {

    //apply the new format
    $title = $data->store_location;
    $title = get_the_title( $title );


    $data->store_location = $title;

  }

  return $data;

}

add_filter('usin_user_db_data', 'stores_titles');
This code will just check when the current field key is “store-location”. If that’s the case instead of showing the ID, it’ll look for the title of that post and return it instead. So instead of 237, you’d see “Main Avenue Store”, for example.
Conclusion
Today we dived into the world of custom user registration fields with ACF Pro and how to read this data with Users Insights. We looked at different ways of storing your data and retrieving it, as well as formatting it correctly. We also discussed the importance of having custom user fields and how you can use personalized and segmented content to improve your marketing results.
We hope you enjoyed it and see you again next time!