How to create custom WordPress user registration forms
To create custom WordPress user registration forms, you can use plugins like “Ultimate Member” or code it yourself by leveraging WordPress hooks and custom fields.
There are many ways to use WordPress to register users. However, the default user onboarding experience might not be ideal for everyone. Today, we will look into how you can enable custom WordPress user registration. We’ll use the Ultimate Member plugin and its WordPress user registration features for that. This allows us to create custom user registration forms in WordPress through a drag-and-drop interface.
Creating a custom form is a great way to stand out if you have a WordPress site with registered users. This way, you can merge a document into your theme, reinforcing your branding instead of using the default one.
Creating forms for custom user registration in WordPress also allows you to register different user segments. This is especially useful if you have different roles on your site or want to grant your users different access levels.
We will also look into a few examples of how to gather information from your users registered via these custom forms. For that, we’ll use Users Insights and see how you can collect custom fields and other user data.
The main topics for today are:
- Plugins for user registration
- Ultimate Member custom user registration for WordPress
- Segmented registration
- Implementing the registration form
- Making the user data private
- Filtering your data with Users Insights
So, let’s get started!

What Is User Registration in WordPress?
User registration in WordPress refers to allowing website visitors to create their user accounts, providing them access to certain privileges or content on the site. It’s a fundamental feature for building online communities, membership sites, or platforms where users can engage with personalized content and interactions.
What are WordPress user registration plugins?
A WordPress user registration plugin is an extension or add-on for a WordPress website that allows you to create and customize registration forms for users to sign up on your site. These plugins offer various features and settings to streamline the user registration process and integrate it with your site’s user management system.
You can use many plugins to allow WordPress custom user registration. The Ultimate Member plugin is undoubtedly one of the most complete solutions. It not only allows you to create custom WordPress registration forms, but it also turns your site into a membership platform. This way, you can restrict content based on the user role and allow front-end registration, login, and profile edits.
But there are other options, so let’s see two other good plugins you could use.
The User Registration plugin is the go-to for lightweight custom WordPress registration forms. This plugin is more focused on the user registration workflow. But it also has a friendly drag-and-drop form builder and works well with most WordPress themes.
Another option is the Simple User Registration plugin. Similarly to the previous contender, this plugin allows you a lightweight option for custom WordPress user registration forms. It is loaded based on a shortcode, so you can add it to any page you want to.
Now, let’s return to our focus, the Ultimate Member plugin. Let’s see next how you can create your custom user registration forms for WordPress with it.
What is a WordPress user registration form?
A WordPress user registration form is a customizable web form integrated into a WordPress website. It allows visitors to sign up and create user accounts with defined attributes like username, email, and custom fields, enabling them to access restricted content or interact with the site.
Advantages of creating custom WordPress registration forms
WordPress registration forms offer numerous benefits for website owners and administrators. When used effectively, these forms enhance user management, streamline data collection, and improve the overall user experience. Let’s explore some key advantages of WordPress registration forms:
- Customization Options: One of the primary advantages of using custom WordPress registration forms, in contrast to the default WordPress states, is the ability to customize them to align with your specific needs. You can easily add and arrange form fields such as name, email, and custom fields to collect essential user information.
- Validation Rules: WordPress registration forms allow you to set validation rules, ensuring users provide accurate and complete information. This helps maintain data quality and reduces errors.
- User Roles: By integrating user roles into your registration form, you can control the level of access and permissions granted to each new registered user. This is particularly useful for websites with multiple contributors or members.
- Integration: Many WordPress registration form plugins offer seamless integration with other plugins and services. For instance, you can integrate with email marketing tools to automatically add new users to your mailing list, enhancing your marketing efforts.
- Data Storage: Registration forms facilitate efficient data storage by automatically saving user information in the WordPress database. This data can be easily accessed and managed through the WordPress admin panel.
- Email Notifications: WordPress registration forms can be configured to send automated email notifications. Users receive confirmation emails upon registration, and administrators are alerted to new sign-ups, ensuring a smooth user experience.
- Security Measures: To safeguard your website from spam and fraudulent registrations, you can implement security measures like CAPTCHA or reCAPTCHA in your registration forms. This protects your site and maintains data integrity.
- User Profile: Registration forms often allow users to edit their profiles post-registration. This feature fosters user engagement and will enable individuals to maintain accurate information.
- Redirects: After successful registration, you can specify where users should be redirected. This ensures that users are guided to relevant content or confirmation pages, enhancing their overall experience.
- Analytics and Reporting: Some registration form plugins offer built-in analytics and reporting tools. These insights enable website owners to track registration trends, user demographics, and behavior, helping in informed decision-making.
- User Experience: A well-designed registration form contributes to a positive user experience. By configuring the layout, labels, login and registration form design, and error messages, you can make the registration process user-friendly and efficient.
- Multi-step Forms: Complex registration processes can be simplified using multi-step forms. These break down the registration into manageable sections, reducing user frustration and abandonment rates.
- Conditional Logic: Implementing conditional logic in registration forms enhances user engagement. Fields can appear or disappear based on user selections, ensuring that users see only relevant information, making the form less overwhelming.
- Time Efficiency: WordPress registration forms save time for both users and administrators. Users can register quickly, while administrators can manage user data effortlessly from the WordPress dashboard.
- Custom Login and Registration Design: WordPress registration plugins offer the flexibility to design and style login forms and registration pages to match your website’s branding and aesthetics. This customization level helps create a cohesive and visually appealing user experience.
Ultimate Member custom user registration for WordPress
The Ultimate Member WordPress plugin is a versatile and user-friendly plugin designed for WordPress websites to easily create and manage user profiles, registration forms, and membership features. It empowers website owners to customize and control user interactions and site access.
Before building our custom user registration forms, you must install and activate the Ultimate Member plugin. The easiest way to install it is via the WordPress Dashboard > Plugins > Add New and enter “Ultimate Member” in the search.
You can create new forms from the Ultimate Member > Forms > Add new section. The forms builder is your home for creating ways for users to interact with your site. In this section, you can complete a user registration form, a custom login page, and a custom profile form. These forms can be added to pages later on, making it easy to provide a customized experience for your users.
Since we aim to create a custom user registration in WordPress, we’ll use the Registration Form type. Then, we must add the primary fields (username and password), but we can pick and choose other fields. For instance, you can add an introductory programming language field to a form aimed at developers. For another state, you can switch up fields, such as the preferred designing tool for designers.
Now, add a few fields in your form. You can pick areas you’ve already created, predefined fields, or use custom fields you’ve created:
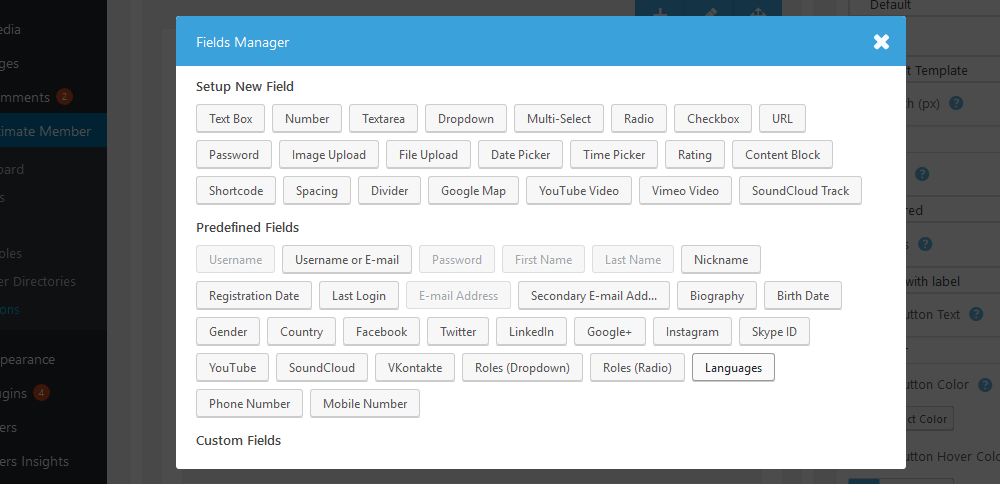
On the second group, “predefined fields,” you can see that some are greyed out. As you add fields to your form, they can’t be added again.
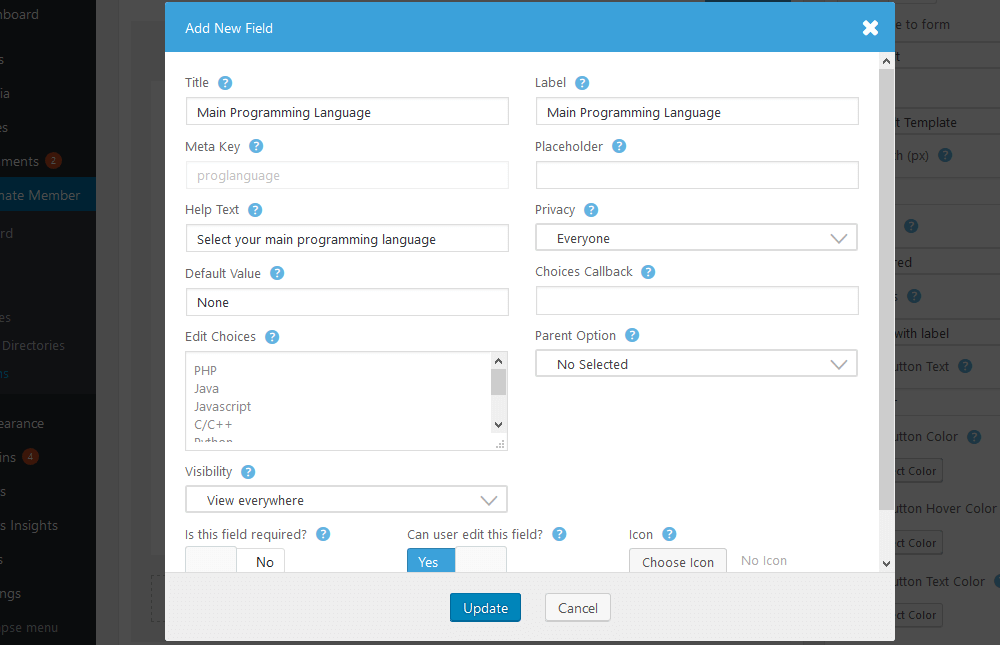
Let’s return to the first group and create a new custom field. Let’s call it Main Programming Language, and it will be a dropdown.
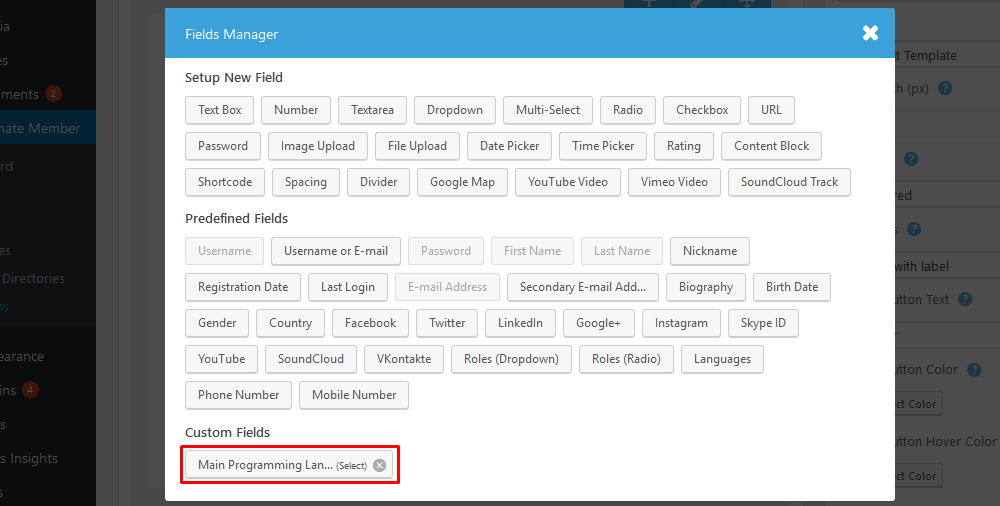
Once you add it, it will be available to all your forms in the third group we’ve seen, “Custom Fields.”
Save that form, and we’re ready to create our registration page. But first, let’s dig deeper into creating different registration forms for better user segmentation.
Segmented registration
You may have noticed that you can create as many registration forms as you want. This is a great tool not just to collect different fields depending on your user type. You can assign different roles to your users depending on their form.
Providing a custom WordPress user registration experience through forms with different designs is also possible. So, it is a different-looking state for designers and developers, employees and employers, and wholesale and retail customers.
The magic is in the “Apply custom settings to this form” field. Enable that, and you’ll see a whole new world of options for your form.
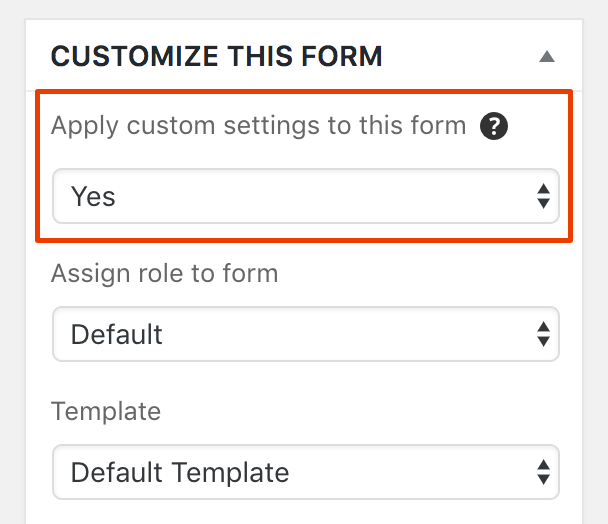
We won’t go through each option as it takes much time, but you can play around with them. They can change the user roles, color scheme, sizes, and even the template used for that page.
Once you have your forms created, let’s finally add them to your pages.
Implementing the WordPress user registration form
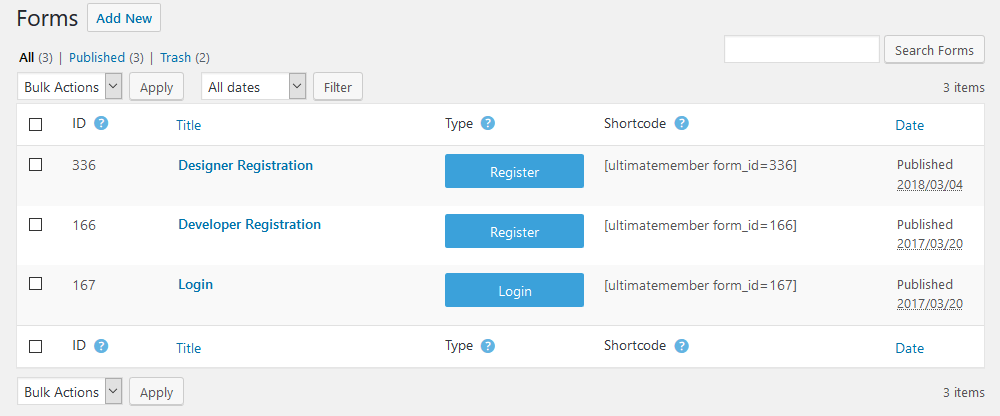
The last step of our custom user registration forms is adding shortcodes to your WordPress pages. You can get the shortcode for each of these pages in the general forms overview:
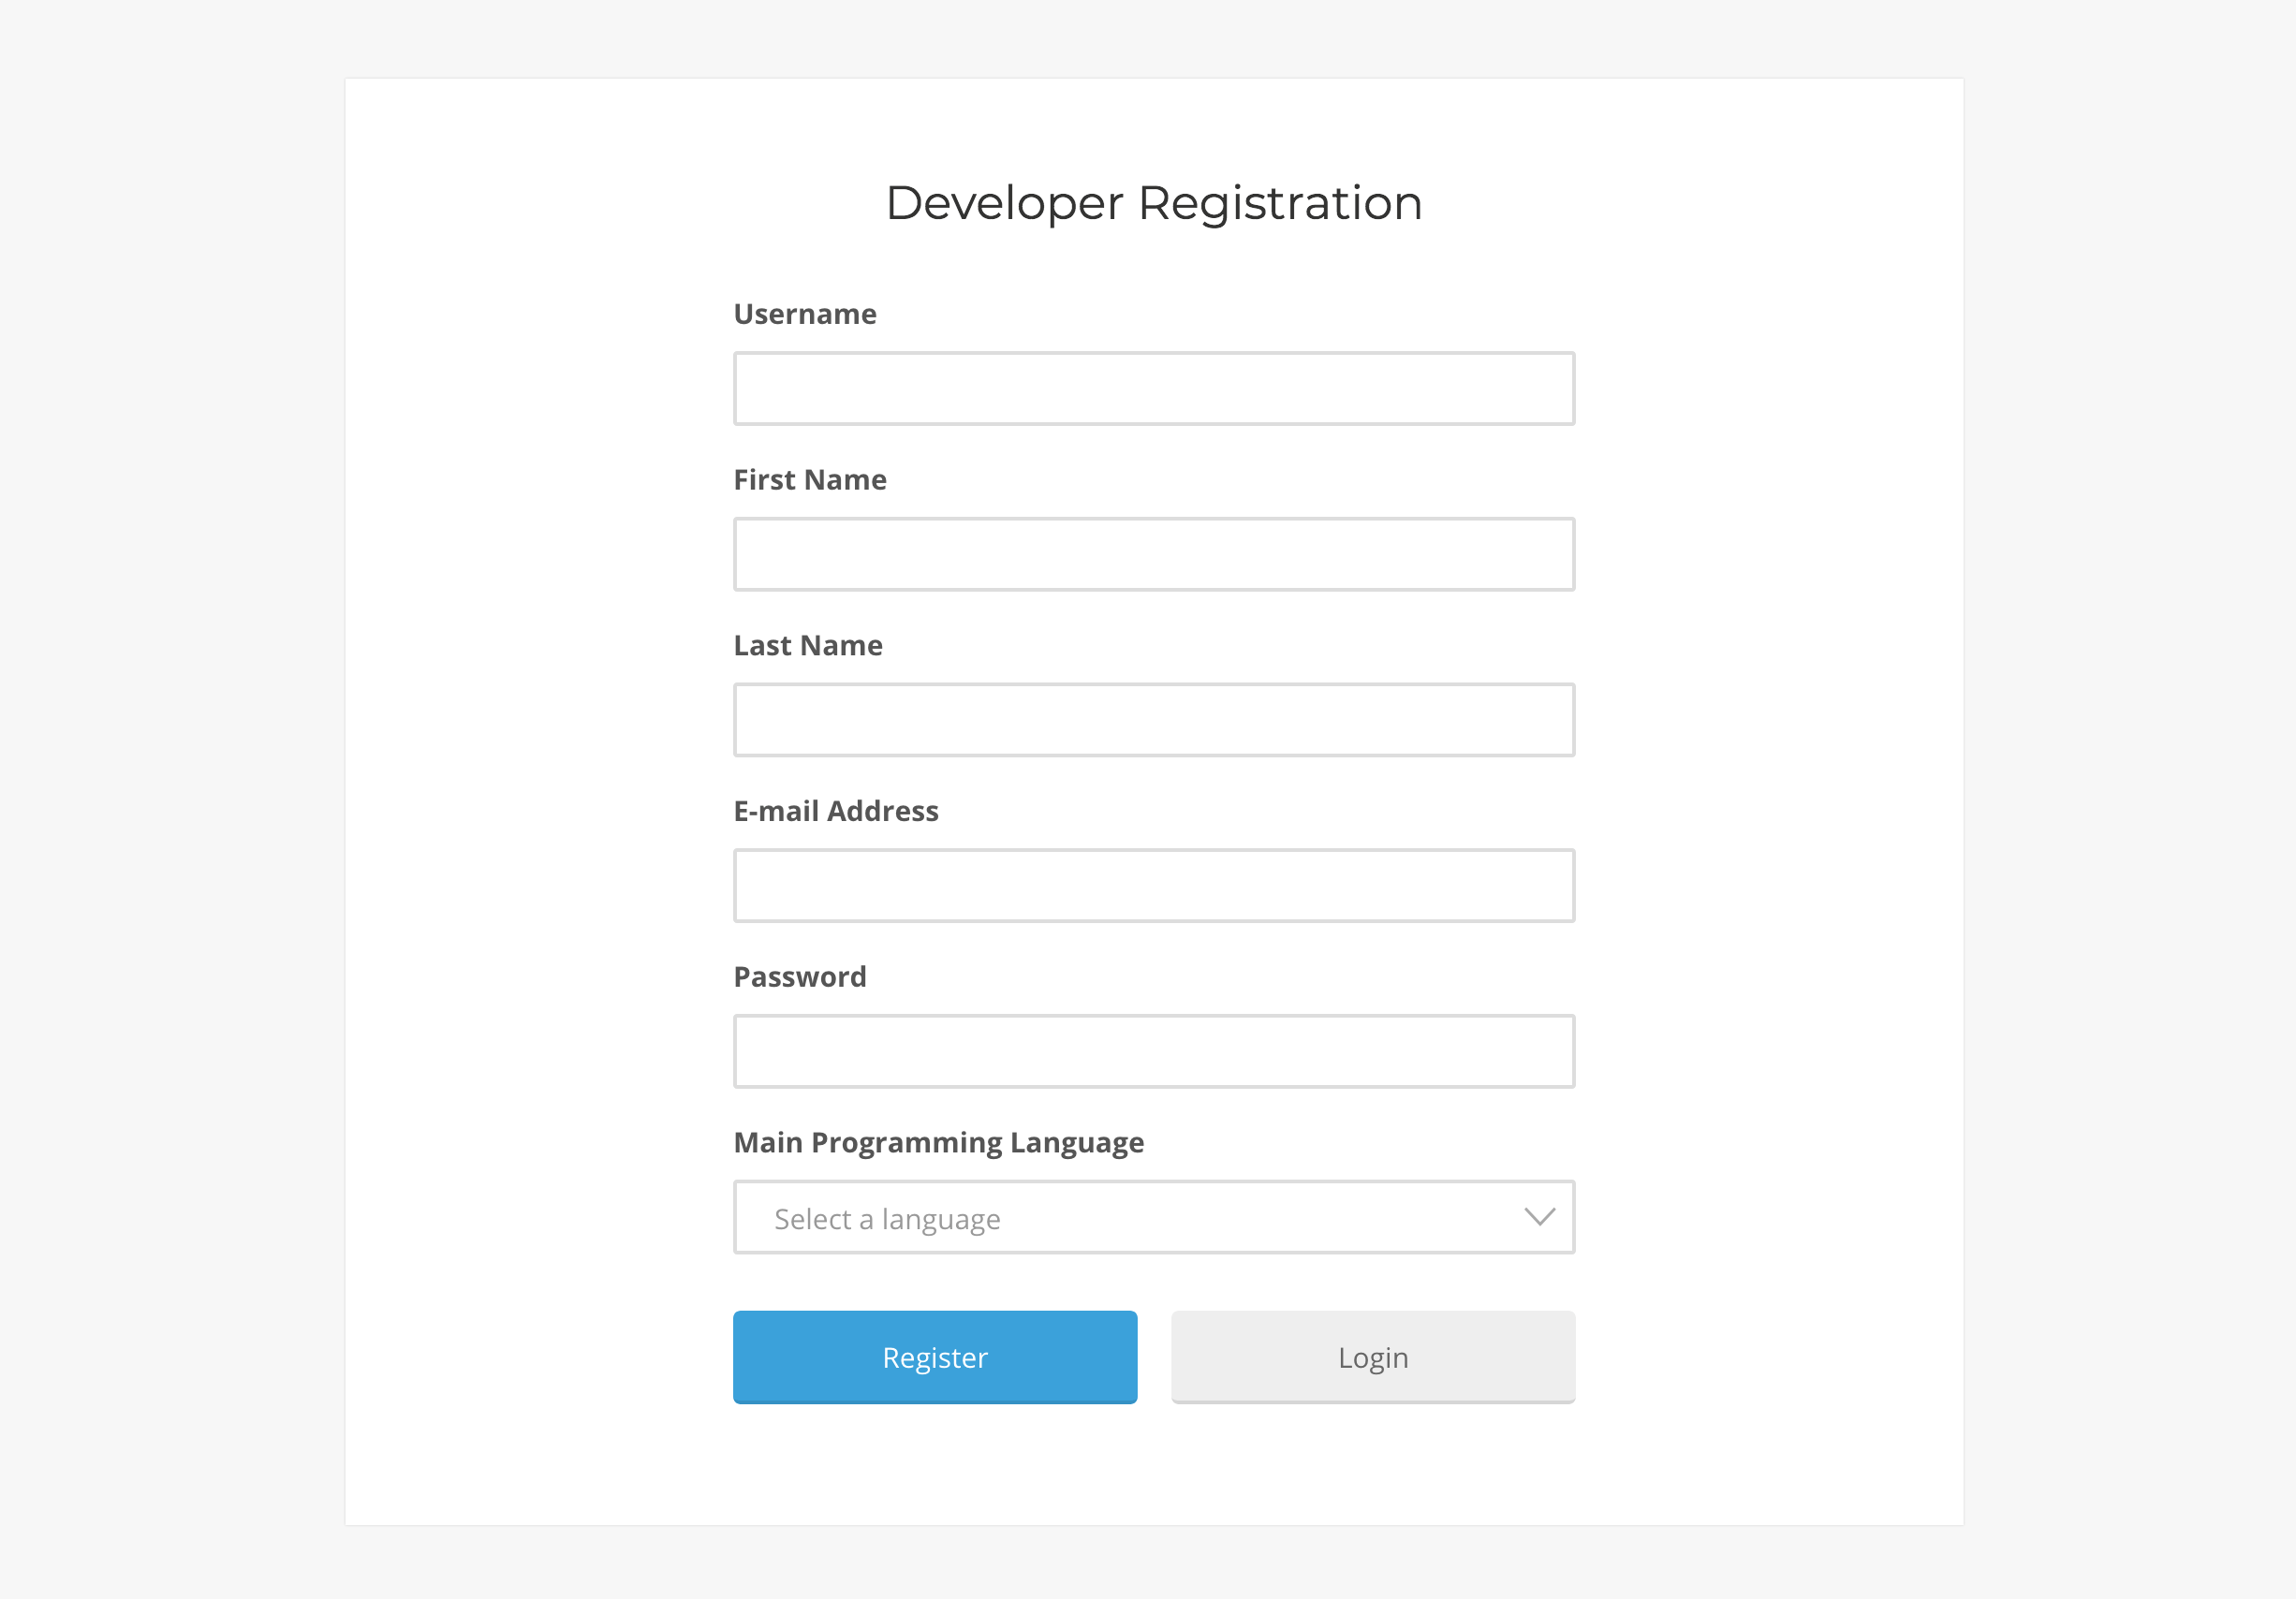
Then, paste that code into a page and save it. This should be its output:
Making the user data private
Ultimate Member, being a membership plugin, creates some public user pages. If you need your users’ data to be private, you must configure the Ultimate Member privacy settings.
The first thing that you might want to do is disable the Member Directories from the Ultimate Member > Settings > General > Users section.
Ultimate Member also creates a User profile page that shows the user data that each user has submitted. To limit access to this page, open it in edit mode and enable the “Restrict access to this content” option from the “UM Content Restriction” section. Then select the “Logged in users” option in the “Who can access this content” field. This will not allow non-user visitors to access the page.
To hide this page from the other logged-in users, go to Ultimate Member > User Roles. Then, for each role that is not supposed to view other users’ profiles, turn off the “Can view other member profiles” option.
Now, the last step is sending your users to these pages. Make sure to add some text or instructions so that users will fill in the correct form for their user type. In these forms, you can include custom fields or even use the roles in a way that it’s feasible to extract the information you want. Regarding retrieving details, let’s see how you can do that with your custom registration forms and Users Insights.
Filtering your data with Users Insights
Once the Ultimate Member module is active in your Users Insights site, you’ll see all your custom fields automatically. This is particularly useful if you want to filter all users based on that data. These fields are available as columns and as filter criteria.
In our example, you may want to check all Java developers who registered through that form. This can be done by filtering users by their Main Programming Language.

Since we can use custom roles, you can also check all the designers registered through our custom form. This can be done by simply using the Role filter:

You can save these filters as segments for later use or export your users and their custom data for further processing.
Conclusion
Today, we looked into how to use the Ultimate Member plugin to create custom WordPress user registration forms. We also learned how to save custom fields and assign custom settings to our forms, such as new user roles or different form templates. Another aspect covered was the data processing that can be done with user insights. So, by the end of the day, you should be able to create your custom user registration forms and extract custom user reports and any information you may need in that aspect.
We hope you enjoyed this tutorial, and see you again next time!