How to create an attendance management system with WordPress
Online attendance management software that captures attendance data in real time, carries all the advantages of a physical one, but better. Along with the digital presence, there’s a full control over your attendee data. Thus, we can perform the next level of event attendee tracking and analysing. It’s possible to store and process unlimited amounts of data regarding your users and this data is seamlessly integrated into one centralised place.
Beyond the attendee list management, an attendance management system can perform a lot of tasks. It’s possible to handle user registration for the events, as well as the event schedule. In addition, you can collect payments and even use the system during the event to control user attendance. And last but not least your system can be used for attendee’s communication. Last minute changes, feedback questionnaire, on-stage questions or user forums. All of that can be done.

WordPress as it is an amazing content management system, and with the help of some plugins, collecting events data is one of its superpowers. Combined with the user management and custom user fields and we have an entire attendee management system. The main ingredient in our recipe is The Events Calendar plugin. Thus, we use the Users Insights plugin, for better user management, filters, exports, and GeoLocation.
Today we investigate what you need to look for in an attendance management system. We go over the setup of the Events Calendar plugin in combination with the RSVP module. In this way, you’re able to build your attendance management system with WordPress. Additionally, we check out how to use Users Insights to better manage your attendance list.
Now let’s see how to put this together.
Using the Events Calendar plugin
The Events Calendar is a free plugin that can be used for events and calendar management. With it, you can easily create and manage your events. Additionally, it’s easy to add other modules for RSVP or event ticket sales. If your event needs a calendar, this is probably the best solution for it.
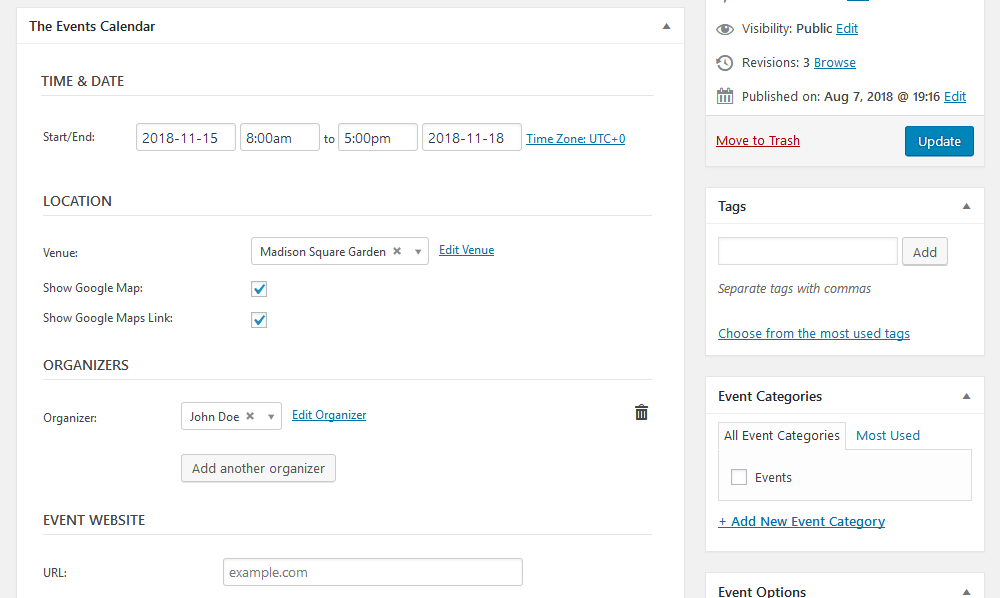
The setup is quite simple. First, install the free plugin. Then, go to WordPress Dashboard > Events > Add new. There you’re able to add the event title, featured image and general description. The real difference though is in the custom fields you get for events.
When you are creating your events, you can pick the date, venue, organizer, and website.
You may as well want to create an attendee list, as opposed to just displaying your events. You can do this with the Event Tickets free plugin.
Once the Event Tickets is installed and active you can create RSVP and event tickets options for your events. Therefore, you know all attendees beforehand and you can even change the tickets online. Additionally, when your users respond to the RSVP or buy a ticket you get an updated attendee list on your site.
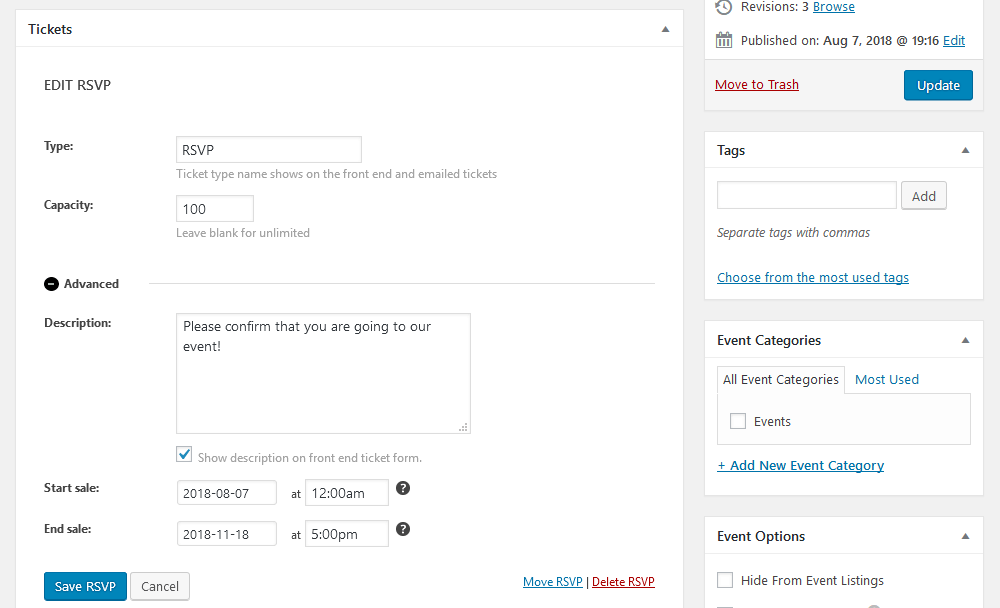
This is how the event edit screen looks like once the Event Tickets extension is active.

There you’re able to set up your desired tickets (RSVP and ticket sales). Each of them has its own options. The RSVP has the name and capacity options, as well as a description and due dates:
While the ticket sales option has the price, capacity, description, SKU, and discounts options.
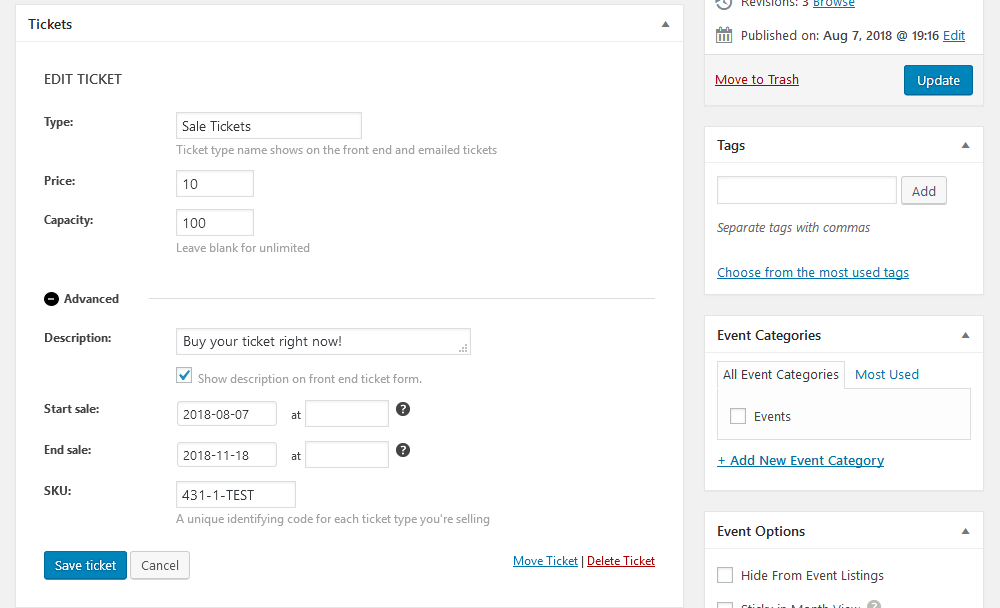
With online sales, you know exactly how many attendees have paid for your event, and you can plan accordingly. In addition, selling tickets beforehand is a good way to improve your cash flow, and plan your resources correctly.
So far, we have already built a great attendance management system. Let’s see how you can better understand your users and turn this raw data into knowledge.
Managing attendees with Users Insights
In case you are planning for the long-run, understanding your attendees and customer base is vital. Whenever you run more than one event, prior knowledge can be used to improve your attendee management. We use the Users Insights plugin, with the “Events Calendar” module active.
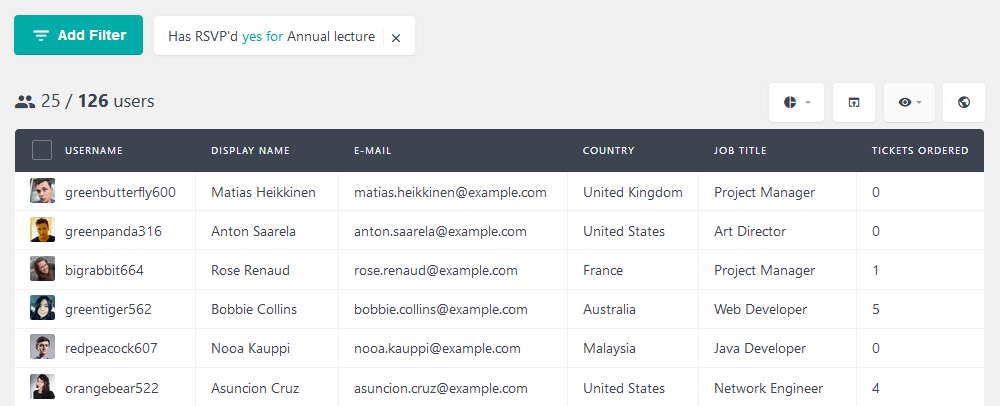
The very first step is simply getting the RSVP or tickets list. In order to filter out users who have responded to a specific event, we can use the “has RSVP’d” filter
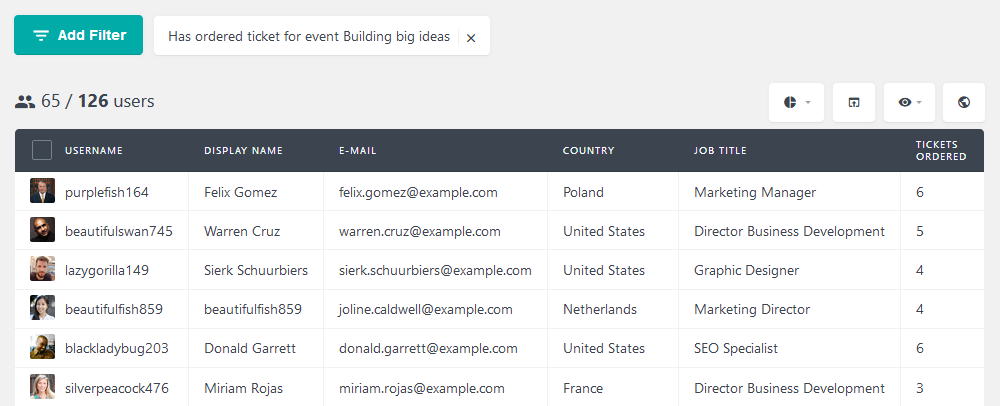
Similarly, it’s possible to filter users who have ordered a ticket for any event in particular:
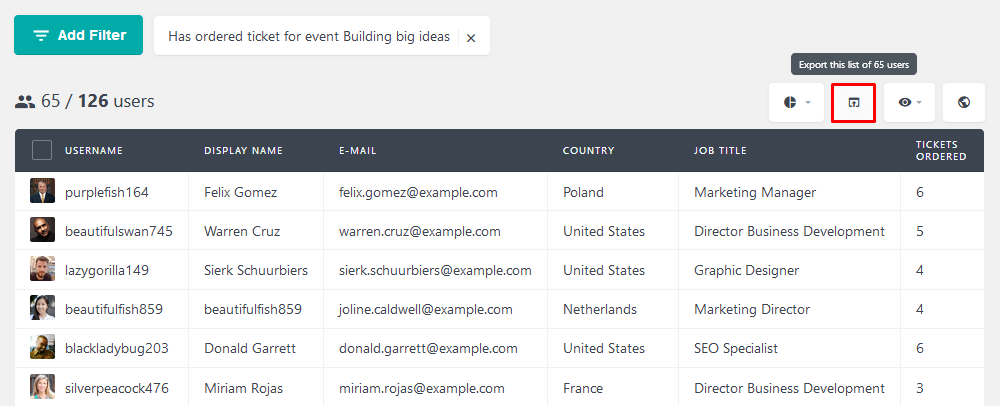
Now you may want to print out this list or share this with other team members. Furthermore, it’s possible to add these users to a mailing list and get in touch with them using MailChimp, for example. In this case, just use the export button.
These filters work great for a particular event management. But when you are on the planning phase or debrief phase there are other interesting filters. For instance, we can figure out which users are our most frequent tickets buyers or attendees by filtering users based on the number of tickets or RSVPs:
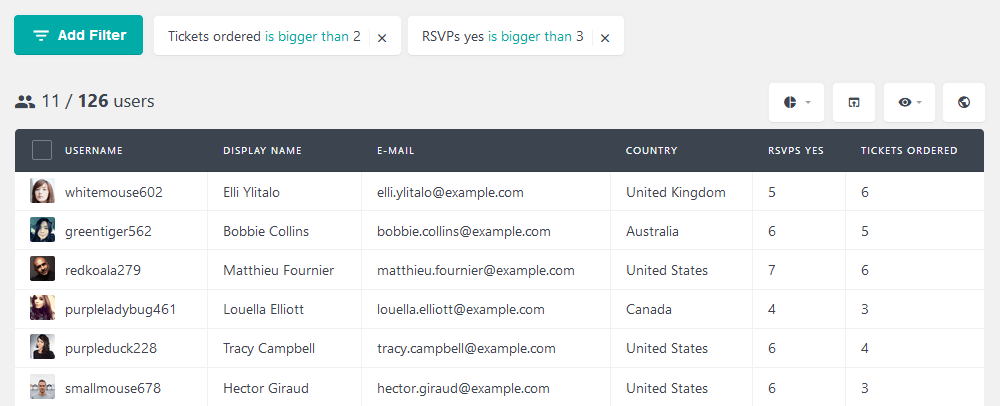
This information can be used in a wide range of applications, in particular, if you collect user data from other plugins. For instance, you may figure out which job titles are the most common in your events, or which cities bring the most attendees.
Another interesting idea is to reward our top attendees. This can be done by filtering users who are going to your next event. Then you order users based on the number of tickets ordered by clicking that column:
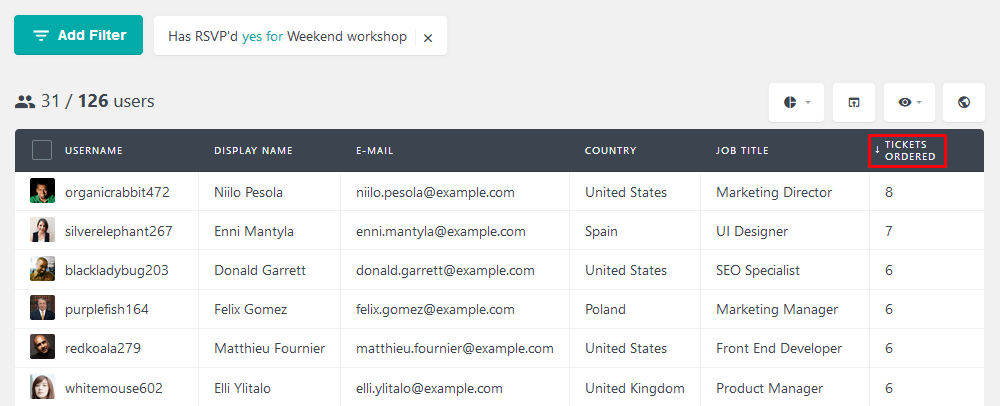
This is a good opportunity to give them a little treat for being such awesome customers.
Conclusion
Today we saw how to use WordPress as attendance management system. We went through tools you can use to create your event and your attendee list. Additionally, we looked into ways you can use the information gathered during your events to improve the next ones.
By the end of the day, you should be able to create your own events as well create your attendance management system.
We hope you enjoyed and see you next time!
