How to import WordPress users to MailChimp
Importing WordPress users to MailChimp is synchronizing user data from a WordPress website to a MailChimp email marketing platform. This integration enables the automated transfer of user information, including email addresses and associated metadata, enabling targeted email marketing campaigns. It allows developers to simplify the management of user lists and leverage MailChimp’s email marketing features by maintaining a consistent, up-to-date user database.
In this tutorial, I will show you how to use the Users Insights export feature to create a customized WordPress user CSV export that can be used to import your WordPress users into MailChimp.
The WordPress user export feature of Users Insights allows you to create a custom selection of users to export. It also allows you to select the user data fields to be exported, so you can export all the user data that you need for MailChimp.
1. Segmenting the list of users that you want to import to MailChimp
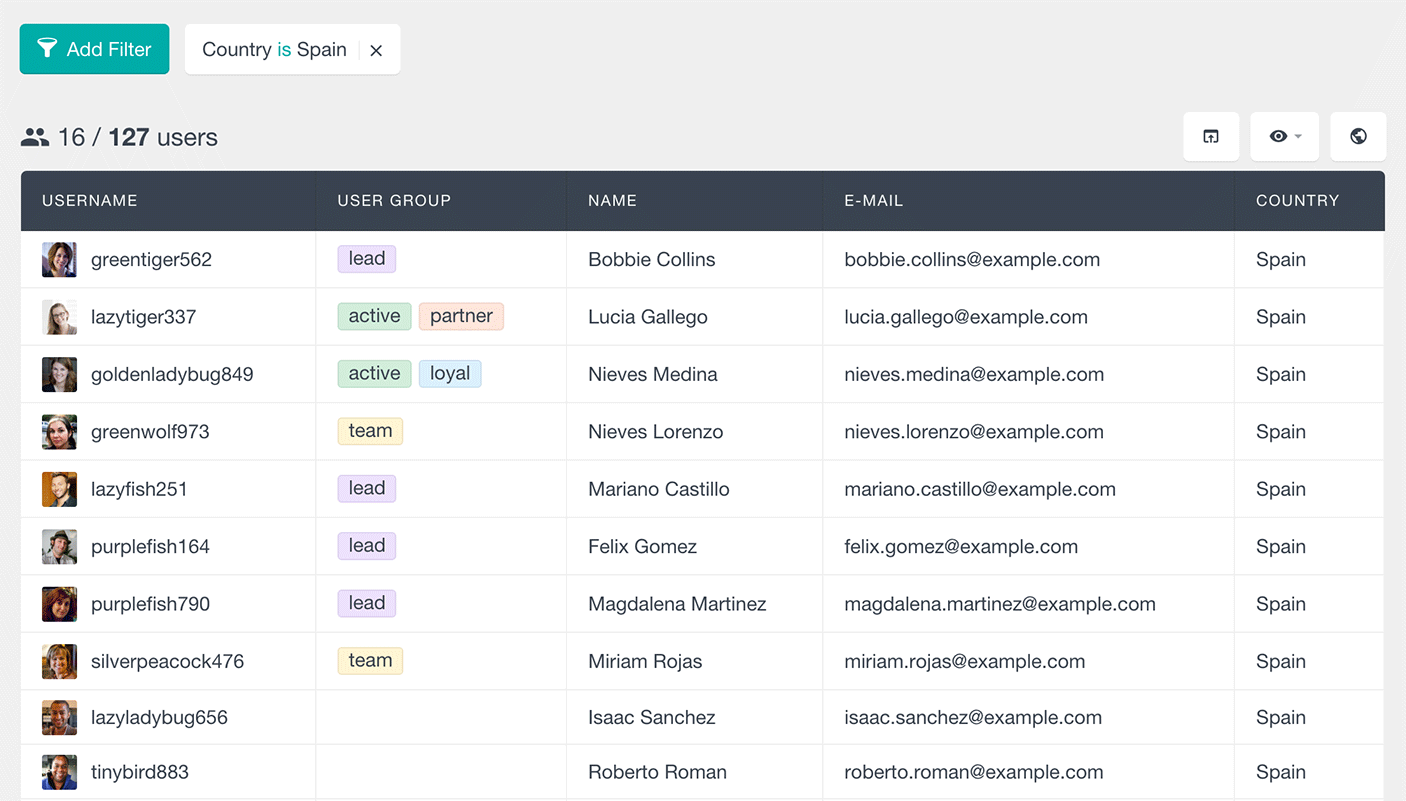
The initial step involves the selection of which WordPress users to import, with the option to import all users if desired. Users Insights, a WordPress plugin, streamlines this process by offering user filters for precise user selection. For example, by using the Geolocation module, users can be filtered by location, such as users from Spain. These selected WordPress users can then be imported into a designated MailChimp list, enabling the targeted distribution of promotional content, in this case, a promo code for Spain’s national day.
This integration between a WordPress site and MailChimp is made possible via the MailChimp import feature, facilitating the synchronization of users as subscribers to the specified MailChimp list. Additionally, users can opt-in or unsubscribe, enhancing the control over their newsletter preferences and ensuring a seamless user experience in WordPress and MailChimp integration.
I am using the “Country” filter and selecting the condition to match the country field to “Spain.” This automatically lists all the users that are from Spain:
In the same way, you can use any of the available filters to segment your user data, such as filtering the users by Groups, Last Seen, purchased WooCommerce product, etc.
2. Selecting the user fields that you want to export
You can use the Visible Columns option to select the user fields that will be exported.
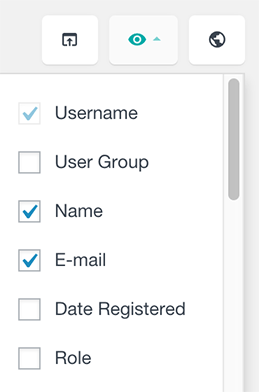
In this example, I am going to select the username, name and email fields. I am going to exclude the country field, as I already know that the current selection of users is from Spain.
3. Exporting the users
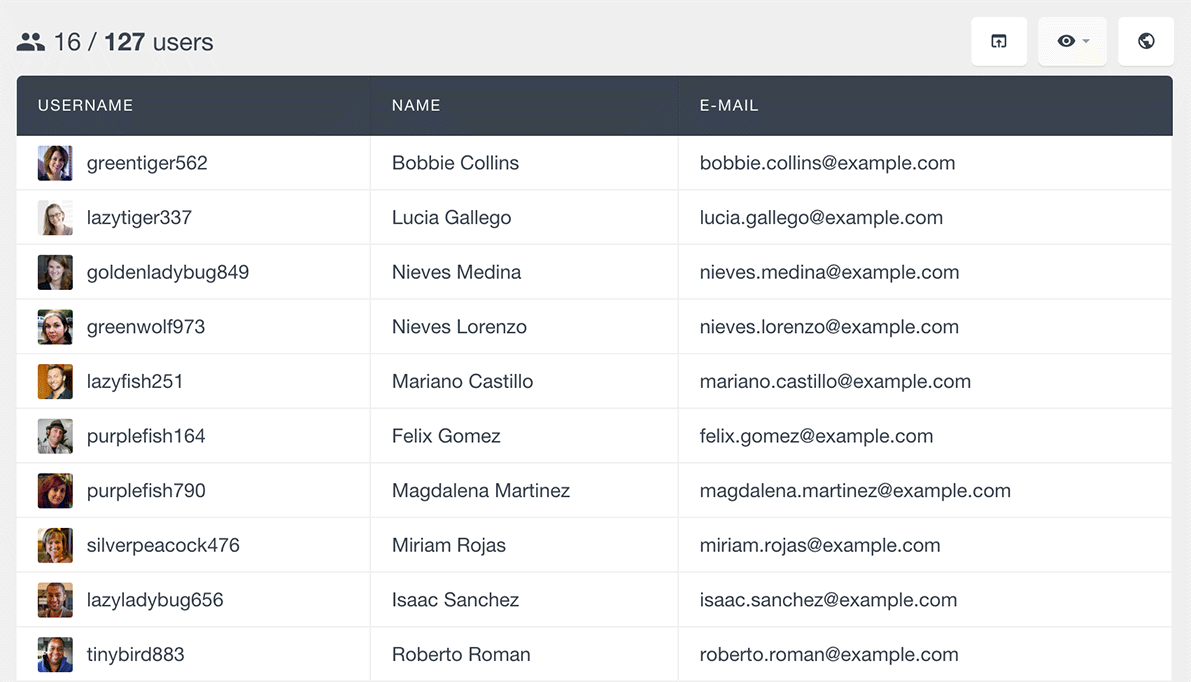
Just by clicking on the Export button, Users Insights will automatically export the current user selection – it will apply all of the filters and export only the visible columns.

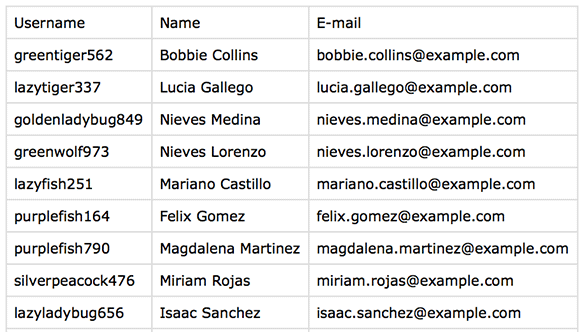
The exported file is in a CSV format, which is a supported format by MailChimp to import subscribers:
4. Importing to Mailchimp
Once you have the CSV user export file, it’s time to import the users to MailChimp.
On the MailChimp site, go to the “Lists” page. You can either create a new list or open an existing list. In this example, I’m going to make a list called “Users from Spain,” as it will contain all of the WordPress users that are from Spain.
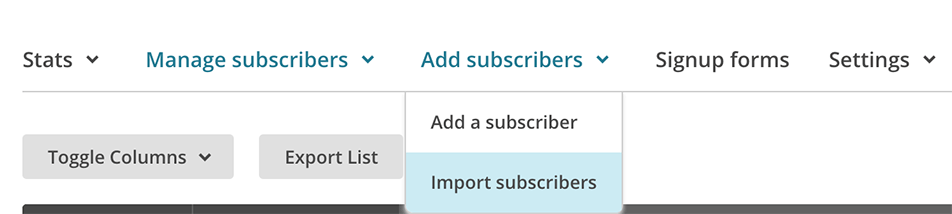
On the list page, click on the “Add subscribers” -> “Import subscribers” link:
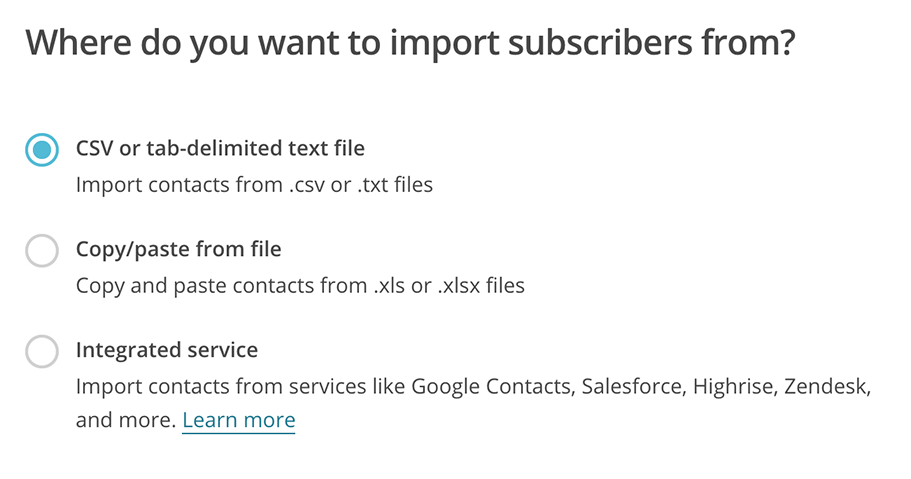
After this, MailChimp will ask you where you want to import the subscribers from – we choose the “CSV or tab-delimited text file” option here:
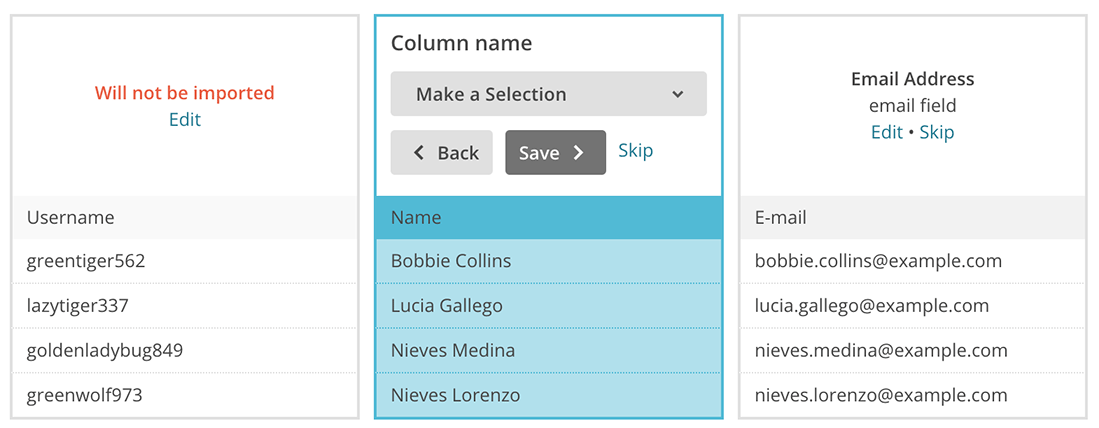
On the next page, MailChimp will ask you how you would like to import each column in the CSV file. I select the following options:
- Username column – I click on the “Skip” option, as I don’t need the username
- Name column – I choose the “New column name” option and create a new column called “Name.”
- Email – the email address from the CSV file should be automatically detected as a primary email for the subscriber
In the next step, MailChimp asks us to categorize the imported list of users; I select the “subscribers” option.
The next step is the actual import process, and if everything goes typically, you should see all of the exported users from WordPress imported to the new list:

Following the outlined steps, you can synchronize your WordPress users with MailChimp to simplify targeted email marketing. This process involves creating and managing email lists within your MailChimp account and efficiently importing your existing WordPress users as MailChimp subscribers.
For instance, if you employ WooCommerce, you can export users who’ve purchased specific products and use MailChimp to suggest related products or use Users Insights’ filters to identify inactive users and send reminders. With this plugin’s filtering capabilities, you gain extensive segmentation options for your WordPress users, empowering the creation of versatile and tailored email campaigns that promote your products and services.