How to email WordPress users
Emailing WordPress users are using built-in WordPress functionality or third-party plugins to send email communications to registered users of a WordPress site. This can include sending notifications, updates, newsletters, or personalized messages to individuals or groups of users based on various criteria. Email communication serves as a way to engage, inform, or interact with users, enhancing user management and engagement within the WordPress ecosystem.
This can be achieved by using dedicated email marketing plugins or directly configuring email templates within the WordPress dashboard (usually done by a dedicated WordPress email plugin). The key objectives include segmenting users and crafting personalized email content to ensure relevance. Exporting user lists is a crucial aspect, which can be done using tools like Users Insights filters and its export functionality. This allows bulk email sending to specific subscriber groups or lists, potentially improving click-through and eCommerce conversion rates.
Let’s get started!

How to send email to users
The process of sending emails consists of two main parts:
- Find the users to email and export their contact details
- Import the user contacts to a mailing service
Finding and exporting the users to email
As you may have noticed, filtering is critical to our success when we want to email WordPress users. You might often want to target just a specific group of users instead of sending an email to all of them. In this way, you can email your users based on their interests or activity on your website.
Targeted emails can also help you avoid increasing the unsubscribe rate by sending too many emails to all the users.
That’s why you should filter your users and find the best audience for your next campaign. Let’s see some basic filtering and exporting before diving into more complex examples.
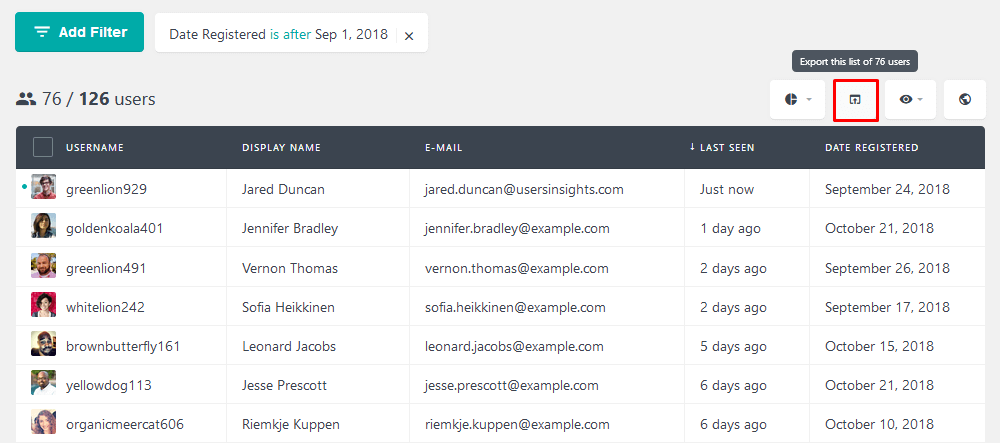
Let’s say you want to filter all your recent subscribers. First, we filter our users based on their “registered date” filter. In addition to filtering users who registered X days ago, we can use other filters. For instance, you can filter users from a specific time range or several days after a date. Then, once you have your users, you can click “export.” This is what it looks like:
Moreover, you can control which columns will be visible. This directly affects your export file. Hence, you can select your visible columns, and these are the ones you’ll see in your export file. Since we will send the data to a mailing service, it’s essential to have the Email field enabled so the user emails will also be exported.
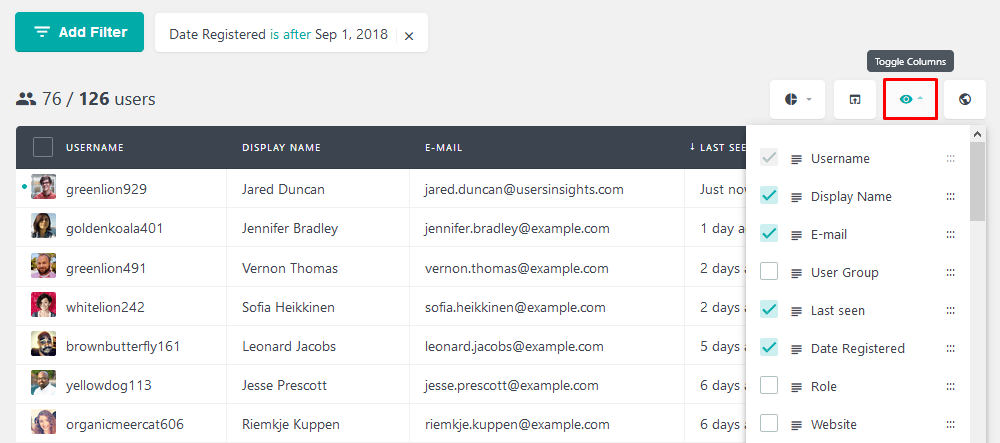
Once you have your desired users and their custom fields, click the Export button to export their data.
Importing the user contact details to a mailing service
Next, we import these users into your desired mailing software, MailChimp or Campaign Monitor. Usually, the import process itself is pretty simple. We have created detailed guides on how to do this:

After the import process, it’s time to email your WordPress users. Since our export file is already segmented, you can create a new campaign and drop them a line. Use the custom fields you’ve exported to give your message a personal touch.
How to send email to WordPress users when there’s a new post
There are many ways to create different user segments. If you collect their job title, such as user meta, you know their professional interests. You likely have different categories on your site, and each category can match different interests. Thus, posts about web development are likely to be read by web developers and designers. On the other hand, posts about entrepreneurship would be a good fit for managers.
Consequently, we can use different custom fields to email your WordPress users based on interest. Then, whenever you have a new post that you judge interesting for this group, just let them know.
Let’s say you have a new guide on the web development category. If you want to let your users know, filter out relevant job titles that could interest them. Additionally, make sure to include columns that can be used later. For example, if you keep the name and job title columns visible, it’s possible to customize your message with these fields:
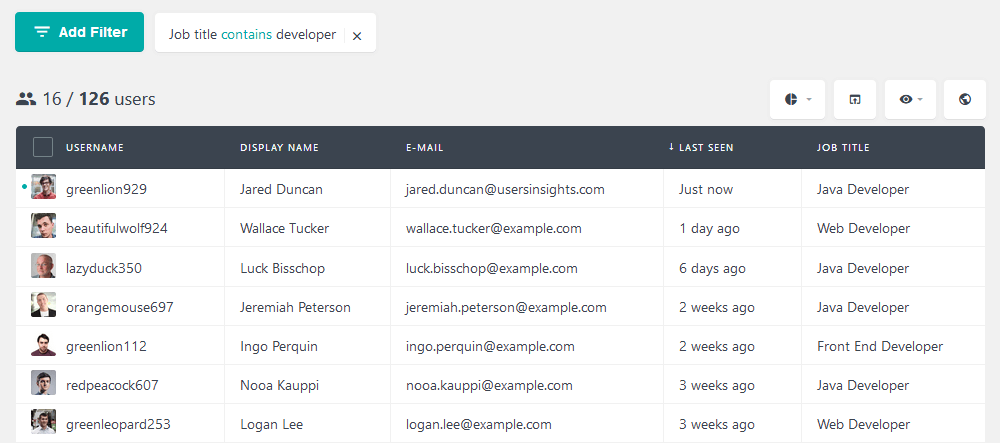
Most mailing lists can deal with duplicates. Therefore, you can try different keywords, and you won’t ever send copies of the same email to the same user. Let’s try a few other job title keywords, then:
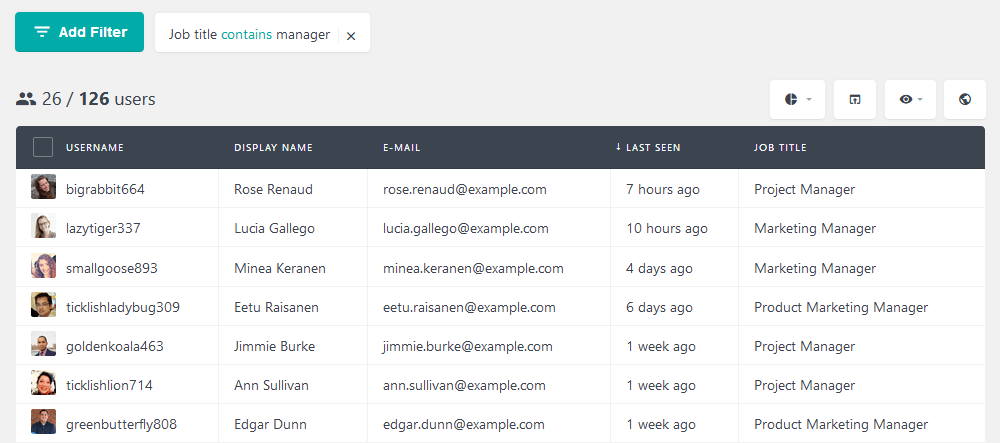
Furthermore, it’s possible to track down these same users if they have visited your site. This information is essential to help you track down the effectiveness of your campaign. Also, this enables you to filter out users who aren’t interested in the categories you thought they would be.
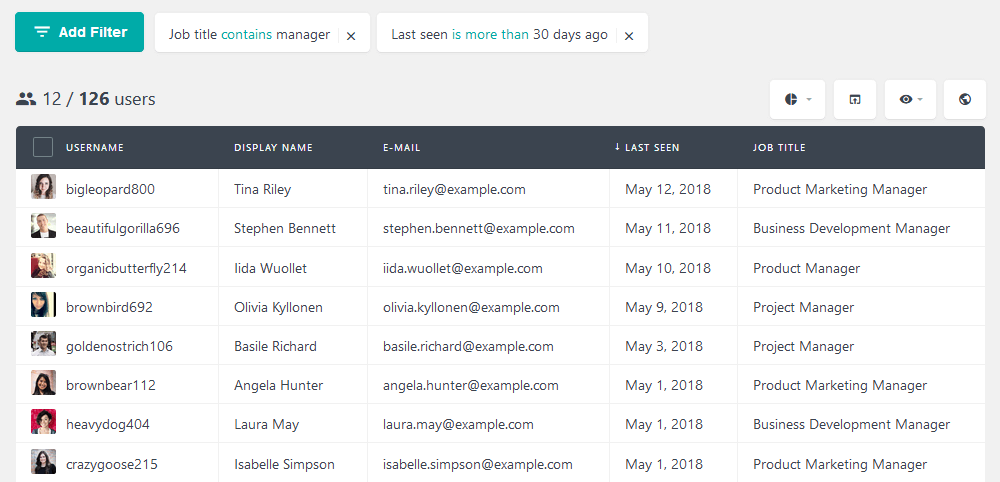
Since this is an extended filter, you can save time using the segments tool. This feature allows you to save a set of filters with one click. You can keep them with a meaningful name, making it easier to recall afterward:
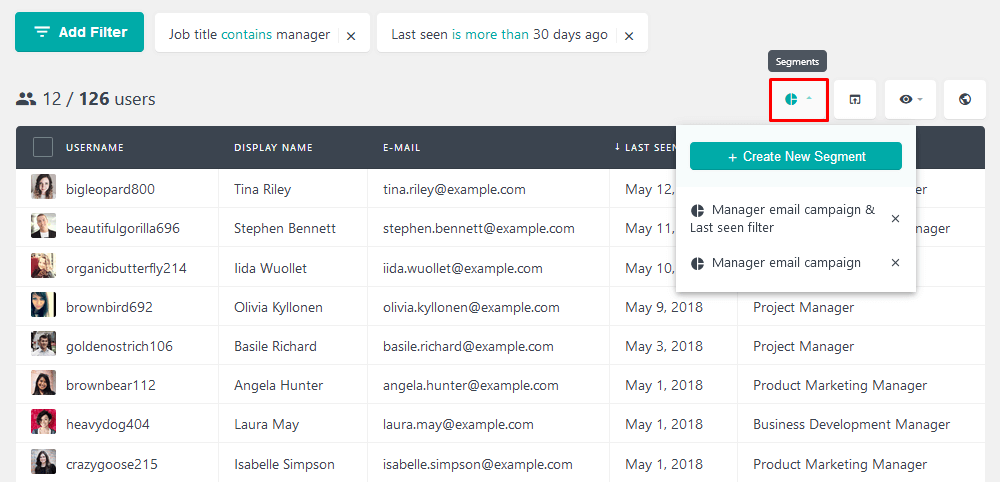
Similarly to the examples above, once you apply the selected filters or segments, click the export button to export these users.
Using WordPress to send email to users based on their location
Often, store owners have brick-and-mortar stores in addition to their online presence. If that’s the case for you, gathering your user location may be a good idea.
You can improve your marketing campaigns by directing users to their nearest store. This is possible with the Users Insights Geolocation API. By using it, you can email WordPress users based on their location.
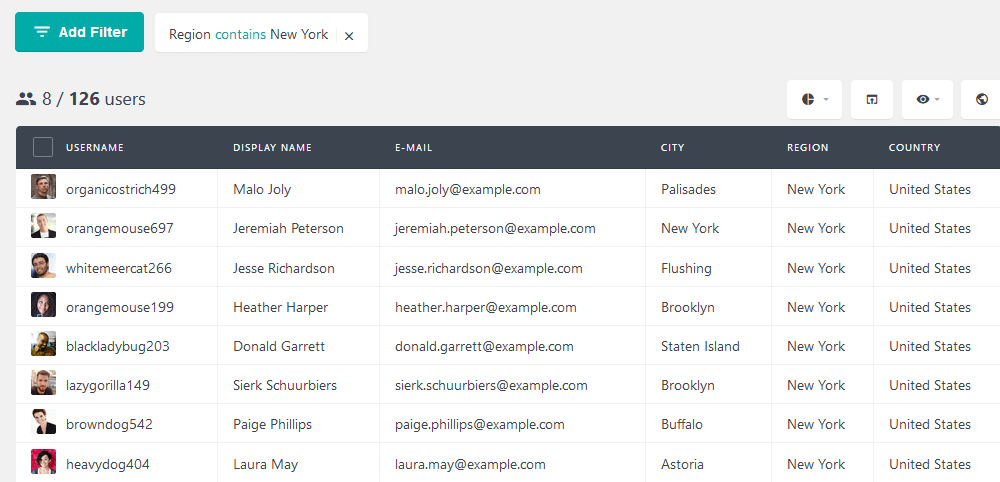
For instance, if you have a product launch or upcoming sale for a particular store, it’s possible to filter users from that city, region, or country.
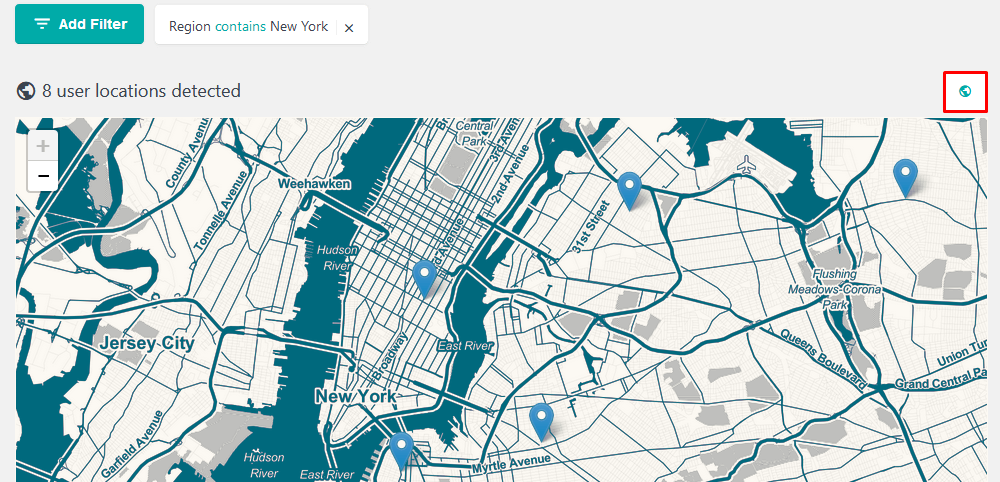
If you don’t know from which cities your users are, the map view can help you. With it, you can zoom in and out to specific locations and find out their city or possible neighborhood. Due to the limitations of the GeoLocation API, this information won’t be perfectly accurate (e.g., it won’t show you the exact address and street number), but it’s a great starting point.
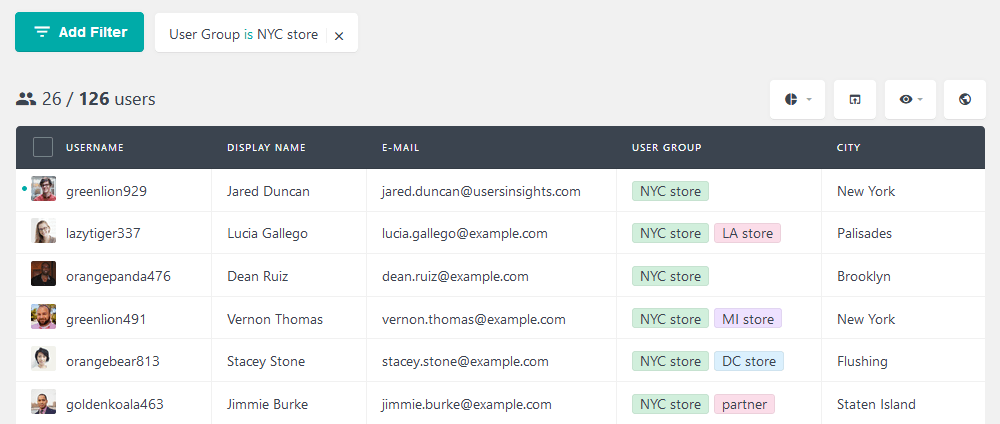
Furthermore, once you filter users from a particular store, you may want to add them to a user group. For example, users near the NYC store can be added to the NYC group. Therefore, once you want to filter all users from them, you don’t need to filter city by city.
Conclusion
Today, we learned some different ways to send emails to all registered users as well as send emails to specific segments of registered WordPress users. In addition to emailing them, we learned many ways to segment users for customized experiences. We found many uses for your custom fields and new options, such as the map and Geolocation tools.
We hope you enjoyed this article and see you again next time!
