How to create frontend WordPress user profile page
In this tutorial, we are going to learn how to extend the WordPress user profiles by creating front-end editable profile pages. These are custom front-end WordPress user profile pages that can be updated and customized by the users straight from the frontend.
There are many different ways to build a website with user accounts with WordPress, ranging from various user profile builder plugins to using custom code and dedicated WordPress theme. Writing a custom code to create and manage profile pages can be quite complicated task but if you are comfortable with writing some custom code you might consider creating custom user profile pages with ACF. Since building custom WordPress profile pages in WordPress without a plugin can be quite complicated endeavor, in this article we are going to focus on creating WordPress user profiles pages with the help of plugins.
There is a number of free and paid WordPress plugins that may offer different features depending on the goal they are trying to achieve. Nevertheless, there are some factors that you will need to consider when looking for a WordPress profile builder plugin:
- Easy to use interface: The WordPress plugin should be simple and easy to use. This will ensure that you and your users will be able to understand and start using the plugin in a timely manner.
- Allow users to register: It is one of the most basic requirement for all profile builder plugins to allow for users to register effortlessly. The plugin should provide functionality to create custom WordPress user registration forms and register your users.
- Editable User Profile: Users should be able to view and edit their user profiles data straight from the frontend of your WordPress website. This makes it easier for the users so they don’t have to depend on the site owners for small changes.
In this article we are going to focus on the Ultimate Member plugin, since it is one of the most versatile and easiest to use. Just by following a few simple steps, we are going to allow our users to edit their profiles on the front-end, without having to access the admin dashboard. Also we’ll be able to create a wide range of new profile custom fields and grant users access to edit them.

The Ultimate Member user profile plugin allows you to create a social network and membership site, by creating different WordPress user profile pages and allowing them to connect and interact with other users. Ultimate Member also provides various privacy settings, which can allow you to make your user profile pages visible only to their owners. So, if you don’t need the membership side of the plugin, but you need to provide your users an easy way to edit their details, you can still use Ultimate Member for that. This is a great solution, since you can allow front-end user profile access, with no WordPress dashboard backend access.
We are also going to learn how you can search through these newly added custom fields by using Users Insights. In this way you’ll be able to not only create profile edit pages, but also see how these profiles are being used.
Ultimate Member user profile features
Once you install and activate the Ultimate Member plugin, your WordPress site is going to be turned into a membership site. The most prominent features include WordPress user profile on the frontend, frontend user registration, user profile with custom fields, custom user roles and a form builder.

Additionally, there are the content restrictions, members directory and conditional loading features. For example, we can hide content, widgets or menus based on the current user access level.
The Ultimate Member plugin also introduces many different shortcodes, some of which you can use to create custom WordPress public user profile pages. And that’s the side that we’re going to explore today. Let’s create our first user profile form now.
Creating a user registration form with Ultimate Member
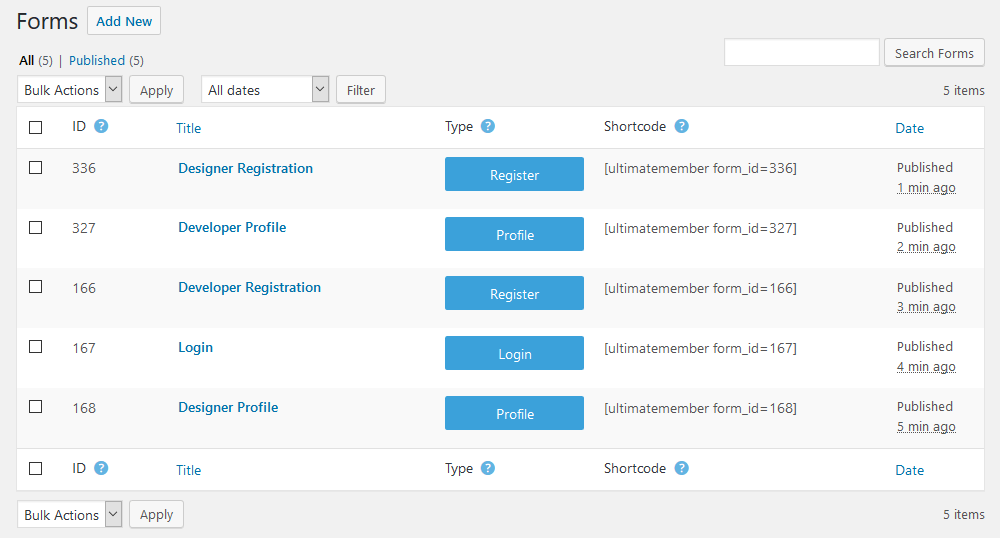
To create a new registration form we need to select forms from the Ultimate Member > Forms menu. This will open the forms page which gives you an overview of all of your existing forms. If you click on the the “add new form” button it will take you to the page where you can create your new user registration form.

When creating a new registration form there are a few fields that are essential and must be included so that Ultimate Member can properly register the user. These are the username field or the username/email field and the password field. These are the fields that WordPress requires each user to have a username and password. These fields are necessary so that the user can login after successfully registering. Apart from those requirements, you are free to add any other fields to the registration form.
Creating a user profile form with Ultimate Member
Under Ultimate Member > Forms you can also create and edit your login and profile forms. We can use it to allow our WordPress users to edit their profile on the frontend. Now let’s start by creating a new form. We will use this form as our profile page template for the different user types. Having multiple forms is useful if each user type has a role or a set of custom fields. For example, you can have different profile page templates for different user types or occupations.
The form creation screen is composed of many fields. Let’s add some fields. In case you haven’t registered your desired custom user fields, you can do that when adding them to a form. For example, if we want to know the primary programming language of our developers, that can be stored in a custom field. From the profile registration, you can click on the “add new” field: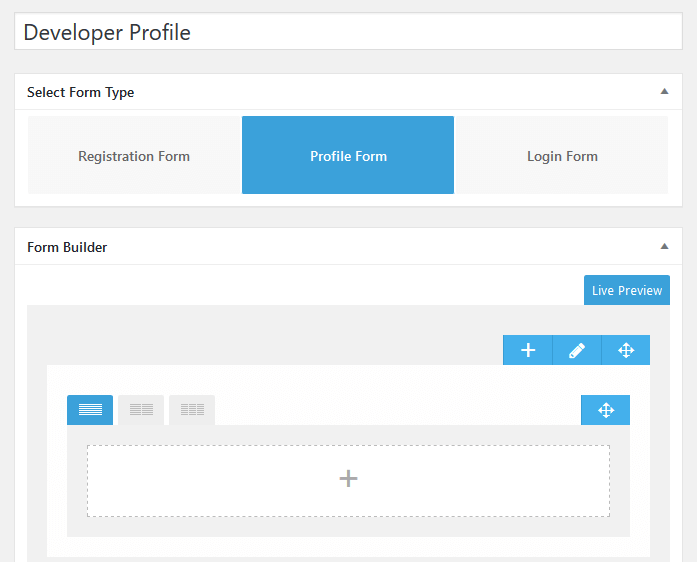
Adding custom fields to the user profile form
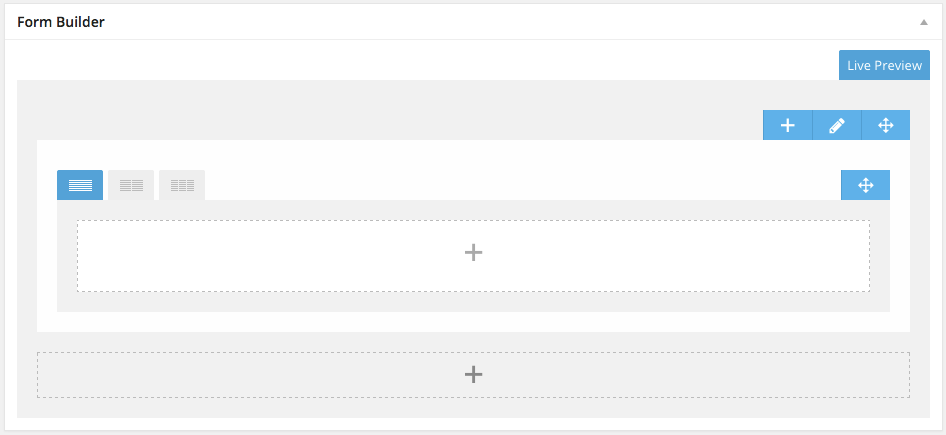
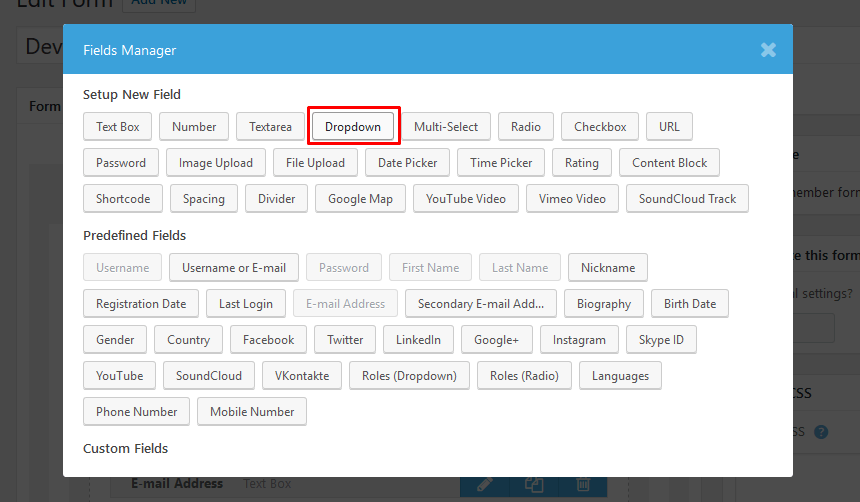
The form builder is where you can add the fields of your user profile form. You can either select one of the many predefined field or click on one of the field types to create a new custom field.
Then select the field type – in our example, it could be a radio or dropdown field:
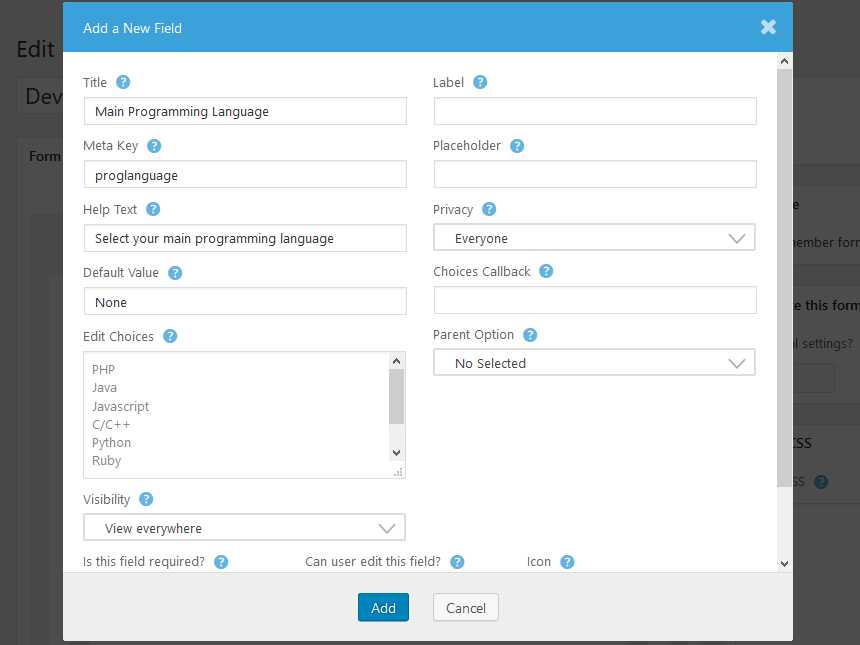
Next let’s add all of the custom field details. There are various options that Ultimate Member makes available. All of the options are clearly explained when you hover on the question mark icon. Some of the most important fields that you should pay attention to are:
- Meta Key – the Ultimate Member user profile data is stored as user meta. This allows you to add user meta to profile page. You need to carefully choose a unique descriptive meta key that is going to store the data of this field, as you won’t be able to change it once the field is created.
- Visibility – setting whether this field will be available in the view profile, edit profile or both pages
- Privacy – in this field you can set who is going to have access to the field. Fields containing sensitive personal data, such as a phone number or address, should be set with a higher privacy, such as visible to owners and admins only.
After you create the field, you just need to repeat this process for all your desired profile fields, be it custom or default fields.
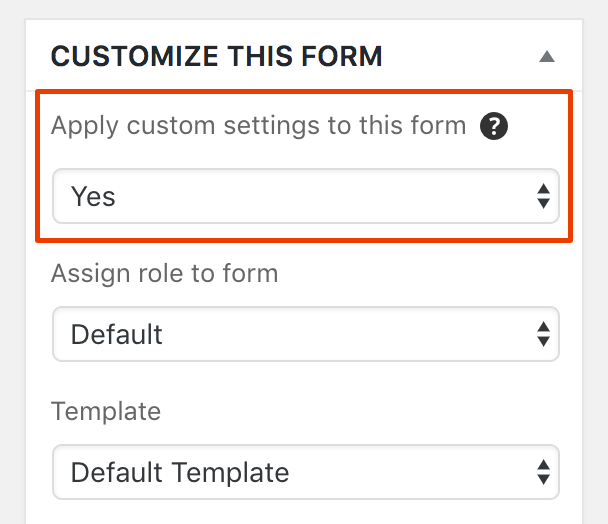
There are also option to change some option on the from level. For example, you can make a form role-specific, change its template, colors, size, alignment. All the design options of a form can be customized, so each form can be unique. This can be done by enabling the “Apply custom settings to this form” field in the sidebar:
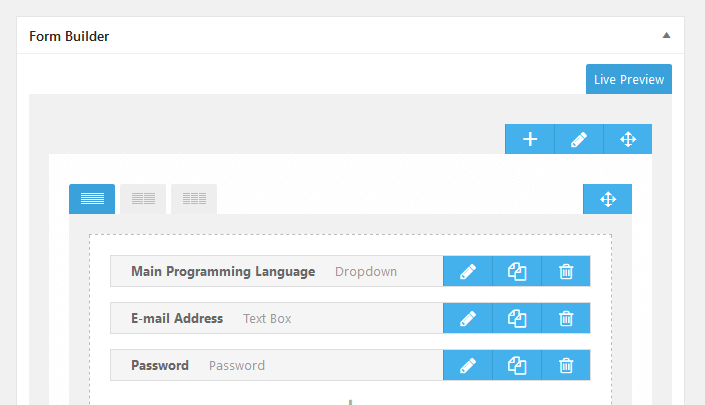
This is the final setup of our form. Since it’s a custom form for profile edit you don’t need to add all your user fields. In fact, you can add just one custom profile field if you want to, in case it’s an essential information for you.
There’s just one missing piece in our WordPress user profile, which is displaying our form. Let’s do that now.
Creating the WordPress user profile page
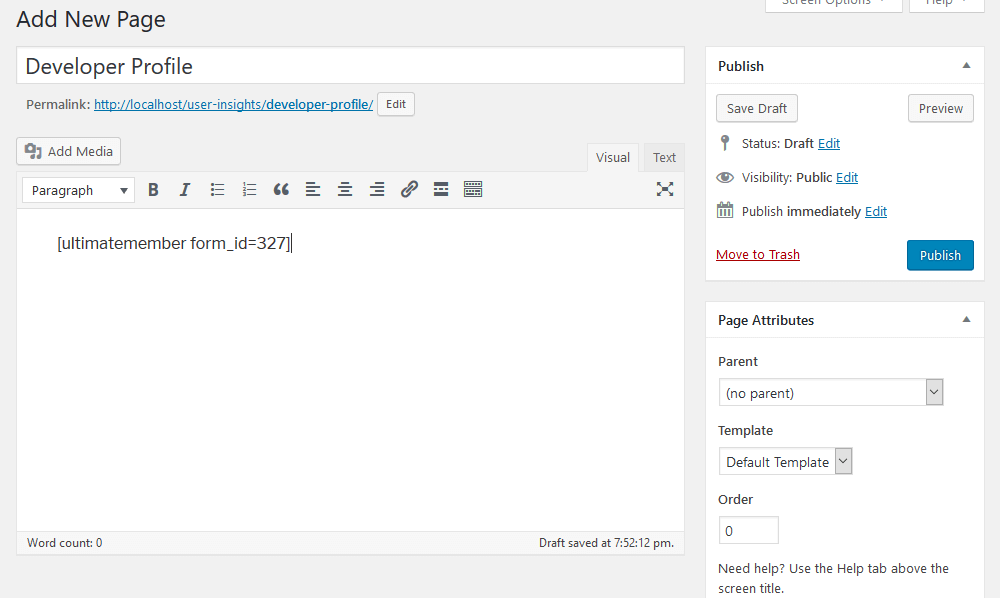
After you create the form, a shortcode will be generated for it. To create our WordPress user profile page, we’ll create a regular page and insert our newly generated WordPress profile shortcode. We’ll also need to set that page as our profile page under Ultimate Member > Settings > General > User page. In this way your profile will be editable. Then just publish this page:
And set it as your user page, it is going to display our custom profile:
You can use the same technique to create multiple WordPress user profiles edit screens in front end. If you have multiple user roles, or even if you want to collect different data from different users, that’s the easiest way to do it.
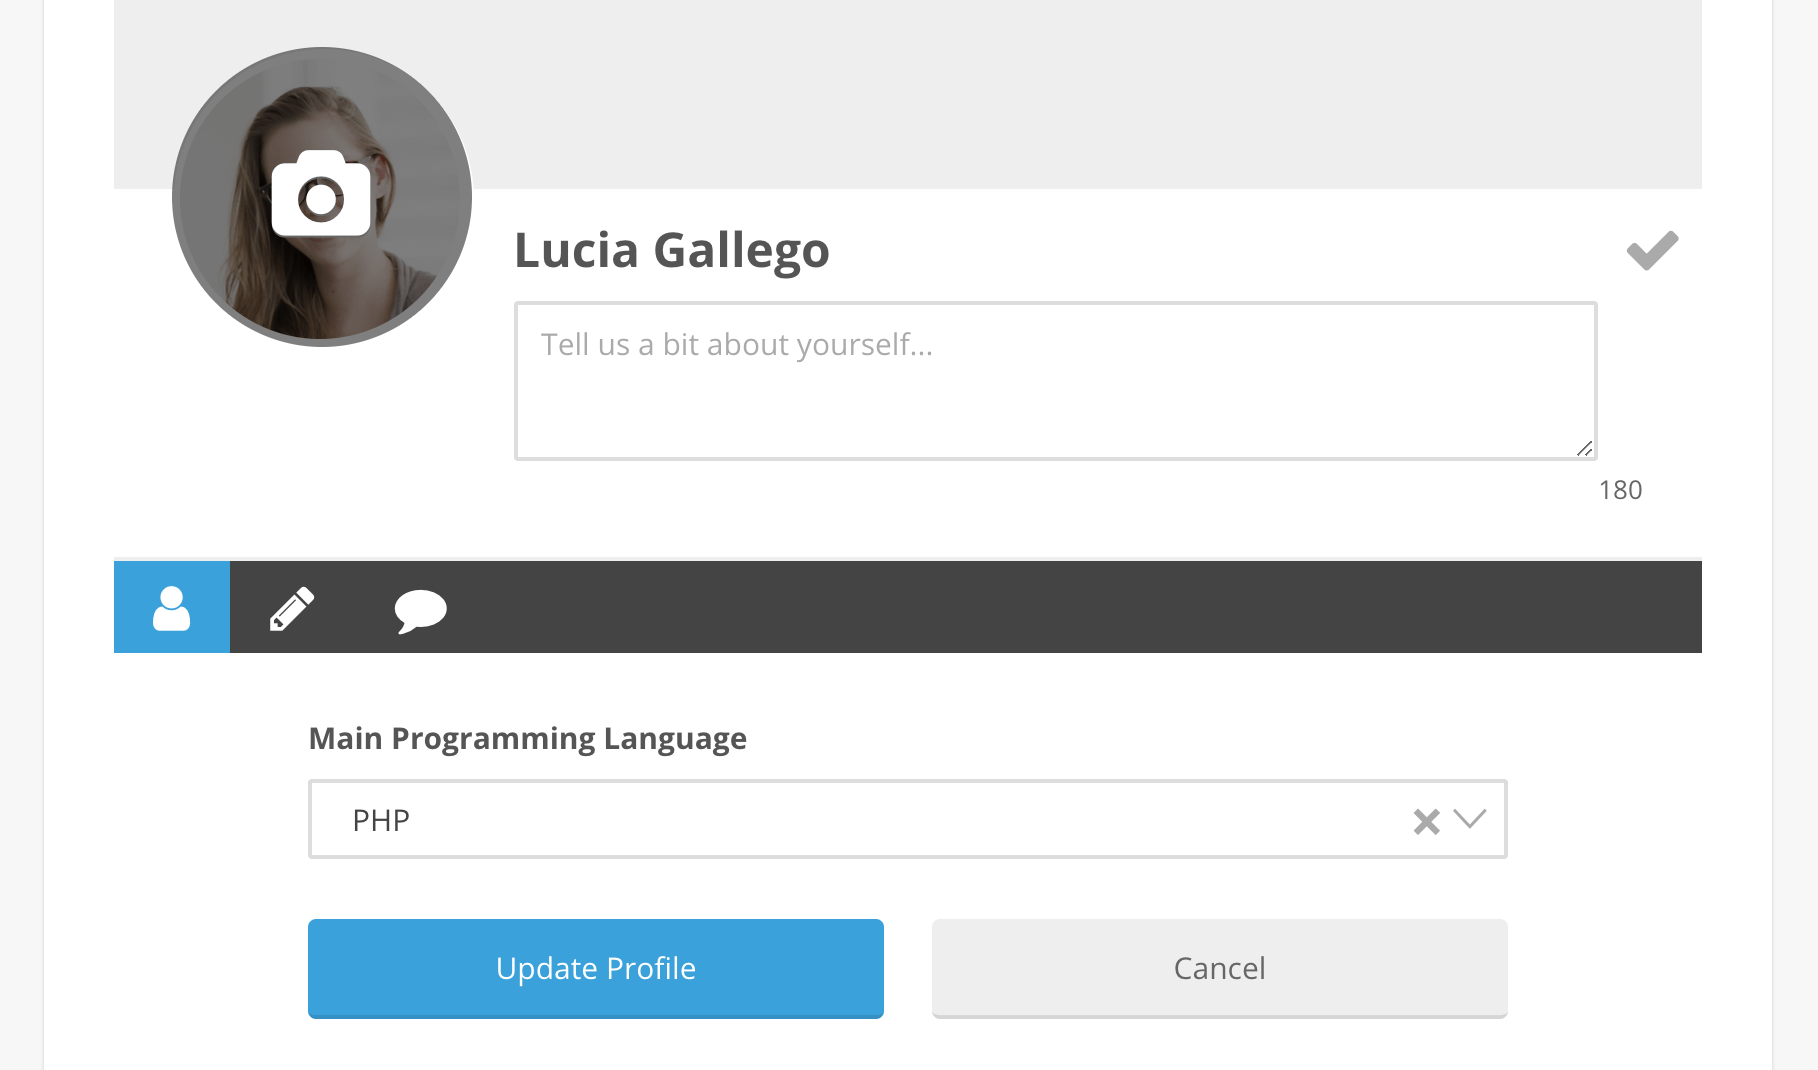
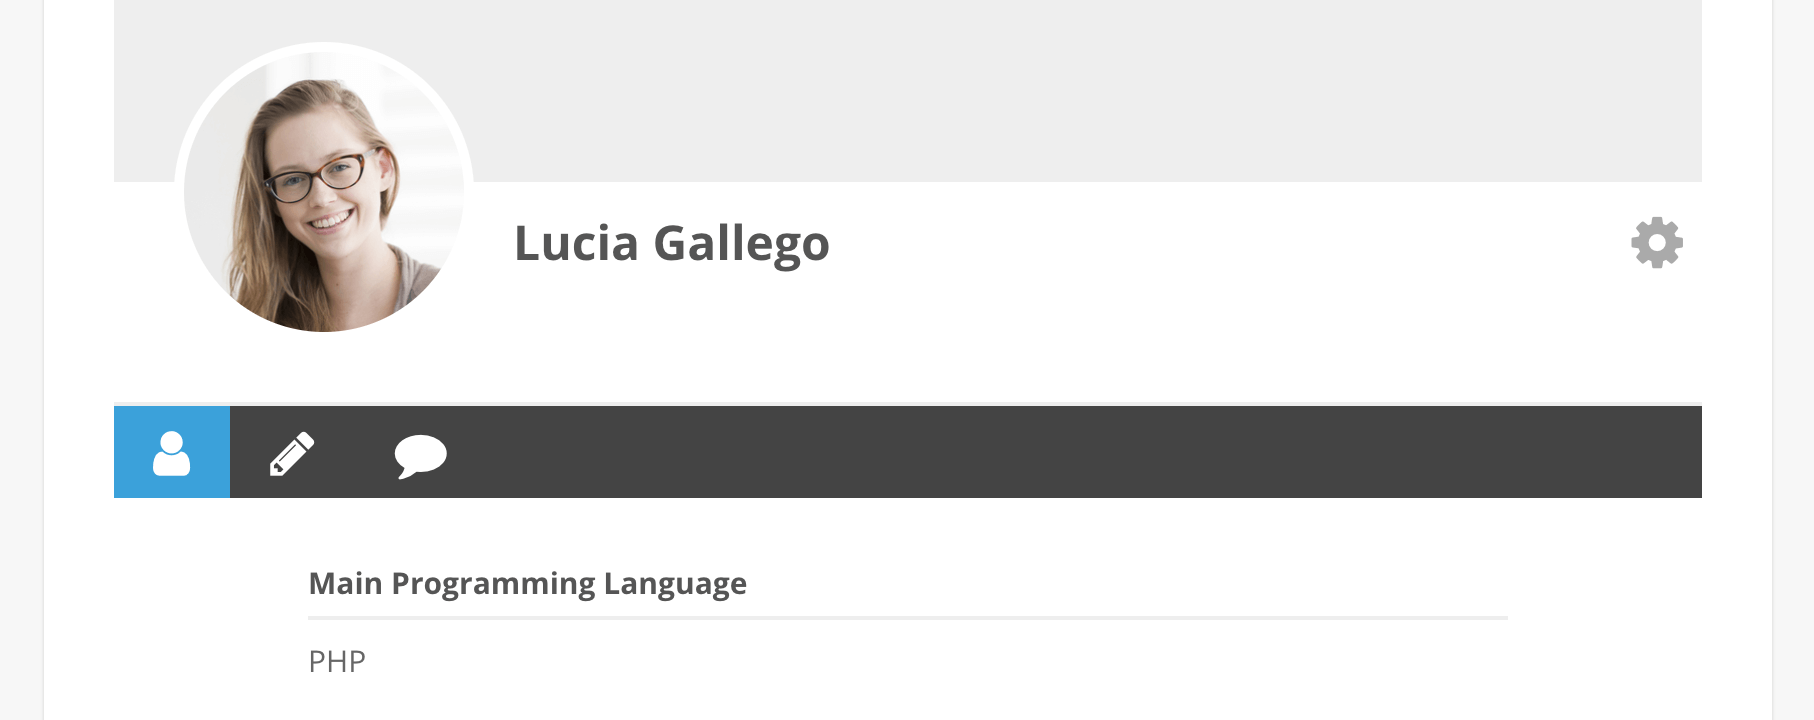
Our users are able to edit their user data via the custom fields and upload their own profile picture now. And we can see if they are using their frontend profile form by checking their profiles. Therefore, once a user have their programming language field, this is how this information is displayed when you check their Ultimate Member profile page:
But checking each of our users manually may be too much work. That’s why we’re going to use the Users Insights plugin. Later in this article we’ll show you how you can search and filter your WordPress users based on their profile fields on their custom user profile page. But first, let’s talk about data privacy.
Making the user profile pages private
Since Ultimate Member is a membership plugin, it makes some of the user pages public by default. This includes user profile pages and members directories. If you need to keep the profile pages private to the owners and the admins, you would need to configure the Ultimate Member privacy settings.
Disable Members Directory
Ultimate Member by default creates a members directory that lists all the available members. To disable the members directory, go to Ultimate Member > Settings > General > Users and uncheck the “Enable Members Directory” option.
Limit profile page access
The next thing that we need to do is limit access to the user profile page. This requires changing a couple of settings.
First, open the user profile page in edit mode and navigate to the “UM Content Restriction” section. In this section, you should see a “Restrict access to this content” option. Check this option and then in the “Who can access this content” field that will get displayed below, select the “Logged in users” option. This will restrict access to this page to the logged in users only – the site visitors will not be able to access the content of this page.
Next, we need to also restrict the access to this page based on user roles. To do this, go to Ultimate Member > User Roles. Then you have to edit each role that will not be allowed to access the user profile page of other users. To restrict access, you just need to disable the “Can view other member profiles” option.
Filter and display user profile custom fields
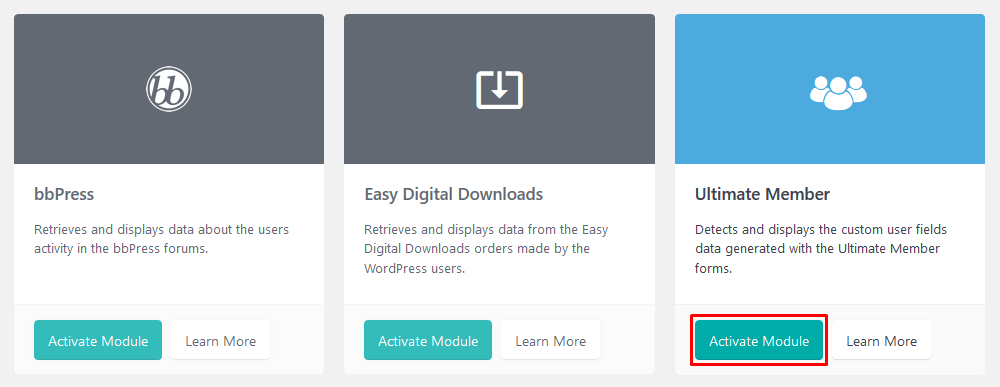
The first step in filtering custom fields in Users Insights is enabling the Ultimate Member module. You can do that under Users Insights > Module Options:
By doing that you should immediately see the custom fields you’ve created both in the filters and in your columns:
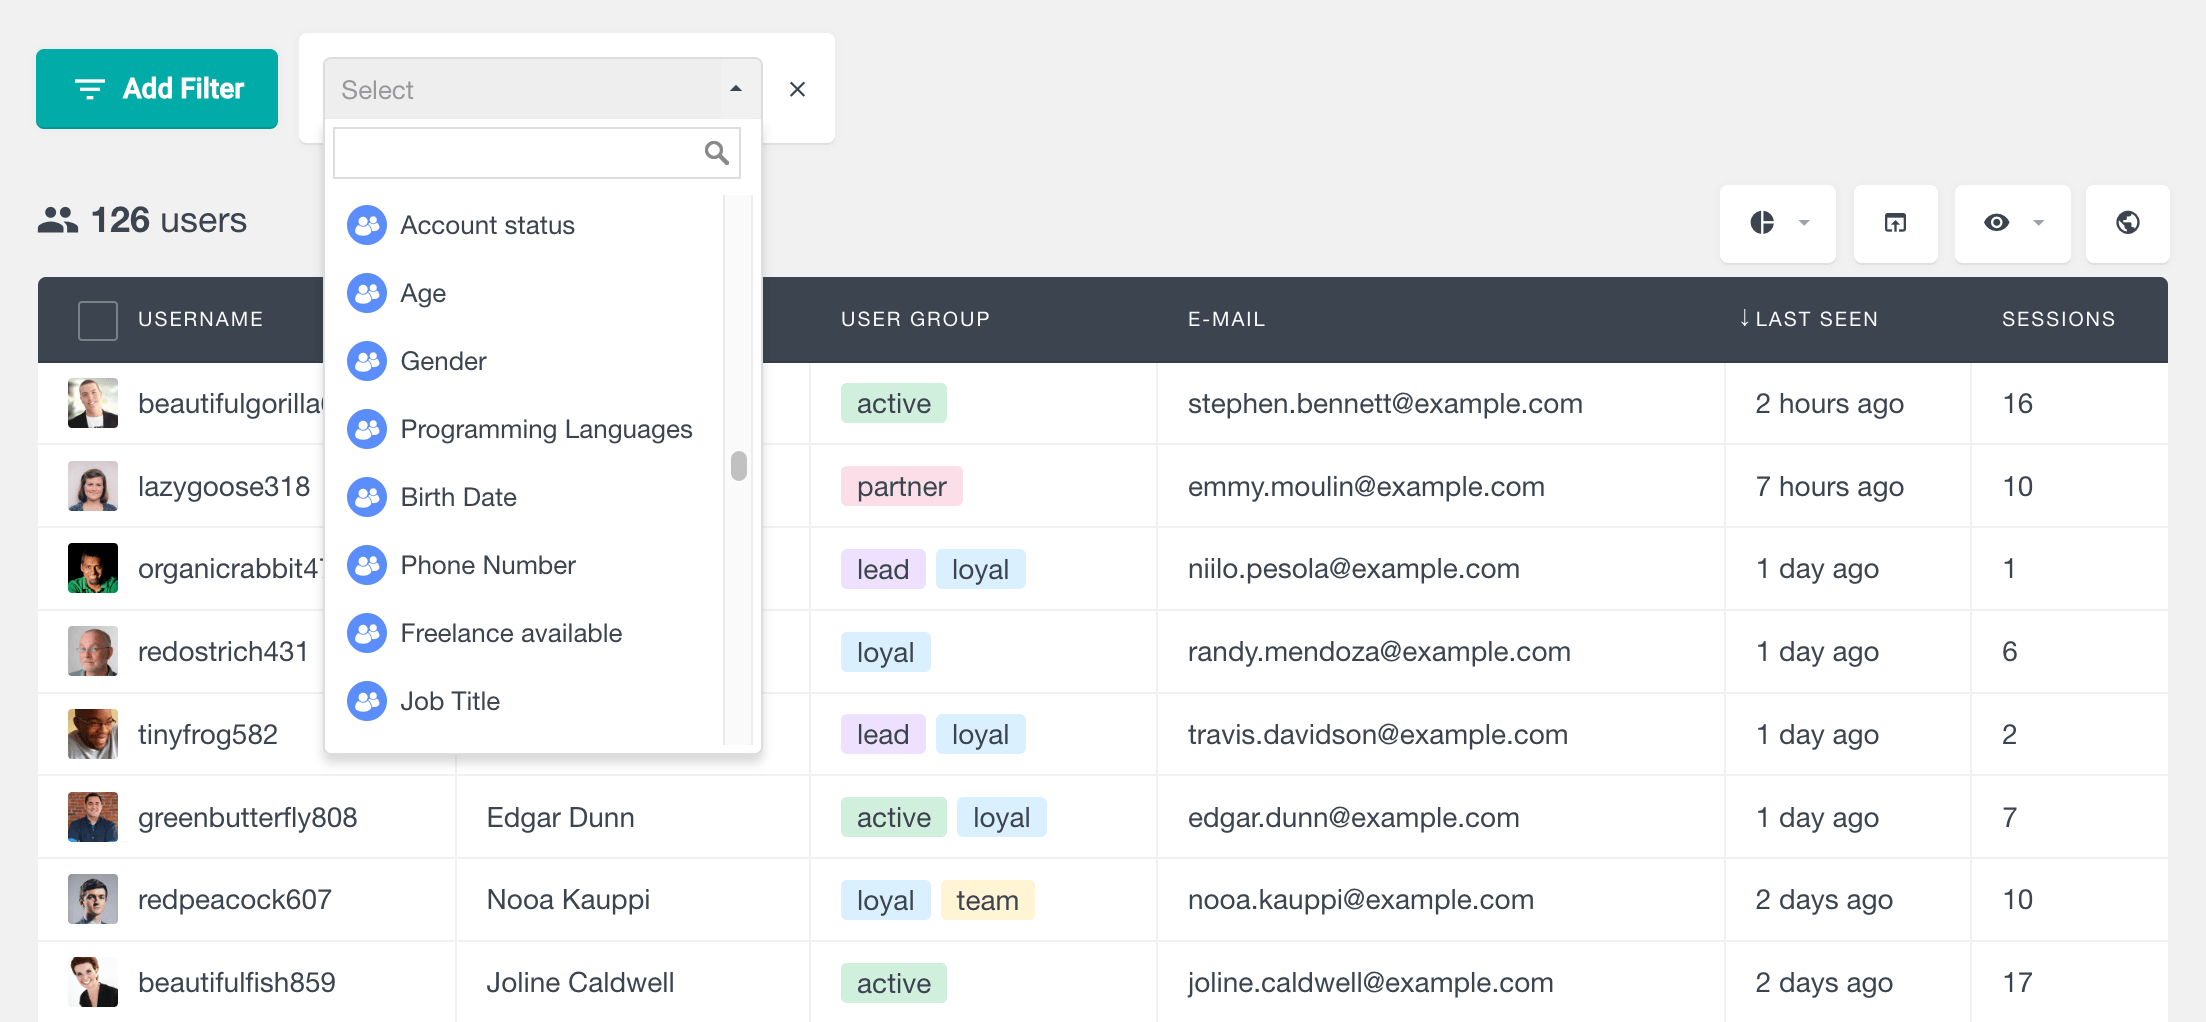
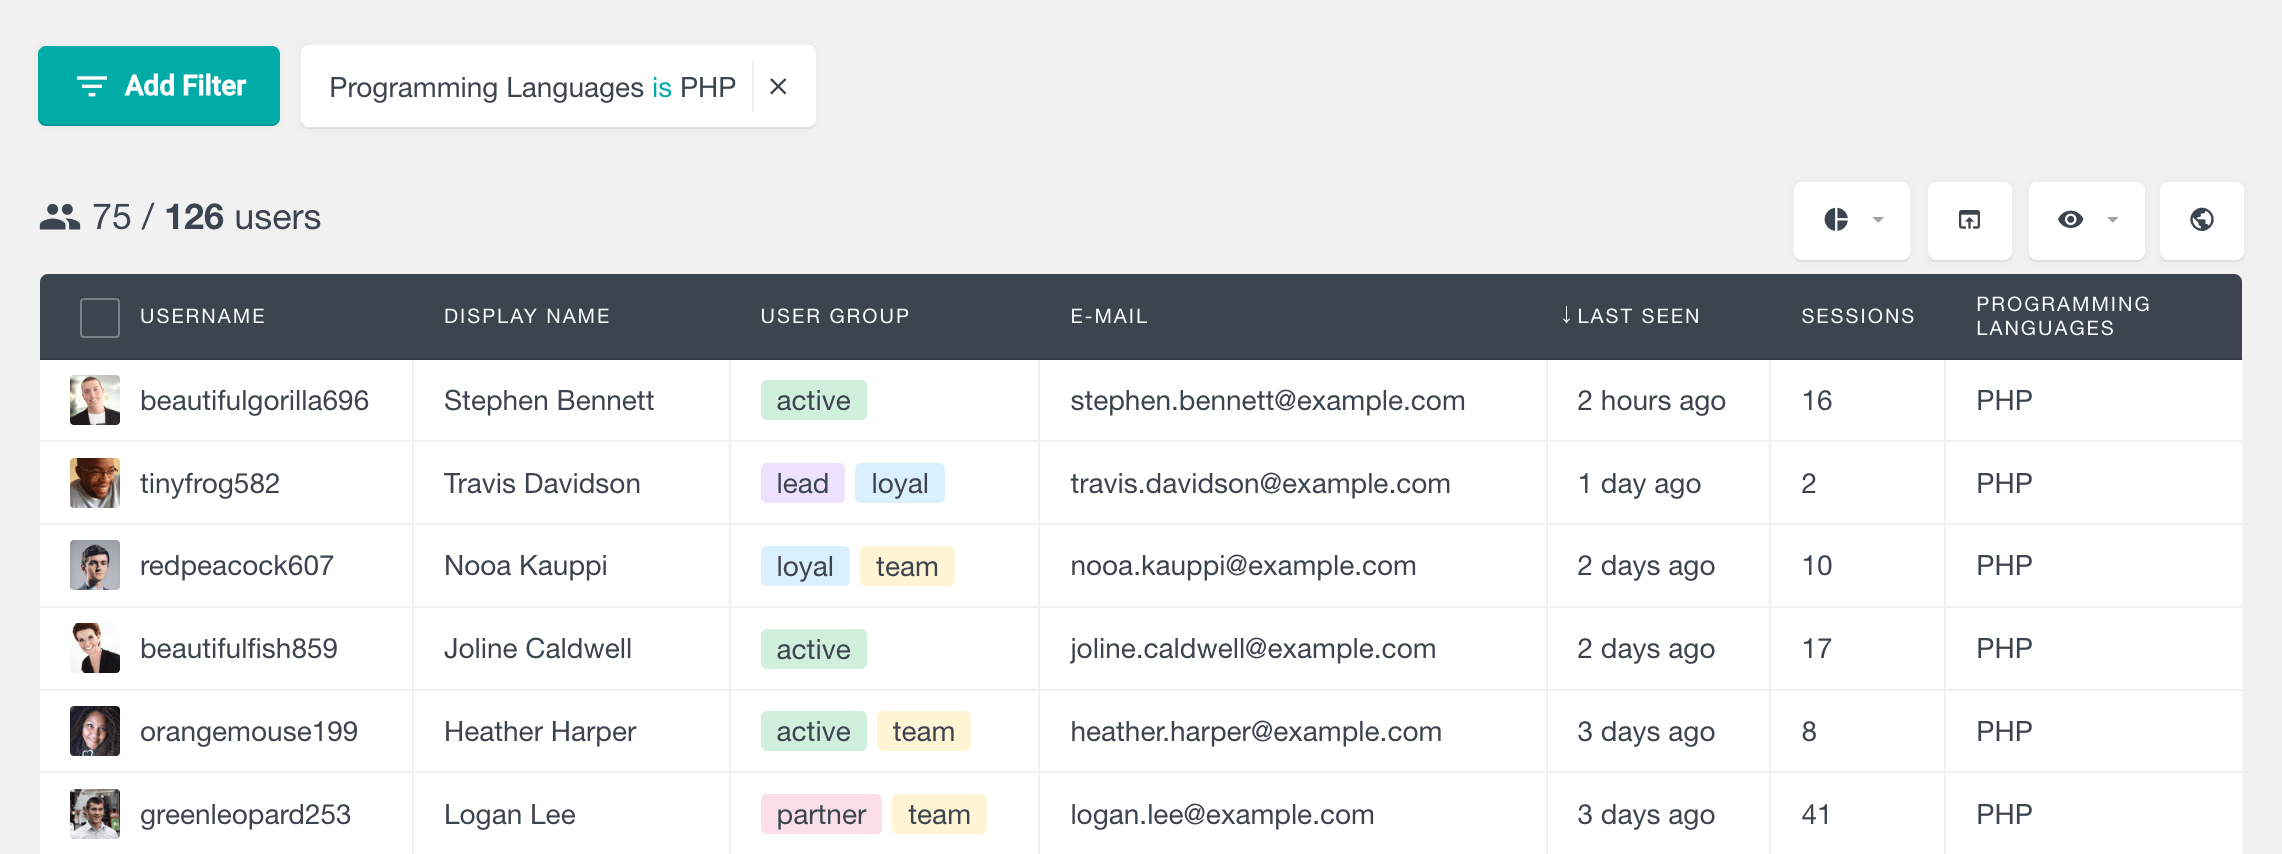
It means that you can filter your users based on this data – or the lack of it. Since our programming language is a drop-down type field, we can filter our users who have this field filled, or by one of the options. For example, you can filter all PHP developers:
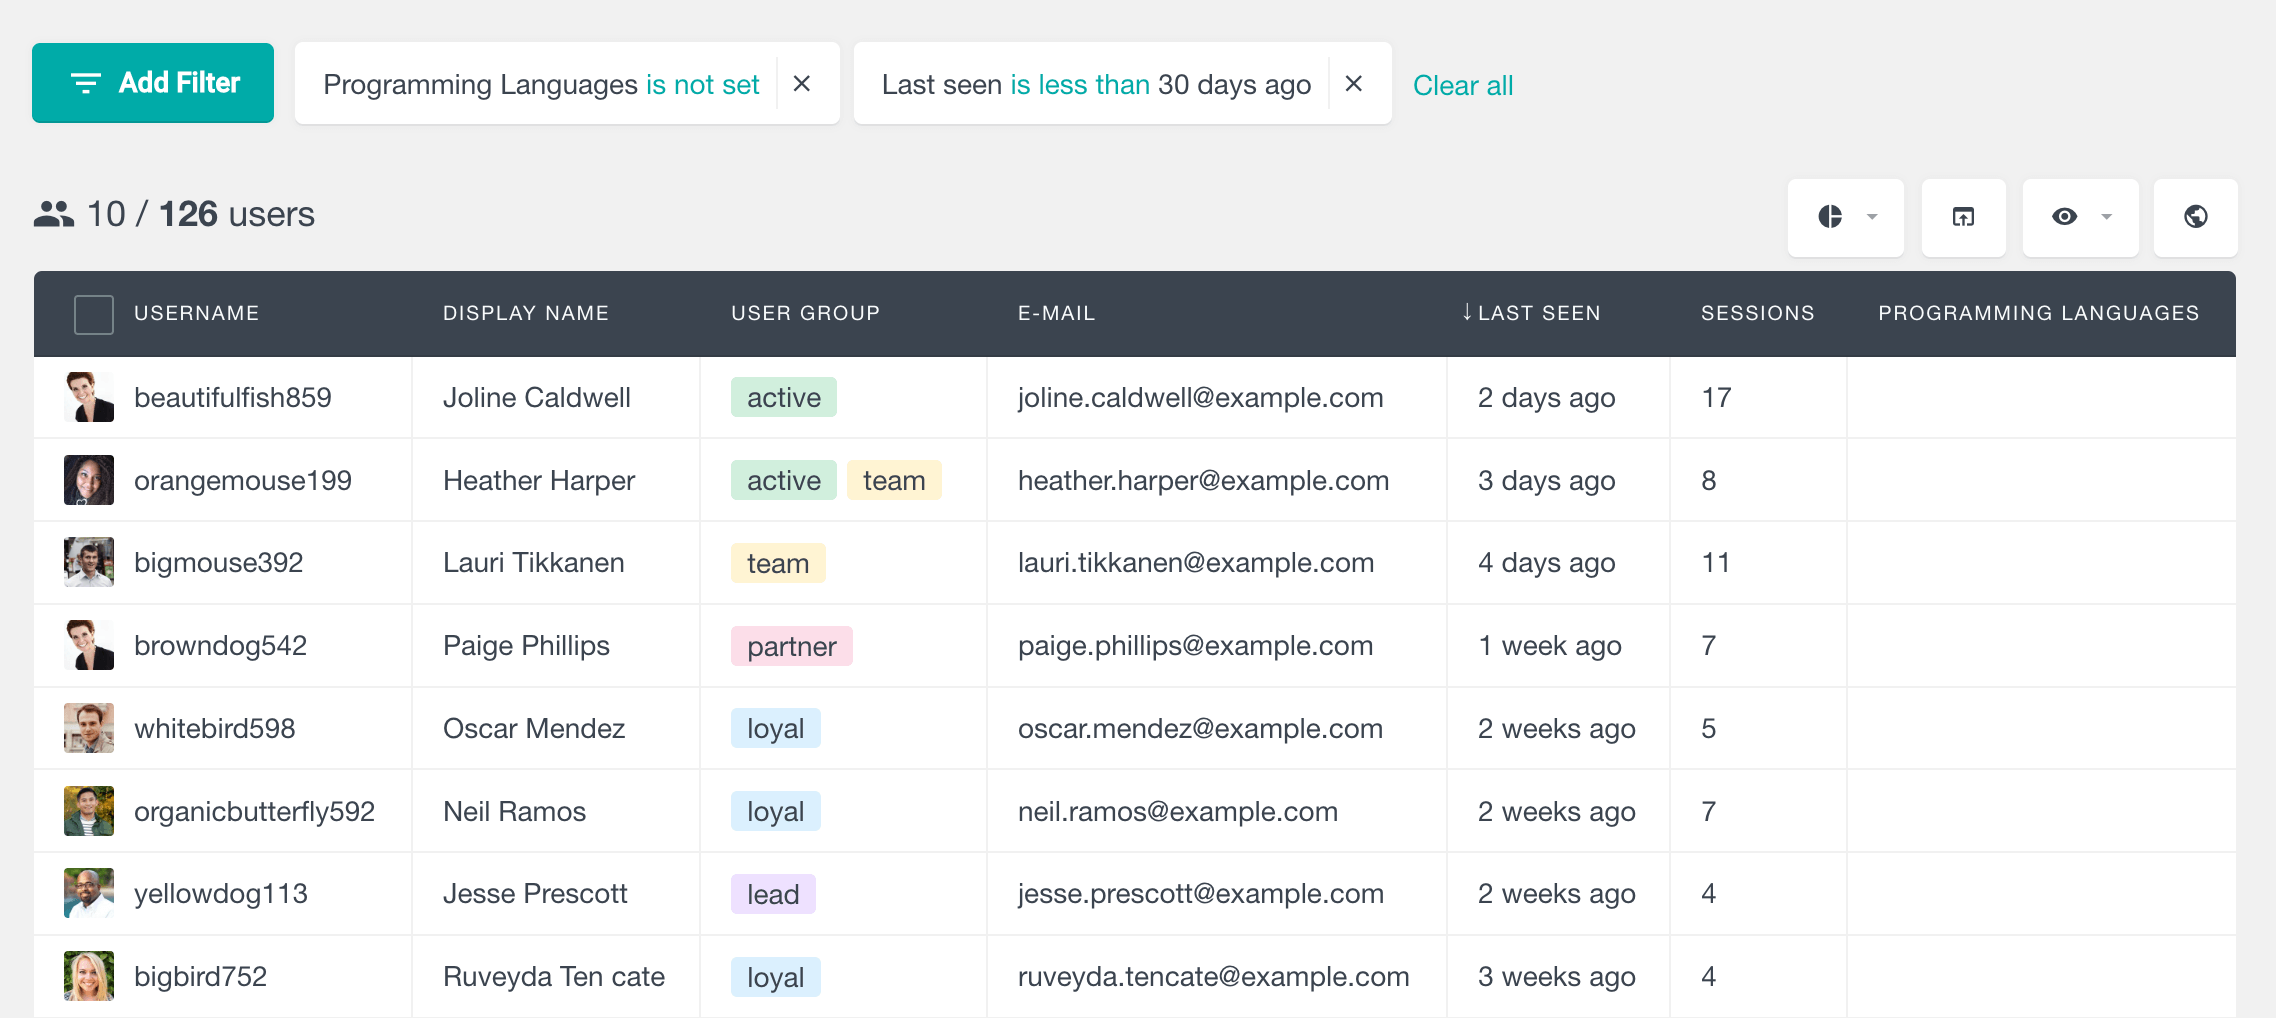
It’s also possible to filter all users who have logged in, but haven’t filled any of our newly created fields. This way you can get in touch with them via email to send the new profile edit page:
Exporting these users is going to give you a CSV file that you can use in external software such as MailChimp or Excel. You can filter, group and export your users and their custom fields using Users Insights.
Creating reports from the user profile data
In addition to the power of individual user reports, we may benefit from quantitative reports as well. This is particularly interesting if you want to get the whole picture and check some general aspects of your user base. That’s when the Reports section is important.
In it, you see the aggregate results for each of your data points. Therefore, you can quickly see and compare different user responses for their profiles. Ultimate member reports can be a good starting point if you don’t know your customer profile base yet. From there you get the big picture and it can sparkle interesting questions.
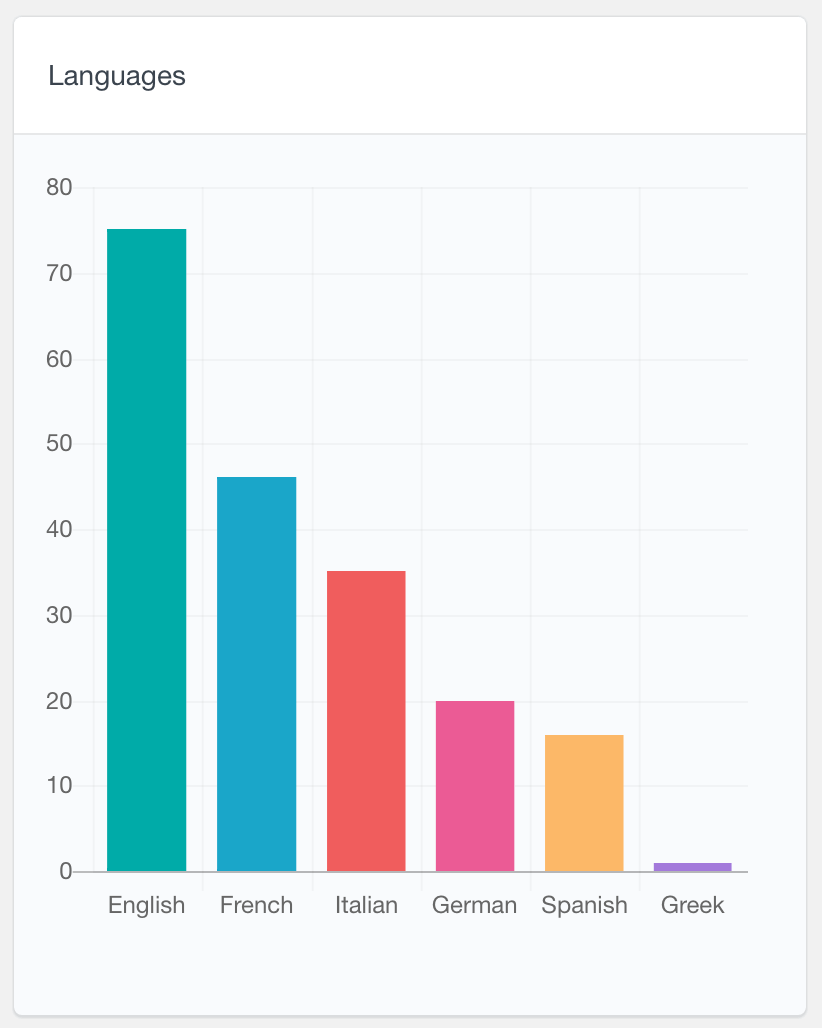
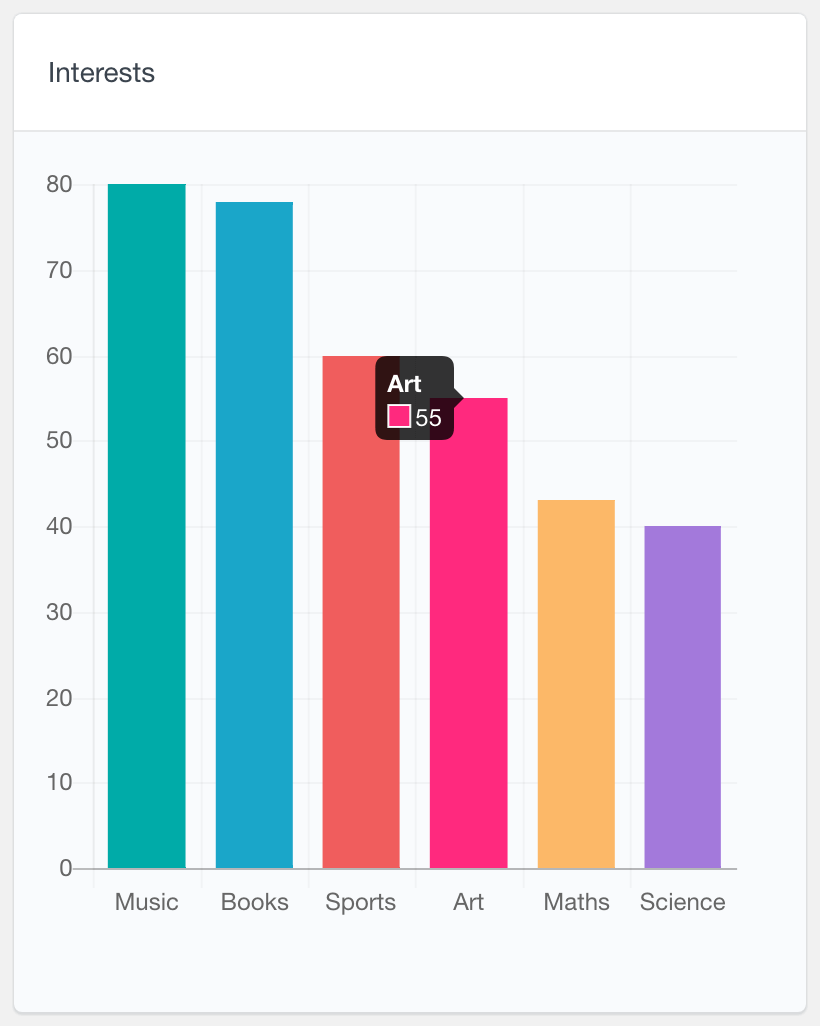
Since all Ultimate Member activity and profile fields data is used, we can quickly check our new profile results. For example, drop down fields such as the main programming language or freelancing activities are shown with all options. In addition, when checking the reports you can quickly exclude unwanted values, and check only the relevant ones for you.
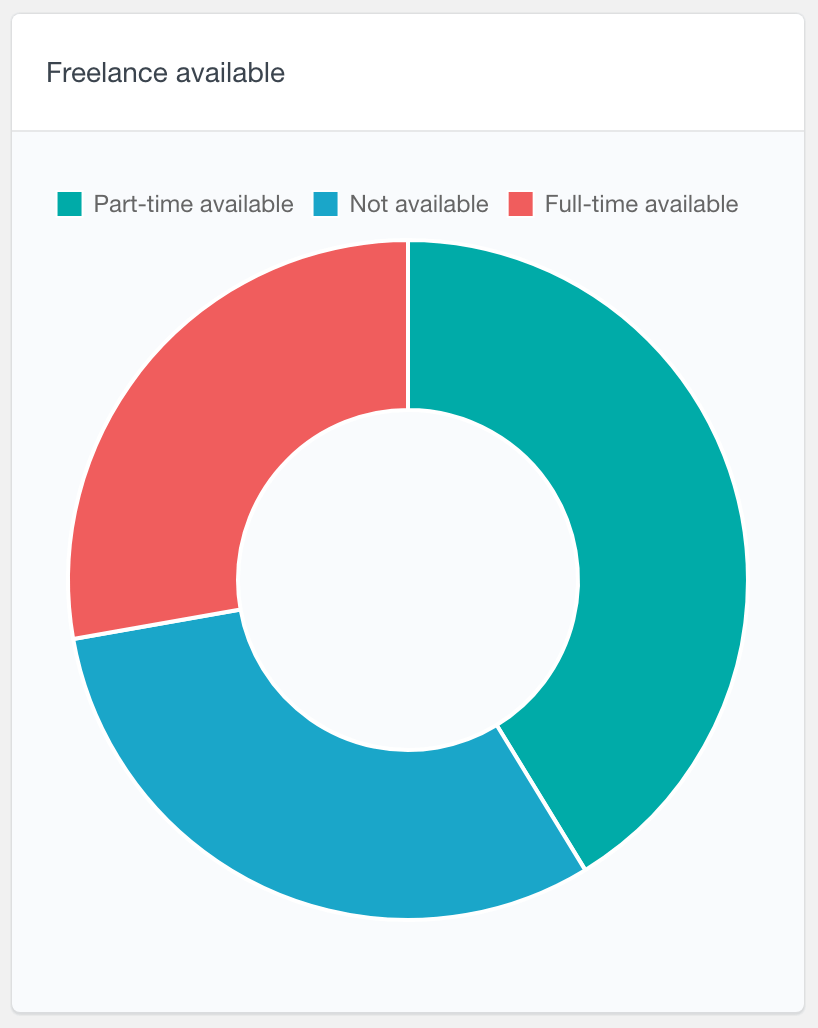
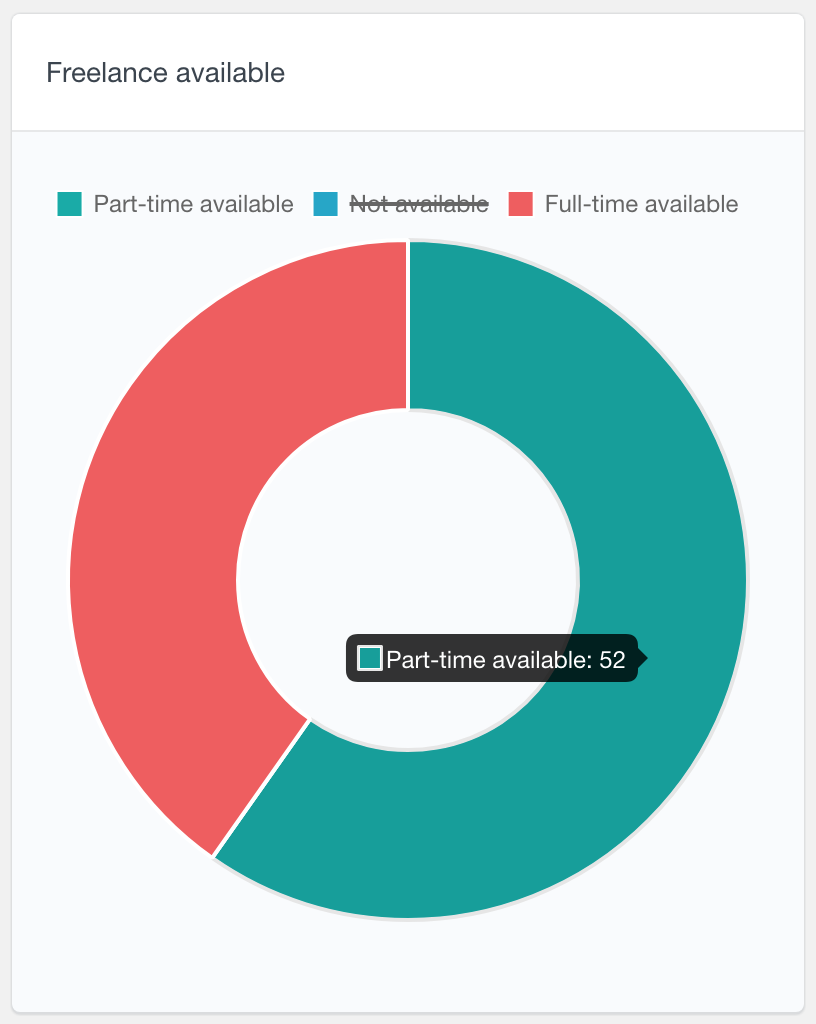
In the example above we can see how excluding a value can change our perceptions. The first scenario all items seemed to have the same values. Then we hide one of them and we can clearly see a trend towards part-time freelancing.
The dropdown fields have an exclusive aspect. You can’t select two at the same time. Hence, when it comes to data presentation a pie-chart is the best option. On the other hand, we could have multi-select fields. For these, we have a bar-chart display.
This is a quick way to find the most popular answers for some of your questions, regardless of user percentage. Here are some examples:
To summarize, the reports are a great way to check your user profiles. They can give you insights on what to look into and what to expect from your users. In addition, the can be a great starting point for deeper investigations, using the smart filters and checking multiple factors.
Conclusion
In this article, we leaned how use the Ultimate member plugin to build a frontend user profile page, which will be editable by the users. The user will generate their own content and save it, which will update the user profile page, without any interaction from backend. We will also implemented a WordPress user management system which can be used to filter filter and organise your users based on their profile data.