How to create a custom WordPress login redirect
Today we look into how to use WordPress login redirect tools for custom login pages. We investigate how and why we should create custom user interactions and redirect to custom pages after login. In addition, we see some code examples of how to implement this in your WordPress site. Then we dive into how to measure the impact of this change.
If you have any sort of online community, WordPress login and sign up are required features. But there is a hidden power behind the user login, the redirection page. A redirect is a process of sending a user from one URL to another. This can be done for a variety of reasons, such as when a user tries to access a page they don’t have permission to view, or when you want to send them to a different page after they login.
When you redirect users after the login you can provide them a clear path to actions. Like a sales funnel, a redirection page can be used as a roadmap of what they can do next.

Why Redirect WordPress Users After Login
There are a few reasons why you might want to redirect your WordPress users after login. For example, you might want to send them to the dashboard instead of the homepage, or you might want to log them in automatically and then redirect them to the homepage.
A redirect is a process of sending a user from one URL to another
For this reason, it is important to customize the redirection page. Often WordPress just redirects users to their previous page. And this is a wasted opportunity. We can use the WordPress redirection page to improve the user experience. Here are some examples of good redirection pages:
- Custom dashboard for WP-admin users
- Custom dashboard for frontend users
- Order details page, if the user has a pending order
- Product updates, if you have a new release
- Sales and coupons tailored for that specific user
- Feedback and customer support forms
- News based on the user data (such as an address, occupation, industry).
Now it’s clear that a custom login path is a good idea. Then we can customize this using the WordPress login redirect functions. We see how to use this for both frontend and wp-admin logins. By the end of this read, you get a new understanding of the WordPress redirect after login functions.
Let’s get started!
The default WordPress login redirect behavior
By default, we have two ways to allow user logins in WordPress. We can either use the /wp-login.php form, or we can add the wp_login_form() function to a page. You can also create your own custom login page.
The WordPress login form is usually the path when you give users Dashboard access.
In addition, this is the form they see if they try to access an admin page directly when logged out. This form has a built-in function to redirect users to their previous page after the login action. If the form was accessed directly there’s no admin page to redirect to then the Dashboard is loaded.
This is the login path used when you aren’t afraid to break the glass wall. Users will see that you have a WordPress system (or some sort of CMS). In addition, after the login, even subscribers can access the WordPress Dashboard to edit their profiles. This login action has no easy overwrite unless you use a plugin.
On the other hand, if you want to keep all user interactions inside of your theme, you can use a login form. This is done using the wp_login_form() function. With it, you can easily add a login form to any of your template files.
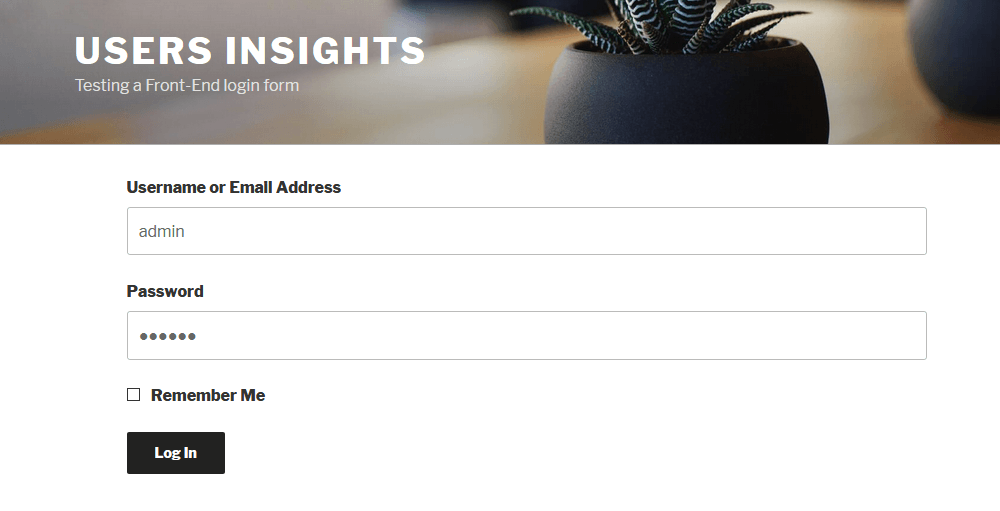
This function has many arguments, and one of them is the redirection URL. If you set no value to it, it simply redirects you to the same page you were. This can be confusing, as you will see the login form again even if you are logged in.
Another limitation of simply using the redirect attribute is the lack of user information. As we will discuss later, it is incredibly useful to have the user object in our function. And this one is a simple string attribute. If we want anything else, we need to collect it ourselves.
Of course, this is still a great way to create front-end forms. It is the quickest way to implement a form. We just need some additional work for a better redirection page.
Redirect Using a Plugin
There are many plugins that let you redirect users. Some plugins let you redirect specific users to specific pages, while others let you redirect all users to the same page.
You can also use plugins to:
- redirect non logged in users
- redirect users after they successfully login
- redirect users after they register for an account, or
- WordPress redirect logged out users
Using a plugin is the easiest way to set up redirects. WordPress has quite a few plugins that can help you with redirects like: LoginWP, Sky Login Redirect, WP Login, Logout Redirect, and others. Which one you are going to choose will depend on your own specific needs.
Redirect Using Custom Code
If you don’t want to use a plugin you can redirect users by using a custom code.
How to use the login_redirect filter
The <a href="https://codex.wordpress.org/Plugin_API/Filter_Reference/login_redirect">login_redirect</a> filter is a great tool to overcome these limitations. It provides us with a simple overwrite for all WordPress user logins. Here is a simple use case for it:
<?php
function my_login_redirect( $redirect_to, $request, $user ) {
    $redirect_to =  home_url();

    return $redirect_to;
}

add_filter( 'login_redirect', 'my_login_redirect', 10, 3 );
?>
When you add this function to your WordPress website any user login redirects to your homepage. This changes both the frontend forms and the WP-login form. Here are the parameters we have in this function:
$redirect_to– The original value of the redirection URL, depends on the form you are using.$request– The URL the user is coming from. Often WordPress assigns the same value for both variables$user– The logged-in user object. This is quite useful for conditional redirections
As long as we have the $user object, we have a whole new world of possibilities regarding custom redirection. We can set our WordPress login redirect rules based on any user information, as we already have it there.
For instance, we could redirect users to different pages based on their roles. We could redirect admin users to the dashboard and other users to the homepage. Or we could redirect “Gold Member” users to a page, while other members have a different one.
Let’s see another example:
<?php
function my_login_redirect( $redirect_to, $request, $user ) {
    //validating user login and roles
    if (isset($user->roles) && is_array($user->roles)) {
        //is this a gold plan subscriber?
        if (in_array('gold_member', $user->roles)) {
            // redirect them to their special plan page
            $redirect_to = "https://mysite.com/gold-member";
        } else {
            //all other members
            $redirect_to = "https://mysite.com/members";;
        }
    }
    return $redirect_to;
}

add_filter( 'login_redirect', 'my_login_redirect', 10, 3 );
?>
Here it is important to mention that at the point when this hook is executed, the global $current_user variable will not be set yet, so we cannot use functions like current_user_can() to check user roles. Our Visual guide to WordPress user login hooks explains this in detail. In there you can see where the login_redirect hook is executed in the login process.
Here is what our code does:
if (isset($user->roles) && is_array($user->roles))– Here we just check if there are user roles and they are in a valid format.if (in_array('gold_member', $user->roles))– This section checks if the gold_member is one of this user’s roles.$redirect_to =– This is where we add the URL we want. There are many functions to get the URL you don’t need to use the plain text version.
Furthermore, we can use other user data for custom redirects. We can target users based on custom fields such as address, occupation, age, birth date, or even past purchases.
How to measure the WordPress login redirect efficiency
Now it’s time to use Users Insights to measure our redirection effectiveness. The right metric depends on the actions you have there. Here we explore a scenario where you have a special offer page providing a limited-time discount. We can use Users Insights to find how many users have used the discount code from those who have been redirected to the custom offer page.
If we have applied a custom login redirect to that page, we can track the visits by using the visit tracking filters:

Then to find how effective our custom redirect is, we can check how many users have used our coupon:
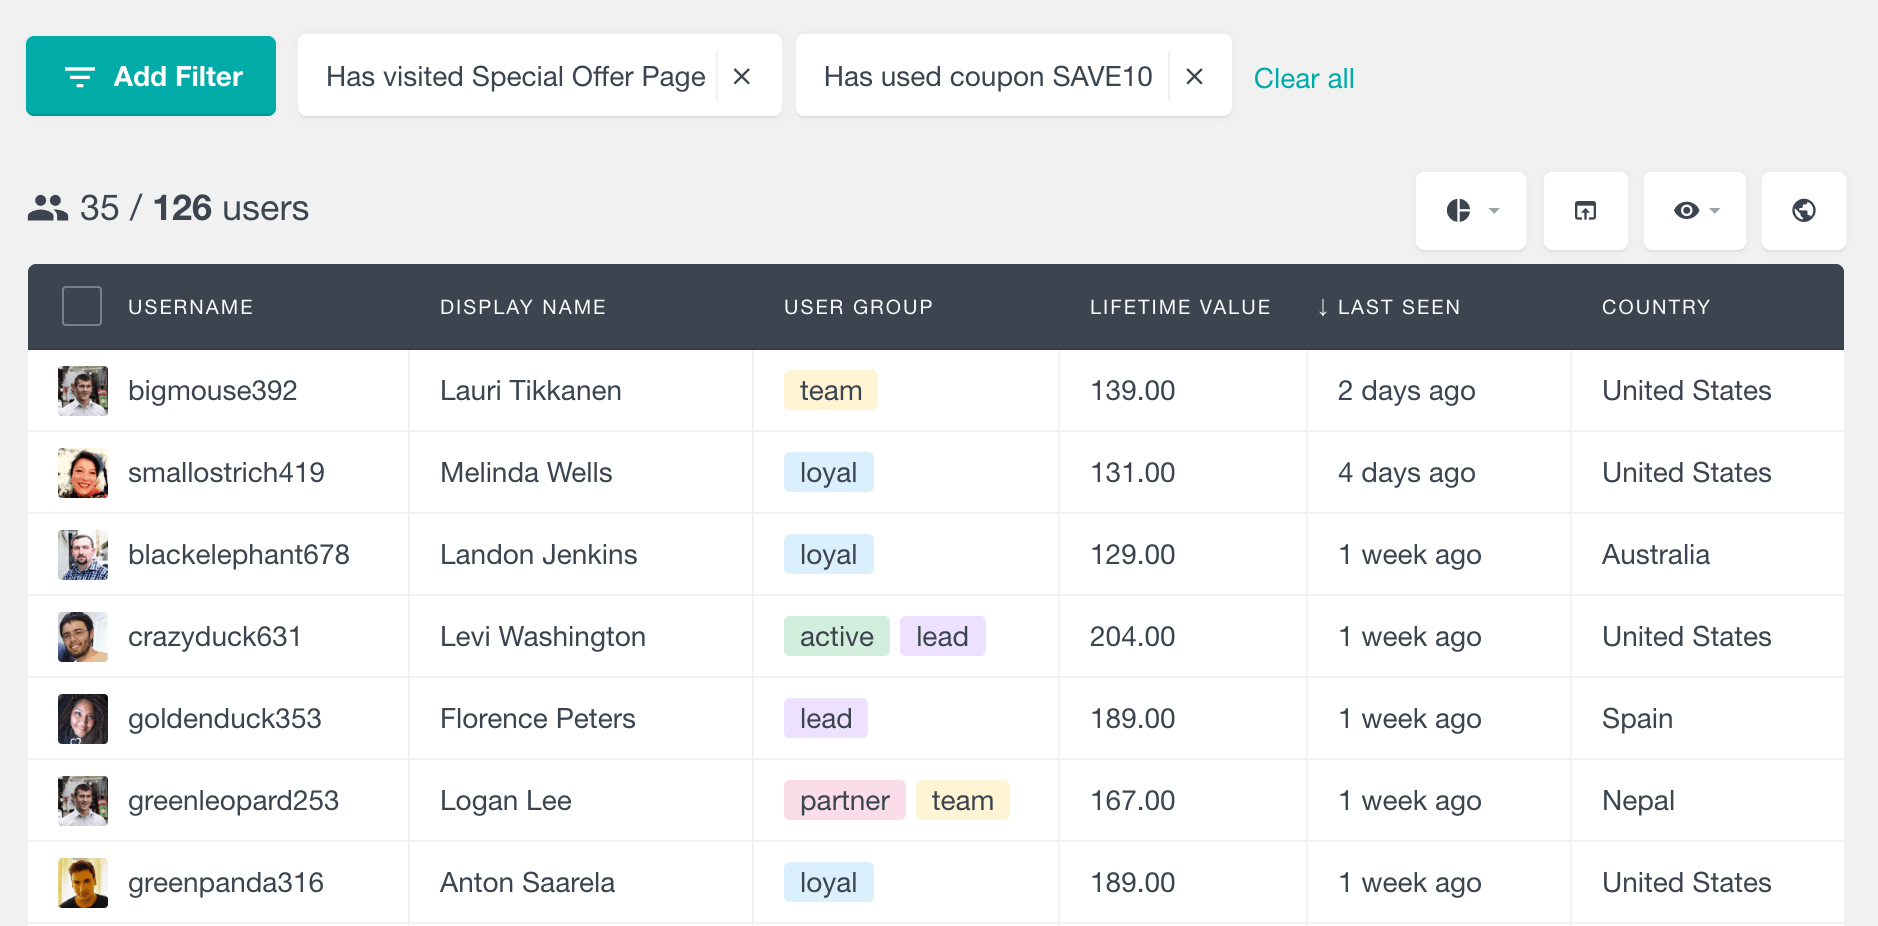
From this, we know that we had 35 uses for 75 visits.
You can also filter users with the last seen filter and then check the key actions you want to measure.
For example, if you have a feedback form there, you can filter using the “has submitted form” option. Here are some other ideas of actions to measure:
- WooCommerce lifetime value increased after the custom dashboard was implemented
- Total WooCommerce orders increase since the custom redirection
- Comment replies
- Membership upgrades
- New support tickets open
- Testimonials/feedback received
Conclusion
Today we looked into how to create custom WordPress login redirects. In addition to simple redirects, we saw how to use user information to create conditional rules. By the end of the day, you should be able to create your own redirection pages that better align with your strategy.
In addition, we saw how to use the Users Insights plugin and check our new page’s effectiveness. We hope you enjoyed this article and see you again next time!