How to create surveys to collect user feedback in WordPress
In this article we’ll learn how to create surveys in WordPress to collect and analyse user feedback. For this we’ll use Gravity Forms as WordPress survey plugin as well as Users Insights to analyse the data collected with the survey and get some valuable insights.
Quite often we need to collect user information and feedback in our sites. Surveys usually have the intention of condensing data on specific aspects, they are invaluable when we can drill down data and get to the bottom of some issues.
Thus, it is important that surveys are created in a way that they generate good quantitative and qualitative data. They describe the issues and show how many users experience it. For example, a customer satisfaction survey can cover many aspects, using questions to assess their relative weight. Therefore, you can focus your resources in solving the most important issues for your customers.

Gravity forms is certainly a go-to solution for form building. But its default form elements aren’t optimized for surveys. In particular, the user interface, which doesn’t have the regular survey question types as options. But this can be solved with the Gravity Forms Survey Addon.
This addon turns Gravity Forms into the perfect WordPress survey plugin. It adds new field types for surveys. In addition, the compilation of the results for this addon is great for a quick overview of your data.
In order to get further analytics, we use Users Insights. With it, we can filter users based on their replies, as well as combined replies. Furthermore, it’s possible to segment users based on survey and other plugin data, such as orders or even location.
WordPress Survey Plugins toolkit – Gravity forms and its extensions
As usual, the first step in our setup is to install Gravity Forms.
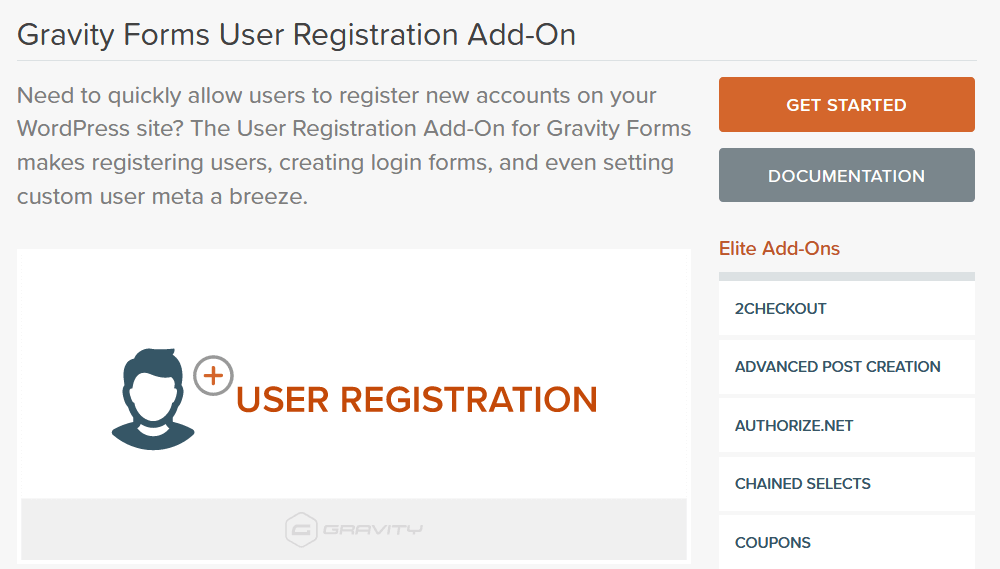
Then, we recommend the User Registration add-on. This addon adds any form entries as custom fields to your users. Which is very useful when we want to analyze users based on their form replies.
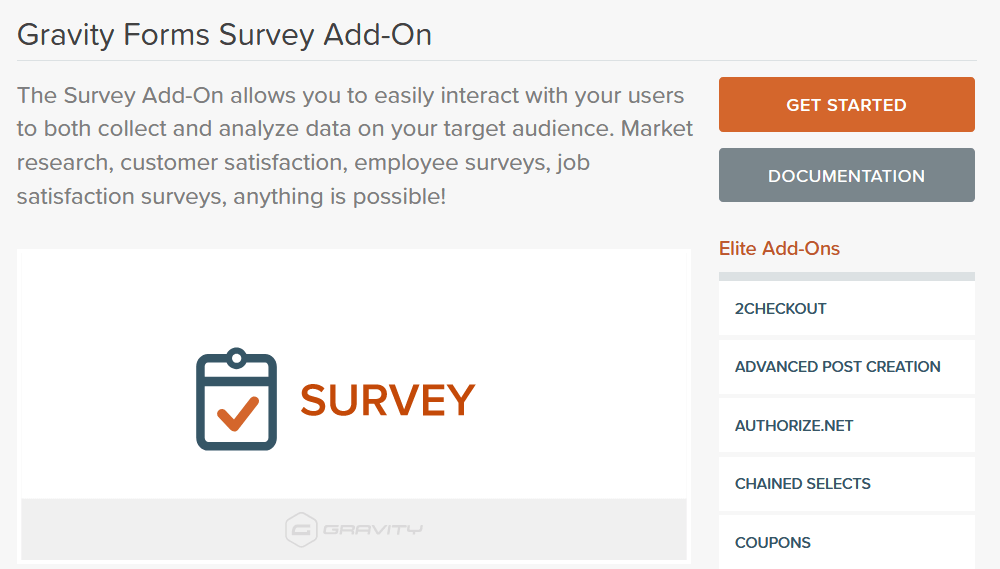
Next, let’s install the Gravity Forms Survey Addon. This addon creates new form elements for the survey with a special design. In addition, this addon improves the form replies display, so you can quickly see which replies are more popular.
That’s what we need for a complete WordPress survey plugin. Then it’s time to create our form. In order to ensure that our data can be read later, we need to keep 2 points in mind. They are:
- Require user login
- Enable the user registration feed for user update
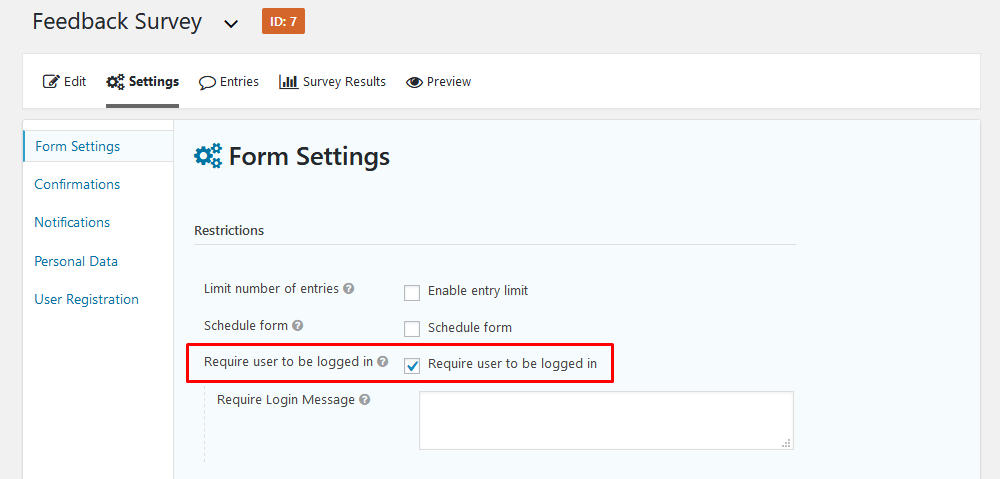
Thus, you can create your form as usual. Add some fields to your form, and let’s move to the form settings. Under Settings > Form Settings we take care of the first point. On the restrictions section enable “Require user to be logged in”.
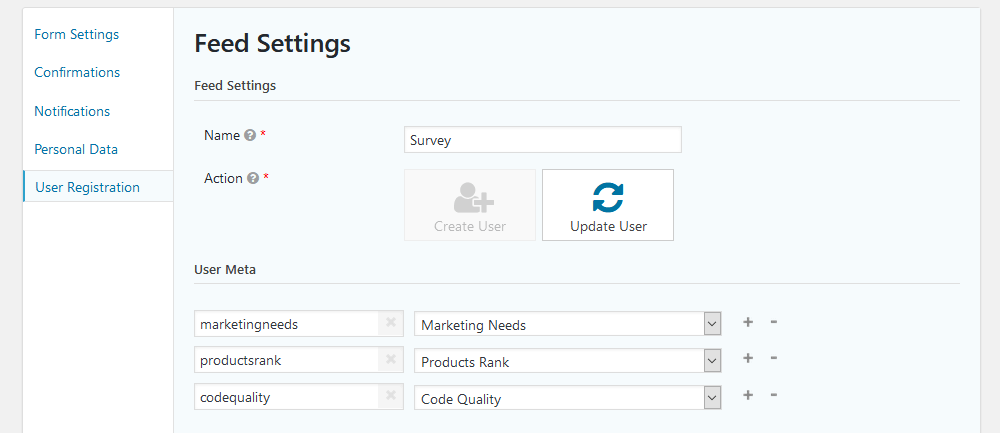
Moving on, we need to tell Gravity Forms how to store these fields. We can do this using the User Registration Feeds. Then go to Settings > User Registration > Add new. Usually, we use “Update User” feeds for this kind of job, as we require user registration. But you can map custom fields in a registration form as well if you want to.
Then, move to the “User Meta” section. In it, you can select which meta key receives which user answer. With it, you can map user replies to current custom fields, or create new ones.
How to create your WordPress survey
The Gravity Forms Survey Addon creates 3 new form elements just for surveys. In addition, it allows you to use 5 of the regular elements in surveys. Here is a full list of all items you can use in surveys:
- Likert – Using the Likert scale (less likely to move likely) with radio buttons side by side
- Rank – List of elements that the user has to put in their preferred order
- Rating – Stars-style system, which can be customized to as many items as you want
- Radio – The regular choosing system where users can pick just one
- Checkbox – This element allows multiple selections per item
- Single line text – With a single line text your users can add any text they want
- Paragraph text (textarea) – Similar to the single line text, but with multiple lines
- Dropdown – Very similar to radio elements, but instead of listing all items it hides them under the dropdown
Now let’s see how these elements store our data while creating our own feedback form. We use one of the 3 new elements, but you can add as many items as you want.
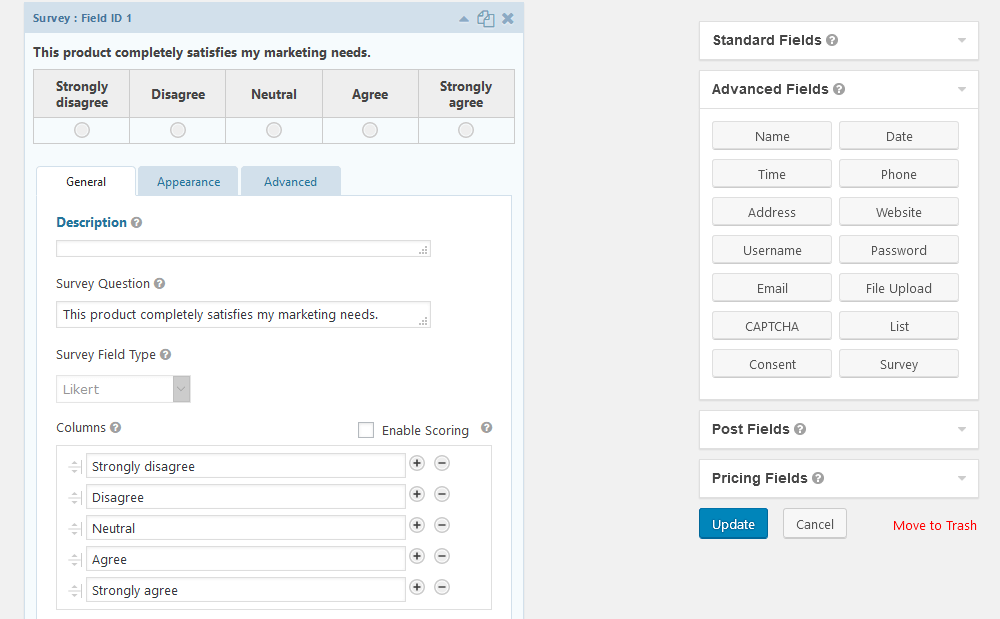
The Likert element has an odd name, but it’s very likely that you used it before. It is widely used in feedback forms due to its simplicity in design. Here is how it looks like:

When creating this element, we have some options. You can add as many variations as you want, adding more nuance to your analysis. In addition, you can allow scoring and multiple values in case your survey questions require that. Here is an example:
Next, we have Rank fields. These fields are used to assess users’ priorities, or how they rank your services or products.
![]()
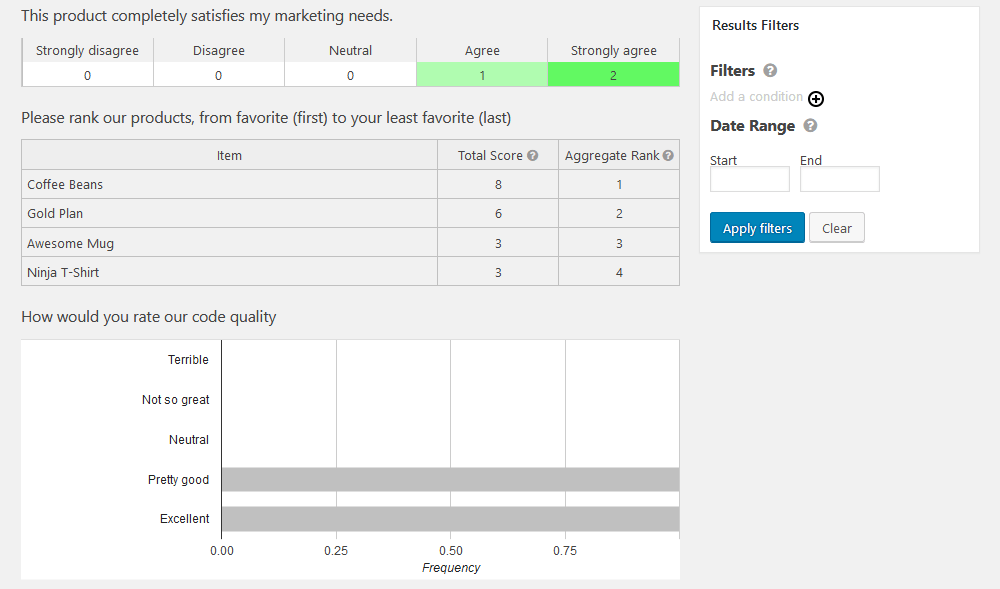
When computing results, Gravity Forms adds the reverse rank points to each of the choices. For example, if you have 5 options then the first option gets 5 points, the second 4 and so on. If you had 10 options, then the first item would get 10 points.
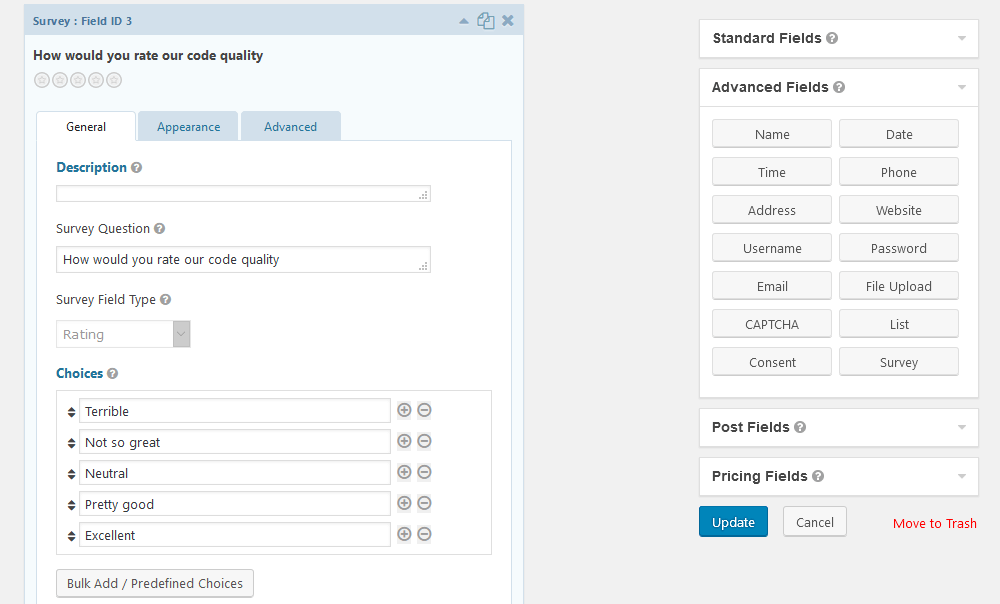
Then there’s the rating system. These are stars similar to what we have for product ratings. The difference is that here you can name each of the options.
Once you have your fields setup, each entry type has its own results display. Here is how our demo data looks like:
Although you can investigate user replies, maybe you need a simple overview of your users’ choices. That why we use the Users Insights plugin.
WordPress Survey Results Analytics
If you use the User Registration addon, then Users Insights can automatically read your users’ replies. You just need to enable the Gravity Forms under Users Insights Modules. After this step, your forms and replies are available as filters and columns. In addition, they are available in your Users Insights user profiles as well.
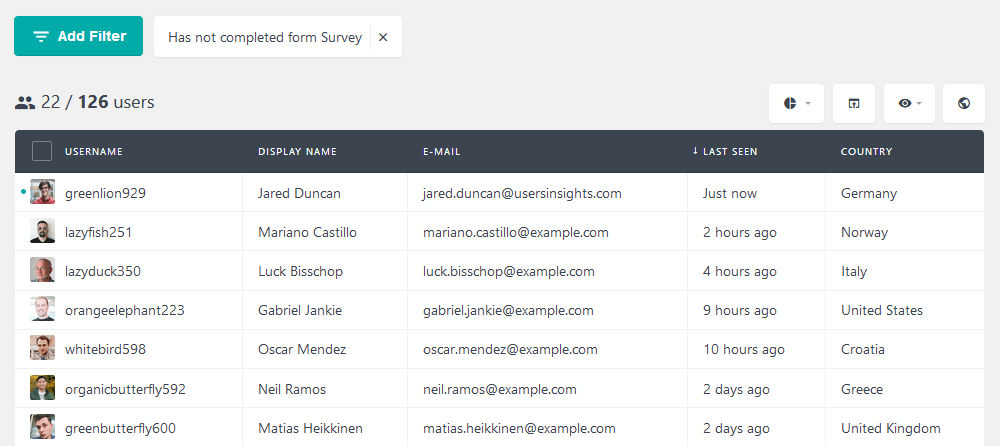
Quite often we need to remind users to reply to our surveys. But it would be very inconvenient to send emails to users who already replied to them. For this reason, you can filter users using the “has/has not completed form” parameter. Let’s see which users haven’t replied to our survey yet:
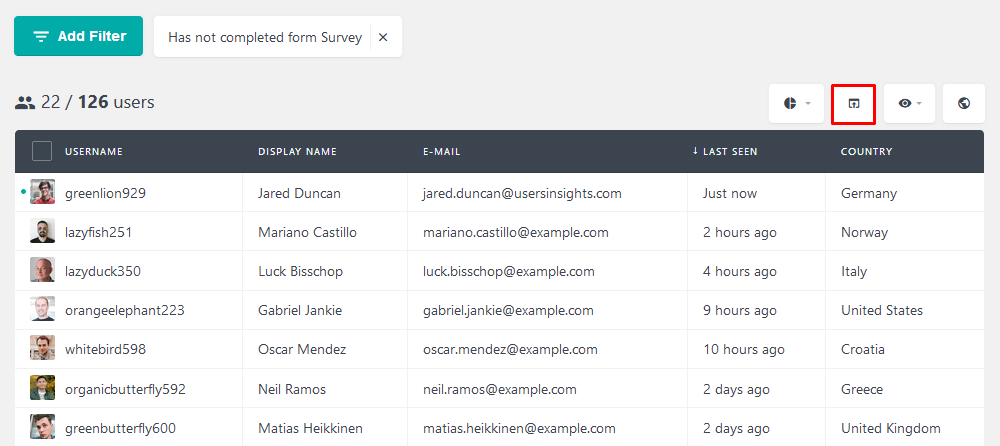
Then you can export these users and get in touch with them using MailChimp or similar. You can do this with the export function:
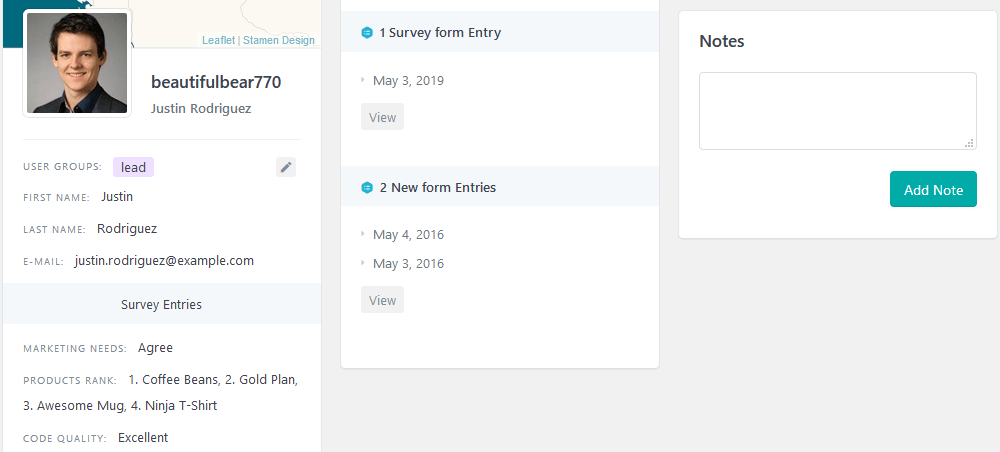
For simple data exploration, you can check the user replies in their profiles. There’s the activity column with all form entries for that user. In addition, the actual replies are saved as custom fields. Here is how it looks like:
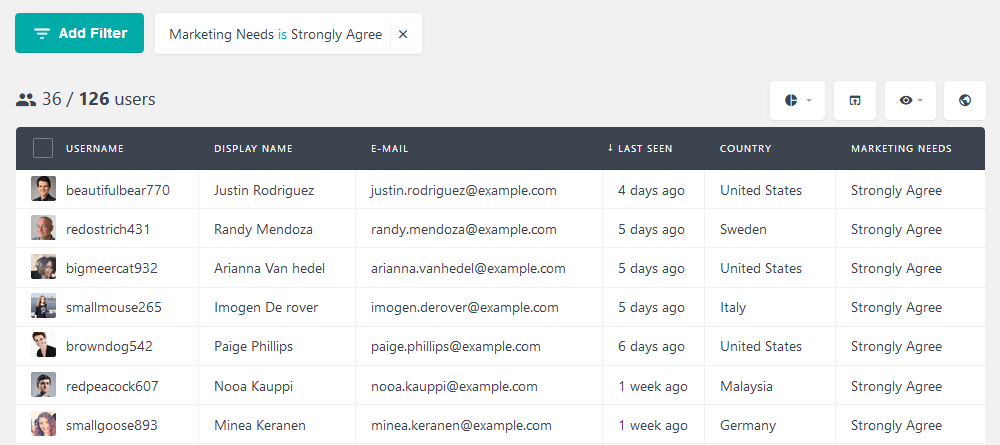
It’s possible to filter users by their replies. For example, if you want to know all the users who are satisfied with our products, we can do this:
In addition, it’s possible to filter replies in combination with other filters. We can combine location and form replies, for demographic reports of our survey. For instance, to get users who ranked the Gold Plan as the first product and are from the US:
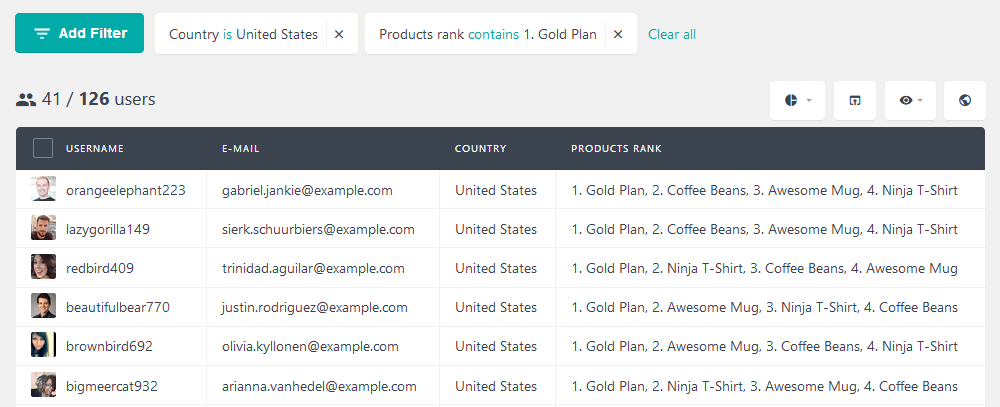
It’s important to notice the data formatting in our filters. Since Gravity forms stores all replies as text, we need to search them as text as well. Therefore, in order to find ranking fields, you need to use the “[index]. [name]” format. Thus, the Gold Plan as first is “1. Gold Plan”.
Conclusion
Today we looked into how to implement the perfect WordPress survey plugin. It is composed of multiple elements, using Gravity forms, its add-ons and Users Insights. In addition, we looked into the details of the setup and analysis of your data.
We hope you enjoyed and see you again next time!