How to create WooCommerce customers
This tutorial will explore how to create WooCommerce customers manually and programmatically. This includes navigating the admin dashboard to manually add and manage customers, as well as using custom code to automate customer creation and streamline the process. By examining these methods, you can effectively implement and manage customer data, enhancing the functionality and efficiency of your WooCommerce store.
When creating customers, we’ll explore the following topics:
- Creating a customer account (manually and programmatically)
- Updating the user information, including billing and shipping details (manually and programmatically)
- Assigning orders to the customer (manually and programmatically)

Creating WooCommerce customers manually
Creating a new customer manually can be accomplished by creating a new WordPress user and assigning the “Customer” role to the WooCommerce customer. This can be accomplished by following these steps:
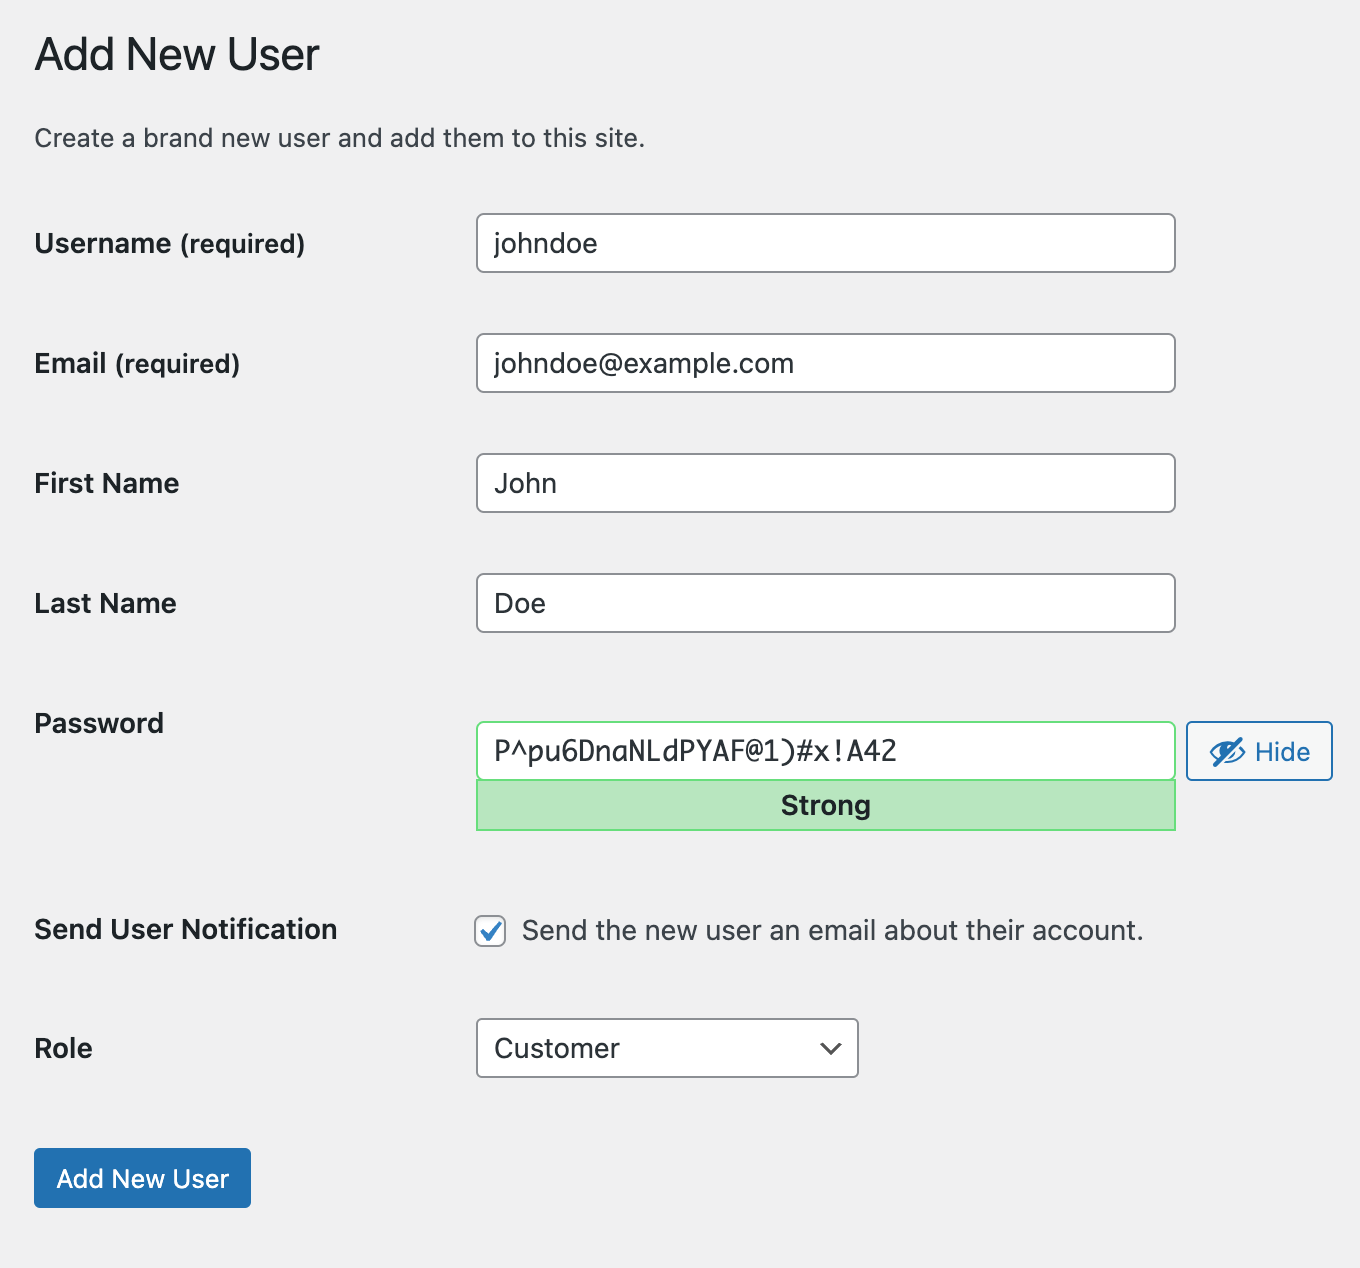
- Navigate the Users > Add New section of your WordPress dashboard
- Enter the required user information. In this section only the username, email and password are required for the user login. However, populating the First and Last name fields is also a good idea. This allows for personalized communication, order processing, and improved customer service by addressing individuals by their names and providing a more tailored shopping experience.
- Select the “Customer” option in the Role field
- You can optionally check the “Send user notification” checkbox if you’d like to send the new user a notification about their new account
- Click on the “Add New User” button
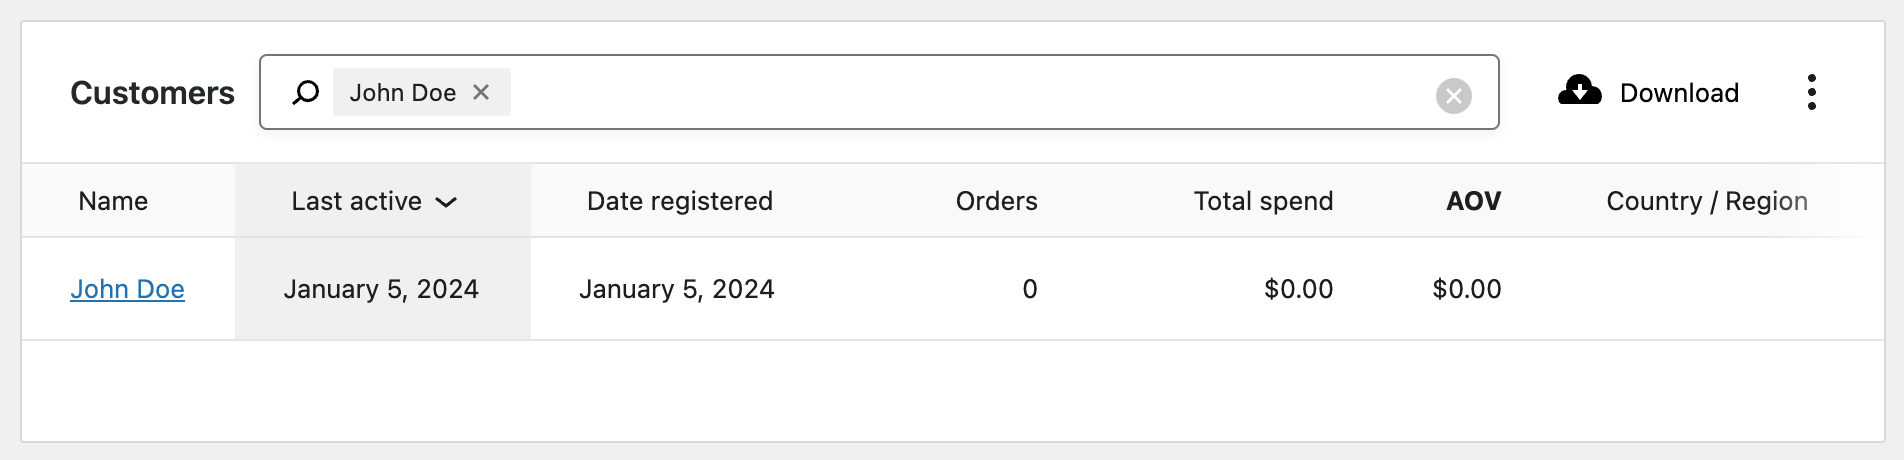
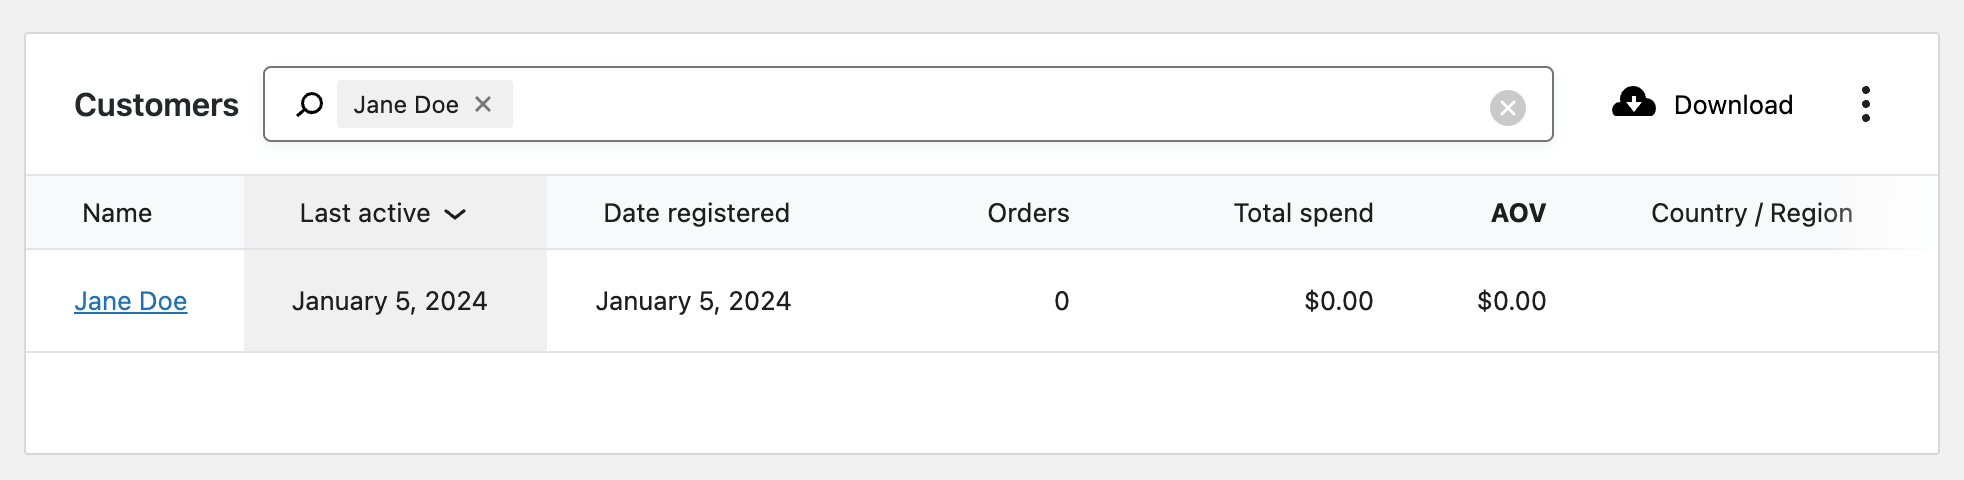
When you create a new user with a Customer user role, WooCommerce automatically detects this user as a customer and stores the required customer data. Now, if you navigate to WooCommerce > Customers page in your dashboard you can see the new customer in the list.
Setting the customer billing and shipping information manually
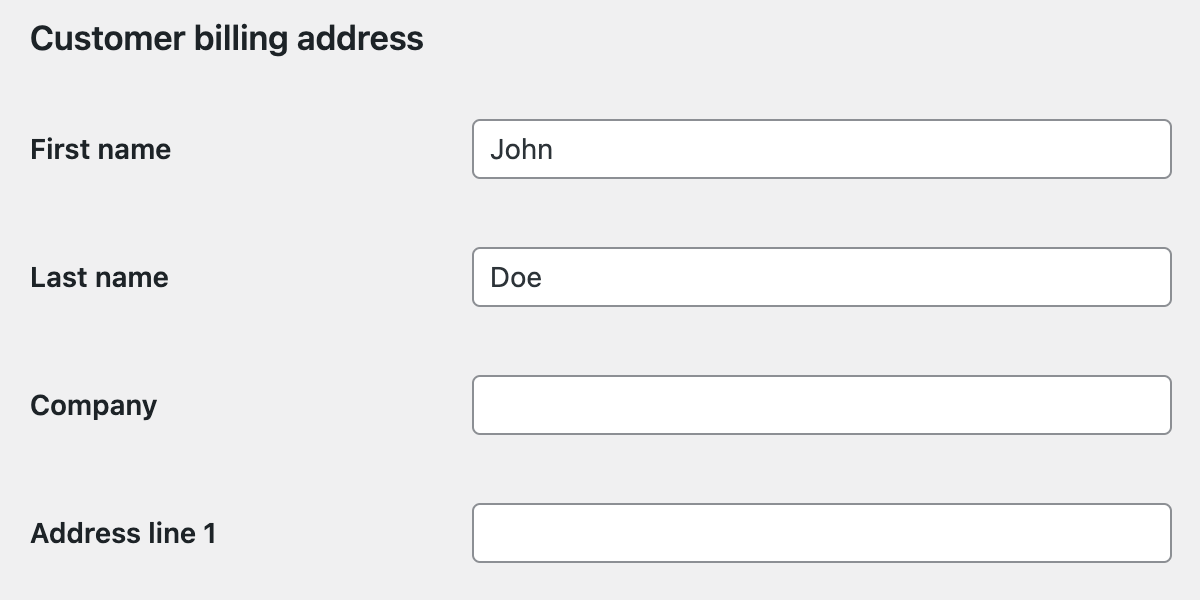
Once you have created the WooCommerce customer, you can update their billing and shipping information by editing the user in the Users page of the WordPress dashboard:
- Go to the Users page of the dashboard
- Search for the newly created customer by their name or email
- Click on the Edit button to open the user account page so you can modify the customer data
- On this page, you will see two sections: “Customer billing address” and “Customer shipping address”. This is where you can set the customer’s billing and shipping information. This includes name, address, phone number, and email address.
Assigning orders to a customer manually
If you need to assign an existing order to the newly created customer, you can follow these steps:
- Go to WooCommerce > Orders page and find the order that you would like to assign to the customer
- Click on the Edit button of the order to modify it
- In the “Customer” section, select your newly created customer
- Click on the Update button to save the changes
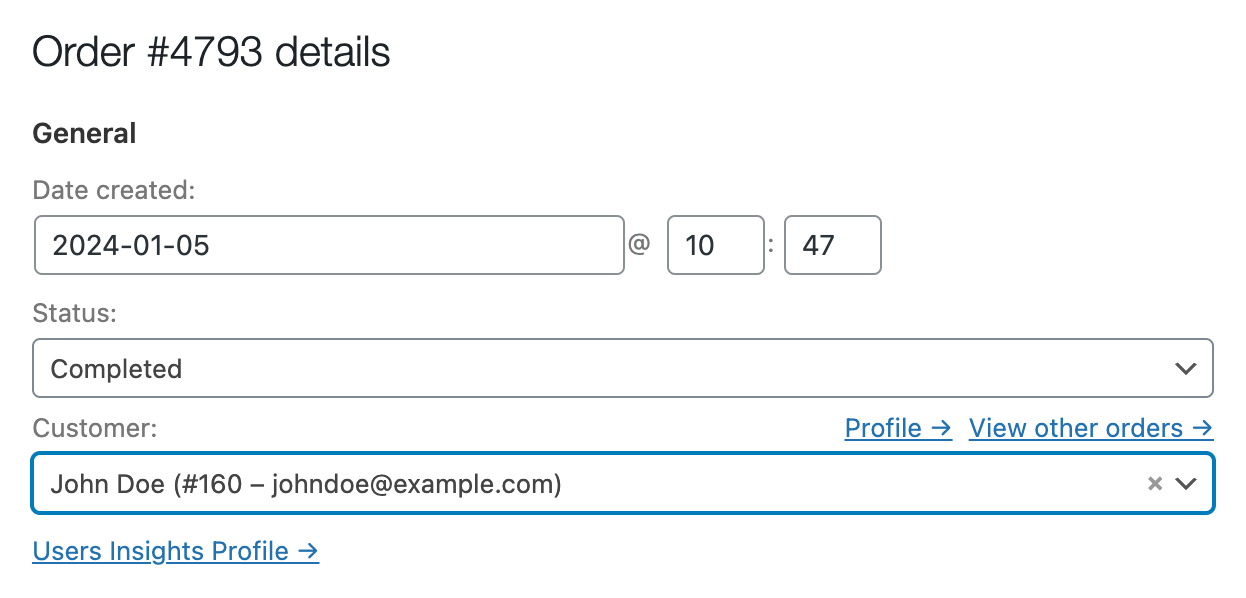
Once the order is assigned, it will be available in the customer’s order history.

Unlock the Full Potential of Your WooCommerce Customer Data
Creating WooCommerce customers programmatically
In WooCommerce there are a few different ways to create new customers programmatically. In this article we’ll explore the two most common methods:
- Using the
wc_create_new_customer()function - Using the
WC_Customerclass
Creating a customer using wc_create_new_customer() function
We can use the wc_create_new_customer() function to create a new WooCommerce customer programmatically. This is a core WooCommerce function that handles account creation, as well as setting the account role to “customer”.
$user_data = array('first_name' => 'Jane', 'last_name' => 'Doe');
$user_id = wc_create_new_customer( 'janedoe@example.com', 'janedoe', 'passwordhere', $user_data );
This code snippet creates a WooComerce customer using the wc_create_new_customer() function. The function accepts the following parameters:
$email(required) – the customer’s email$username– the customer’s user account username. This parameter is optional, if you leave it empty, a username will be automatically generated using thewc_create_new_customer_username()function.$password– the user password. This parameter is optional as well, however, if you leave it empty, you need to ensure that the “woocommerce_registration_generate_password” option is enabled.$user_data– this is an associative array of arguments passed to the WordPresswp_insert_user()function when creating the WooCommerce user account. In this case, we have set the user’s first name and last name. However, you can add additional options like user_url (customer website), display_name, and description to customize the customer account further.
The wc_create_new_customer() function returns the WordPress user ID as a result. Please note that this is different from the internal customer ID that WooCommerce uses behind the scenes.
After running this code snippet, the customer should be available in both Users and WooCommerce > Customers sections.
Creating a customer using the WC_Customer class
Another way to create customers programmatically in WooCommerce is by using the WC_Customer class. For this we need create an instance of the class, set the user details using the class setter methods and invoke the save() method to persist the data in the database:
$customer = new WC_Customer();
$customer->set_username( 'janedoe' );
$customer->set_email( 'janedoe@example.com' );
$customer->set_password( 'passwordhere' );
$customer->set_first_name( 'Jane' );
$customer->set_last_name( 'Doe' );
$customer->save();
Here is a step-by-step explanation of the code:
$customer = new WC_Customer()instantiates a new WC_Customer object- Use the
set_username()method to set the username for the customer as ‘janedoe’ - Use the
set_email()andset_password()methods to set the customer email and password respectively set_first_name()andset_last_name()methods are used to set the customer’s first name and last name$customer->save()saves the customer data to the WooCommerce database, effectively creating a new customer account with the provided details
Other methods for creating customers programmatically
You might wonder if you can alternatively create the WordPress user using the wp_insert_user() to create an account and set the “Customer” role to the user. While you technically can do that, using the methods described above is recommended. This is because the WooCommerce core methods also fire some additional hooks that might be used by WooCommerce and other plugins to run additional functionality upon customer creation.
Setting the customer billing and shipping information programmatically
The WC_Customer class provides helper methods for setting a customer’s billing and shipping details. To use these methods, we need to instantiate the WC_Customer class using the WordPress user ID. After that, we call the corresponding setter methods to set the address information, such as city, state, and country. In the end, we call the save() method to save the data in the database. Here is how you can set the customer billing information:
$user_id = 123; // set user ID here
$customer = new WC_Customer($user_id);
$customer->set_billing_address( '123 Some street' );
$customer->set_billing_city( 'Chicago' );
$customer->set_billing_state( 'IL' );
$customer->set_billing_country( 'US' );
$customer->set_billing_email( 'janedoe@example.com' );
$customer->set_billing_first_name( 'Jane' );
$customer->set_billing_last_name( 'Doe' );
$customer->set_billing_phone( '0123456789' );
$customer->set_billing_postcode( '60007' );
$customer->save();
And the following snippet illustrates the process of setting the shipping information of the customer:
$user_id = 123; // set user ID here
$customer = new WC_Customer($user_id);
$customer->set_shipping_address( '123 Some street' );
$customer->set_shipping_city( 'Chicago' );
$customer->set_shipping_state( 'IL' );
$customer->set_shipping_country( 'US' );
$customer->set_shipping_first_name( 'Jane' );
$customer->set_shipping_last_name( 'Doe' );
$customer->set_shipping_phone( '0123456789' );
$customer->set_shipping_postcode( '60007' );
$customer->save();
Similarly we create an instance of the WC_Customer class using the WordPress user ID. Then we set the shipping information using the shipping setter methods and finally we persist the data by calling the save() method on the $customer object.
Assigning orders to WooCommerce customers programmatically
We can use the WC_Order class to assign an order to a customer. In the following example we’ll assign an existing order to the customer. If you need to create the order programmatically, you can check this tutorial for detailed instructions. Here is an example of how this can be achieved:
$order_id = 456; // set order ID here
$user_id = 123; // set user ID here
$order = new WC_Order($order_id);
$order->set_customer_id( $user_id );
$order->save();
Here is an explanation of the code snippet:
- We create an instance of the
WC_Orderclass by passing the order ID. This will automatically lookup the order in the database and create an instance using the order information. - We call the
set_customer_id()method of the$orderobject to assign the order to the customer - Finally, we call the
save()method to save the changes in the database
Checking the new customer account
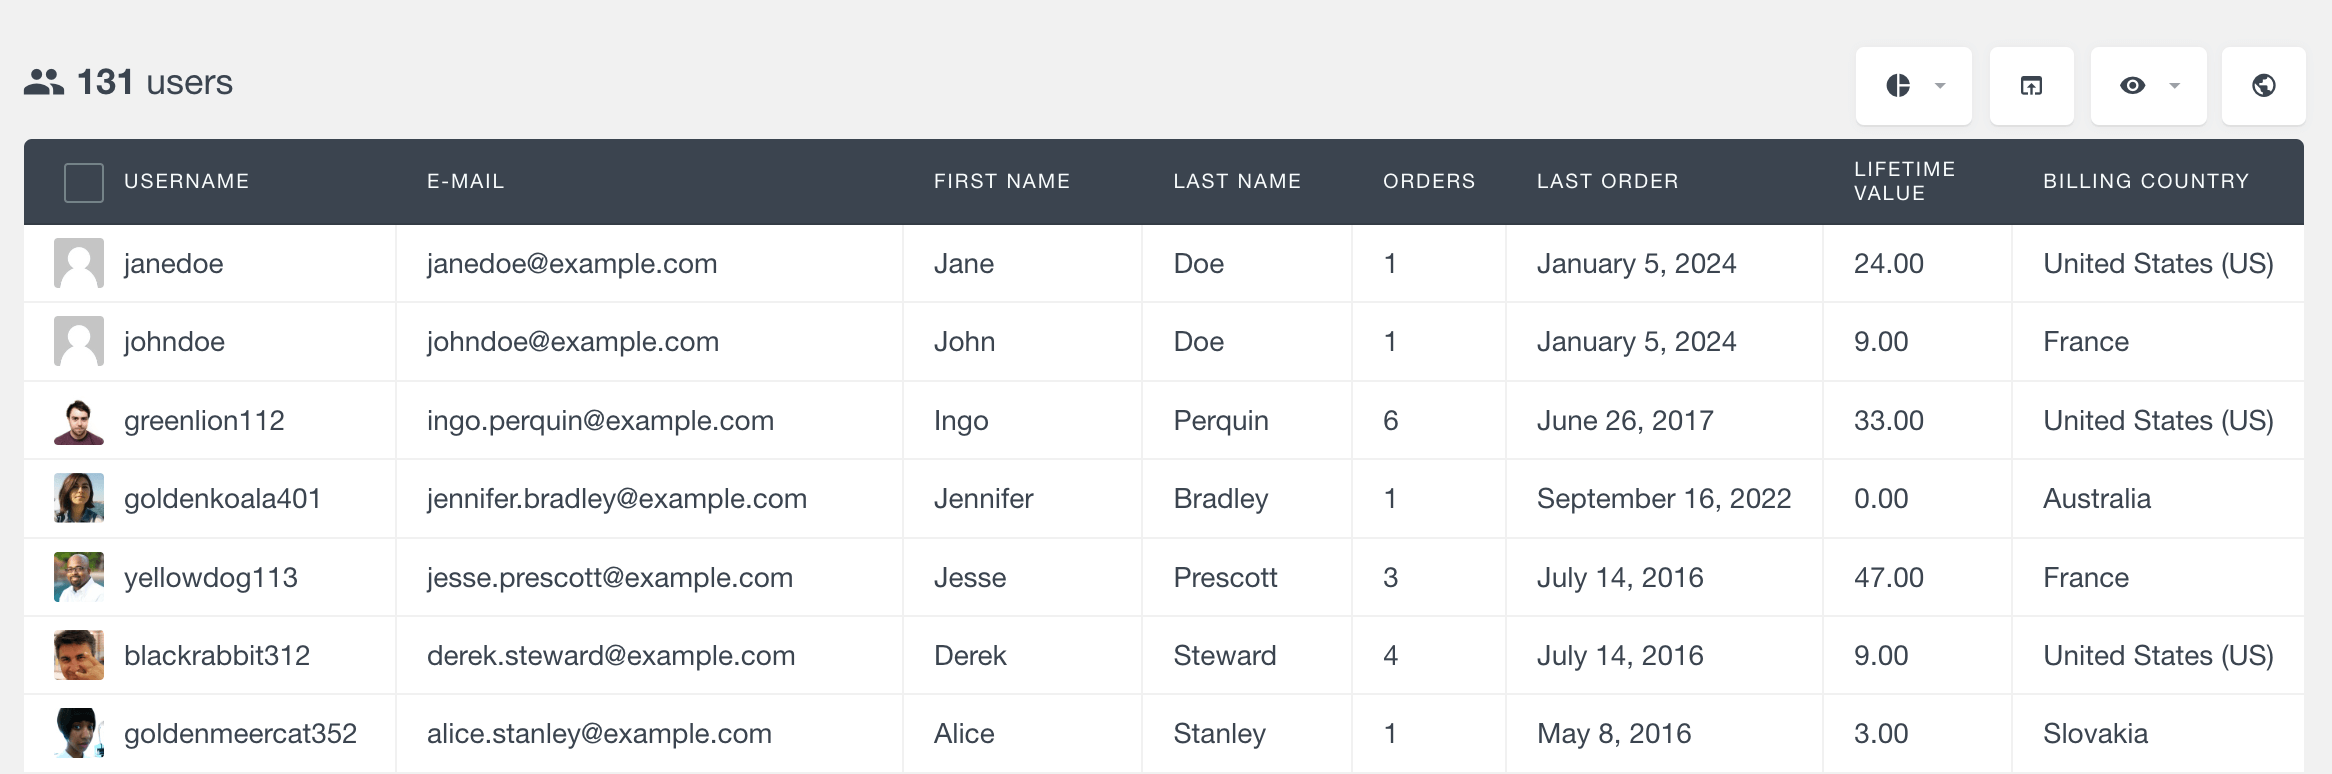
Regardless of whether you create the customer manually or programmatically, it is always a good idea to verify that all the customer data has been created correctly. If you are using the Users Insights plugin, you can easily do so from the user table page:
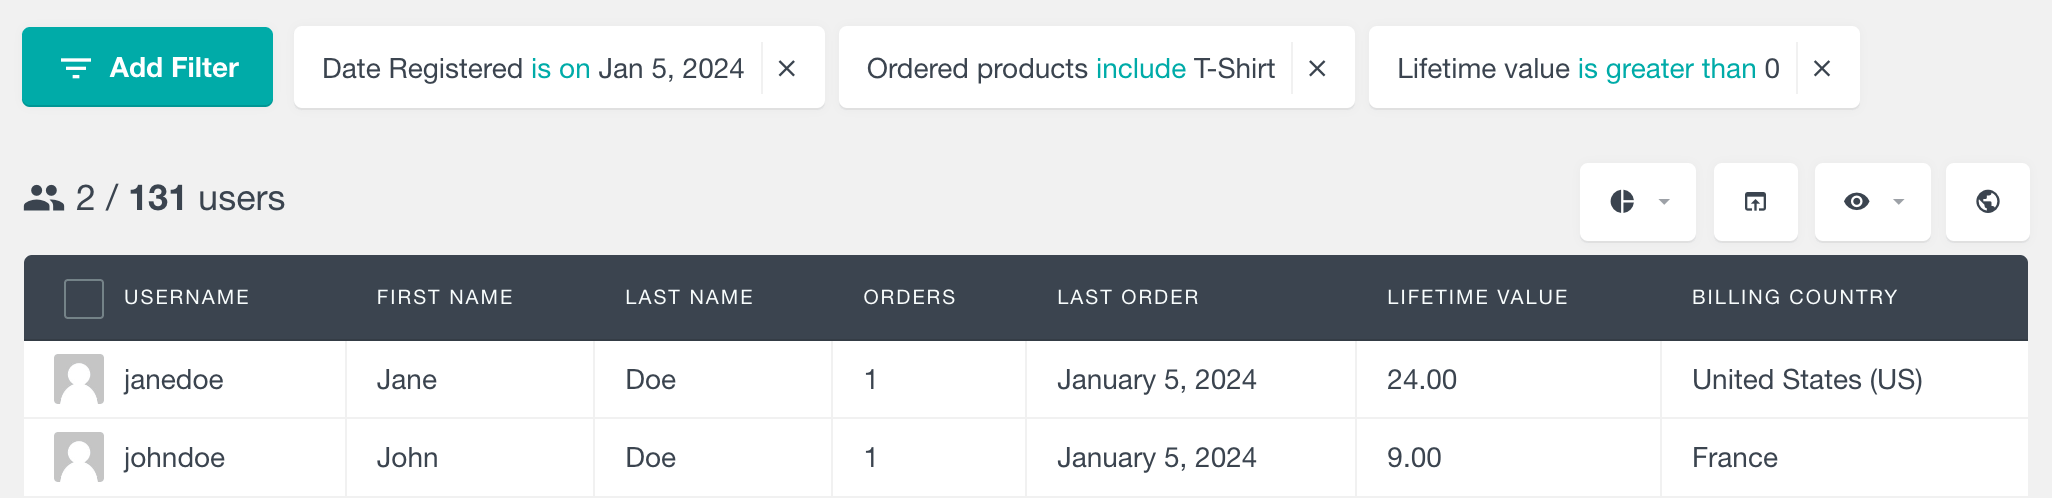
You can even use some of the WooCommerce filters to find the newly created customers by their customer and order details. You can also use any of the fields and filters from the available features and 3rd party integrations:
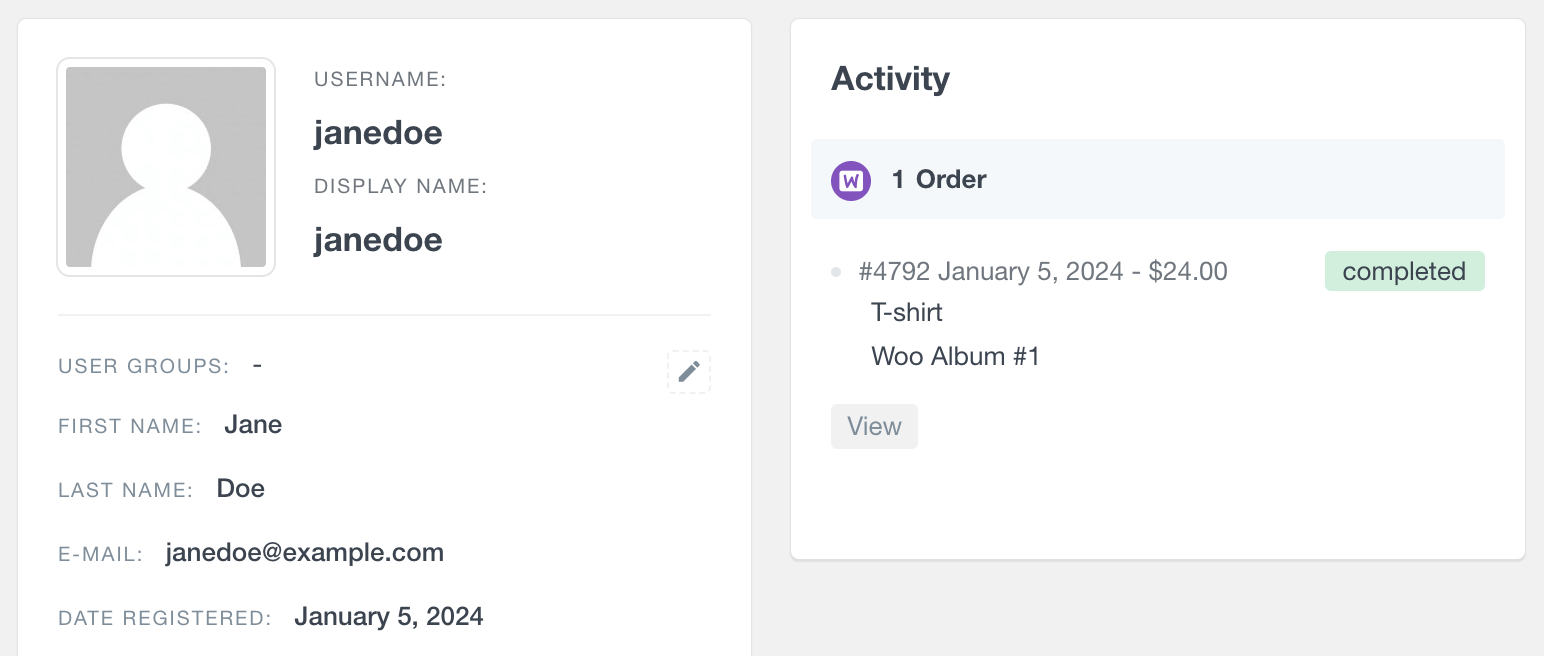
And finally, you can verify that the required orders have been assigned correctly to the user by checking the Orders section of their User Profile page:
Conclusion
In this guide we have covered the creation and management of WooCommerce customers, both manually through the admin dashboard or programmatically via code. Understanding the process of creating customer accounts, updating user information encompassing billing and shipping details, as well as effectively assigning orders to customers, can be useful to optimize your WooCommerce store efficiently. Seamlessly handling these tasks can ensure a streamlined user experience, enhanced database organization, and robust functionality within WooCommerce-powered WordPress websites.