How to sell bookings with WooCommerce and WordPress
There are many business applications for bookings and scheduling systems, the most common application is for businesses based on a scheduled time slots. From doctors to hairdressers and personal trainers, a lot of services are based on a scheduling a time slots and are charged by the time or per appointment. Today we look into how to create and setup your own WooCommerce booking system.
First, we investigate how and why you should have a WordPress appointment and booking. We look into different options for WordPress appointment plugin, in particular, the WooCommerce based solutions. Then we check how to set up your WooCommerce booking products. And finally, we dive into how to filter users based on their booking information.
Let’s get started!
Why should I use WooCommerce event booking and appointments?
There are a lot of business applications for bookings and appointments. In general, bookings are used for time-specific services. Thus, a doctor appointment makes sense, while software development may not work the same way.The most common usage is for services where you need the customer to be present. Private classes, massage, your favorite laser tag place. All these are booking-based services.
When it comes to the actual WooCommerce event booking implementation, there are a few options.
You can use it simply as a way to lock time slots for a specific customer. This ensures that you have only one person for that hour, day or whatever time-breakdown you specify.

Another option is to book and charge. This is the go-to use that you would have for a regular WooCommerce appointments site. For this option, WooCommerce would manage your bookings and revenue.
Using WooCommerce Bookings is a great option, as it fits nicely into any WooCommerce or WordPress site. In addition, you can use the user base you have for the services, as well as their history. Thus, a customer who bought a book on how to play the guitar may be interested in coaching or lessons.
Now it’s time to go through our setup.
How to set up WooCommerce and Bookings
For this solution, we use the WooCommerce Bookings plugin by the WooCommerce Team.
This plugin requires the latest WooCommerce version, and that’s it. Once you enable the WooCommerce Bookings plugin, you get a new product type: Bookings. They can be used for your event and appointments.
It is worth noticing that this means that you can have multiple booking products. Thus, you can have multiple types of consultation products, appointment types or even different resources. This is interesting if you have a team or even if you have multiple booking sources.
Here is an example. Let’s create a bookable WooCommerce product. Just go to Products > Add new.
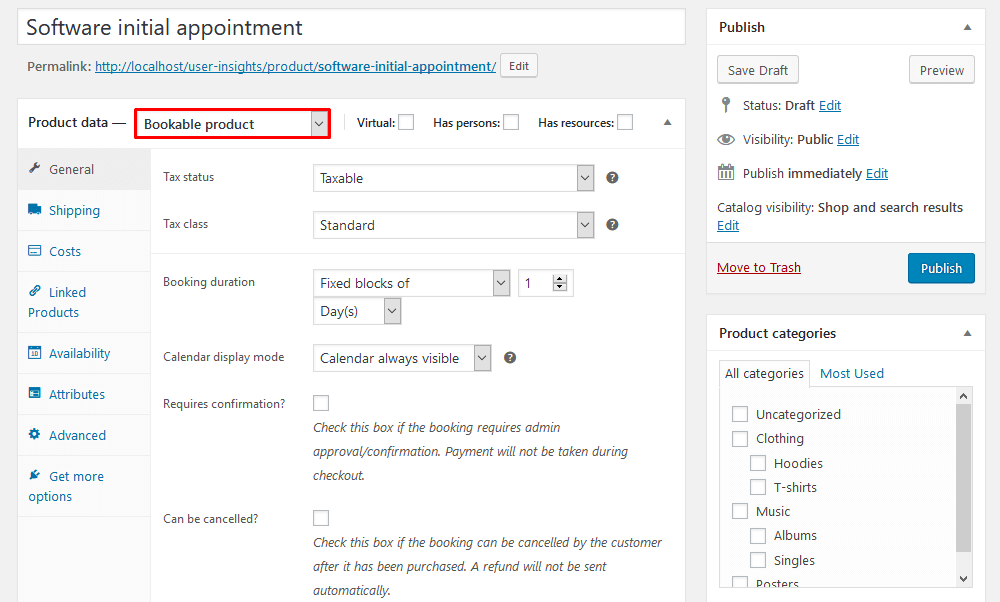
Here you can set up the basic booking options, allow customer cancelation and define the booking duration. But notice how you have now 2 extra options next to the product type. First one is “has persons” and the second is “has resources”.
The “has persons” option allows you to define how many customers can benefit from that service. For example, an Airbnb can have different prices depending on how many guests are staying. Let’s enable that option and see what else we can do there:
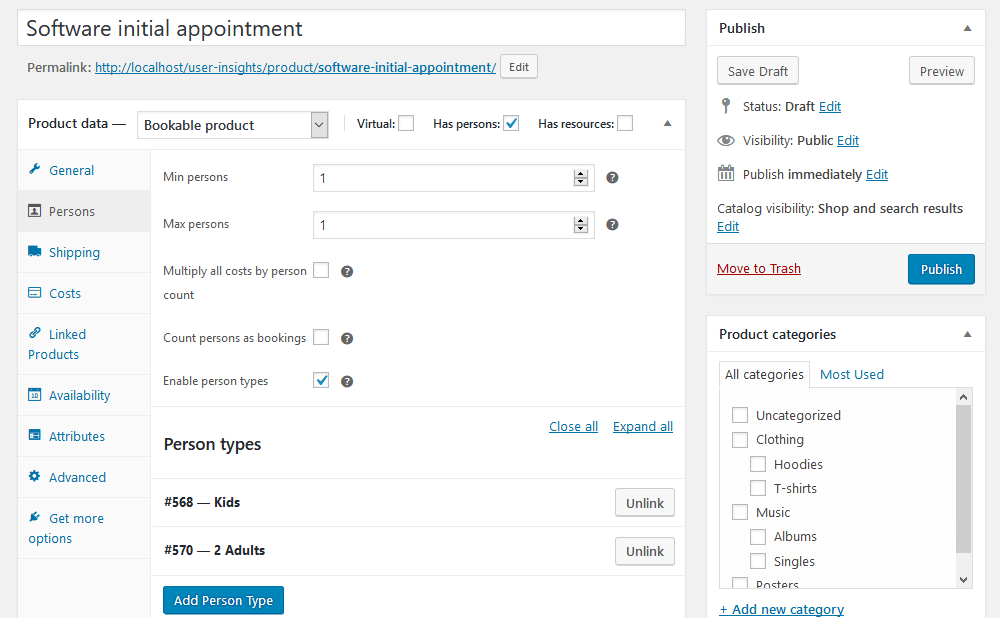
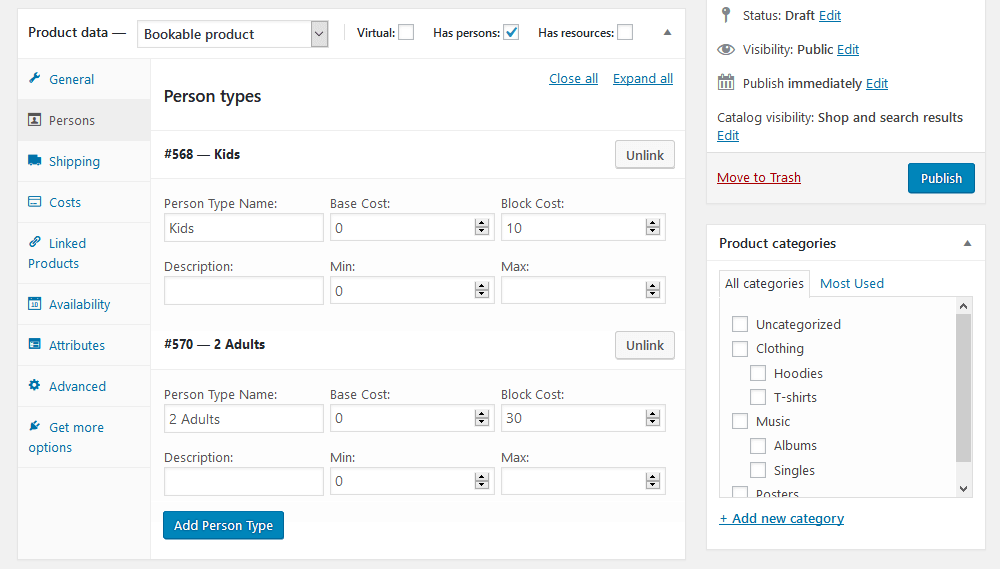
The first few fields are self-explanatory. Things get more interesting when you have the person types. This allows you to do different cost types. For instance, you may not want to simply multiply the person number by the booking costs. Then you can have different prices for bigger parties, or concessions for kids. Here is how we would add it:
Now back to our resources’ management. If you enable “has resources” you see a new tab as well. This option allows you to allocate customers to a specific resource or to distribute the load among team members. For instance, if have a course booking WordPress site probably you have many teachers. You can add them as resources under Bookings > Resources. Then, when you create a product you can use this information. Let’s see it in action:
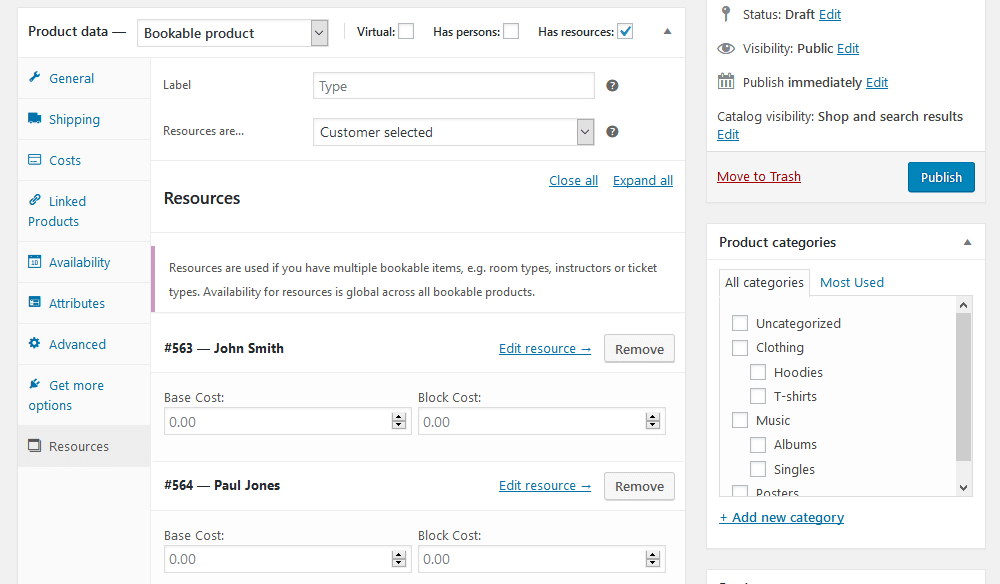
There you can see that we allow users to pick their own teachers. You can force the system to chose them as well if you want. Then as customers book their time slots your resources’ calendars are updated accordingly. This prevents double booking and you can sync your calendar with Google Calendar to display it elsewhere.
In addition, your booking calendar can be displayed by product or by resource. This allows you to see an overview of your sales or filter them by what you want to see.
How to filter users based on appointments and scheduling
Now your WordPress scheduling plugin is up and running. Then it’s time to filter our customers and bookings. For that, we use the Users Insights plugin. Just make sure you enable the WooCommerce module under Users Insights > Modules.
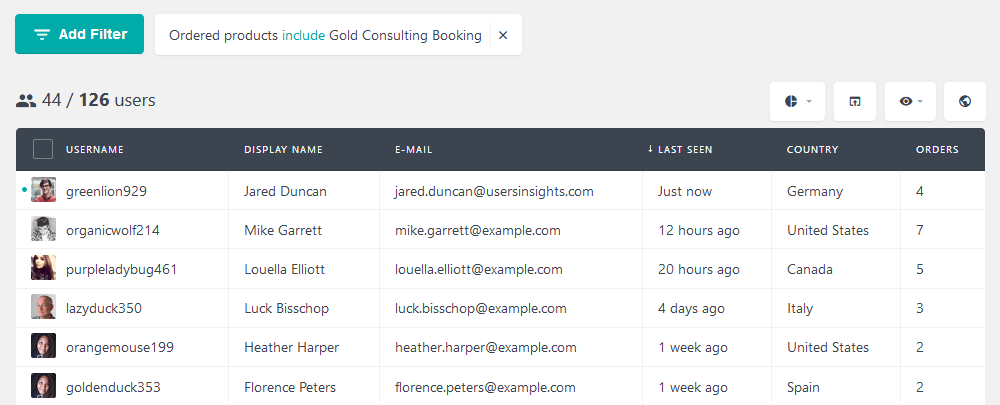
First of all, we want to filter all users who bought a bookable product. We can do that by filtering users with the “ordered product” filter.
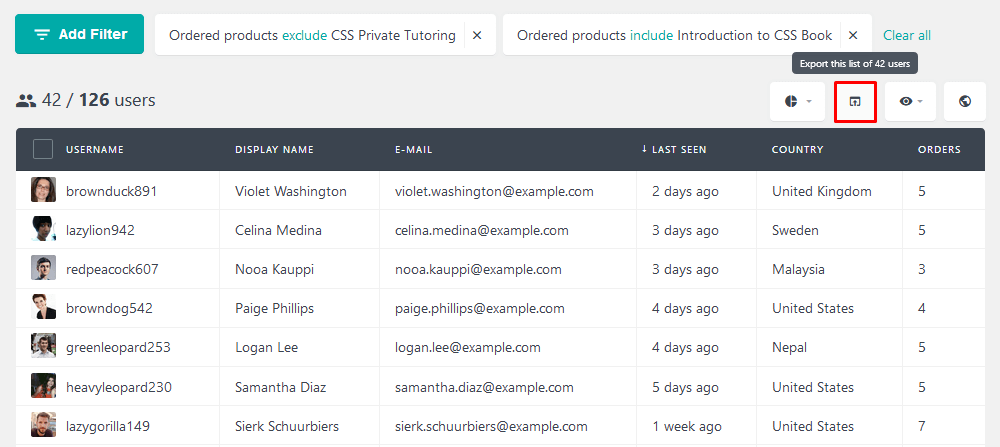
Likewise, you can check users who haven’t bought a product. This is particularly relevant for marketing purposes. For example, you can filter all users who bought your “Introduction to CSS” but haven’t booked to “CSS private tutoring”. Then you can export these users and get in touch using MailChimp. You can offer them special deals:
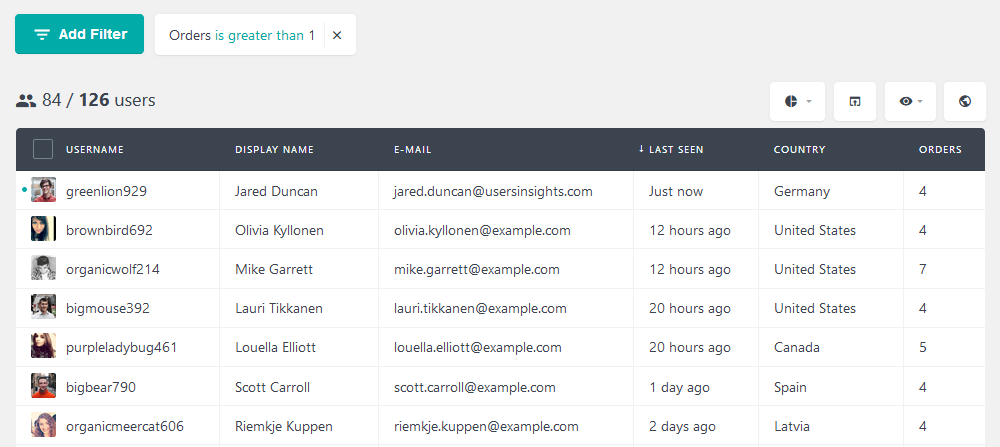
When it comes to bookable products, your repeat buyers are very important. Therefore, it may be a good idea to identify them and make sure you keep a good relationship. You can filter repeat buyers by their order count:
In addition, there are filters regarding the order attributes. This is a powerful search and can be used in many ways. For example, you can filter all users who have ordered a bookable item but canceled. Thus, you can use this information to get to the bottom of your cancelation causes.

Conclusion
Today we looked into how to set up your WooCommerce booking system. We went through the basics of your how WooCommerce scheduling system can be useful for you. Then, we saw how to use the WooCommerce Bookings plugin. There are many options for your scheduling and appointments, including resources management and multiple bookable products. Lastly, we investigated how to filter users based on their purchases and booking products bought.
We hope you enjoyed and see you again next time!