How to create custom exports of your Paid Memberships Pro users
Paid Memberships Pro is one of the most popular WordPress memberships plugins, making membership site creation and management a much easier task. It also allows you to add features for subscriptions-based e-commerce, as well as one-time payments. If you are using Paid Memberships Pro, understanding your members and how they interact with your site is one of the most important jobs. Today, we are going to show you how you can create custom exports of your Paid Memberships Pro user data.
In this article, we are going to do a step-by-step walkthrough of the custom export process. First, we will introduce you to the Paid Membership Pro (or the PMPro) module of User Insights and show you the kind of data it provides. Second, we will show you how you can create your own filters to get records of specific members. And finally, we will teach you how you can export your members data in a CSV file that you can use in many different ways.
Whether you want to get specific data of your users, transfer those records to other systems or websites, keep backups or create custom reports, you can do all this will a few clicks after going through this article. So, without further ado, let’s dive right into it and create your first custom export.

The Paid Membership Pro module
The simplest way to create such exports is to use the Paid Membership Pro module of Users Insights. We believe that the most significant strength of this module is that it allows you to create advanced filters to search through your data in a considerably short time.
Once the PMPro module is activated, it automatically detects the data of members as well as sales that is present in the website and makes it available in the Users Insights users table and smart filters. For example, if you wanted to filter your users on the basis of their membership level and status you can do that using this module. Other filters provided are, user registration date, membership start date, membership end date, status, etc.
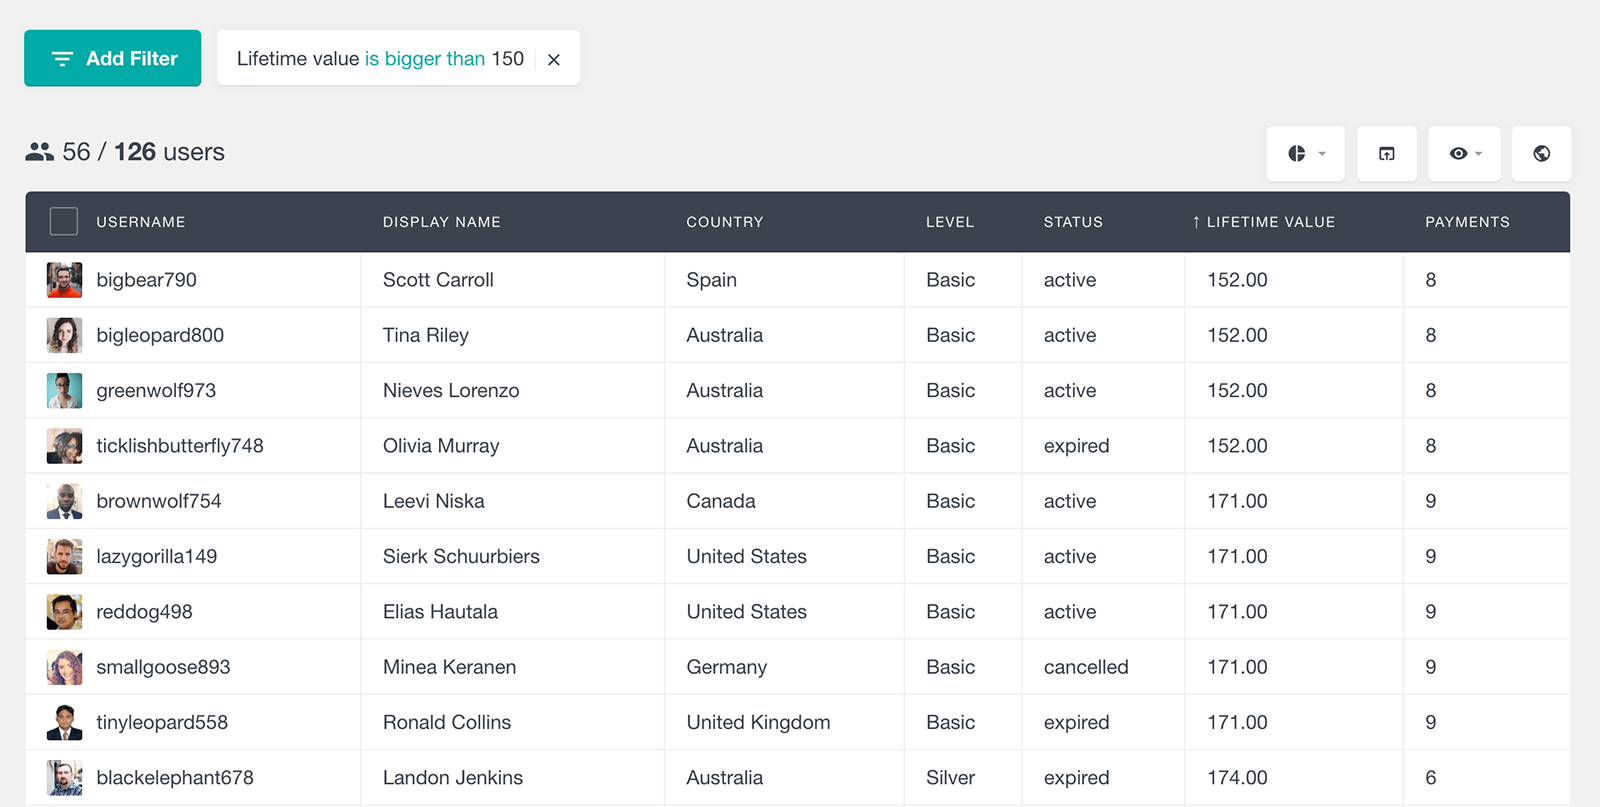
For example, if you want to get the data of all the users who have spent more than 150 dollars in your website, you can add a filter which selects the “Lifetime value” column and set its value as “greater than 150”. After adding the filter, you should get an output similar to this:
You can add as many filters as you want to produce much finer results. For an in-depth look on all these fields and filters, you can read more in the main article on Paid Membership Pro module as well.
Exporting user data
Now that you know how to customize the output based on your desired filters, it is time we showed you how to export this data from WordPress and download it to your computer.
The Export feature of Users Insights works on the principle of “What you see is what you get”. This means that, the data that is being exported will be exactly the same to the data that was shown in the table before you clicked on the export button. This includes the applied filters, the selected visible columns and the sorting order of the table.
Once you add the filters (if needed) and select the visible columns on the table to get your desired output, you are ready to export that data. To do this, you can click on the export button above the top-right corner of the table. After you click on this button, a pop-up appears. The pop-up shows you the exact number of records that will be exported and asks you for confirmation.
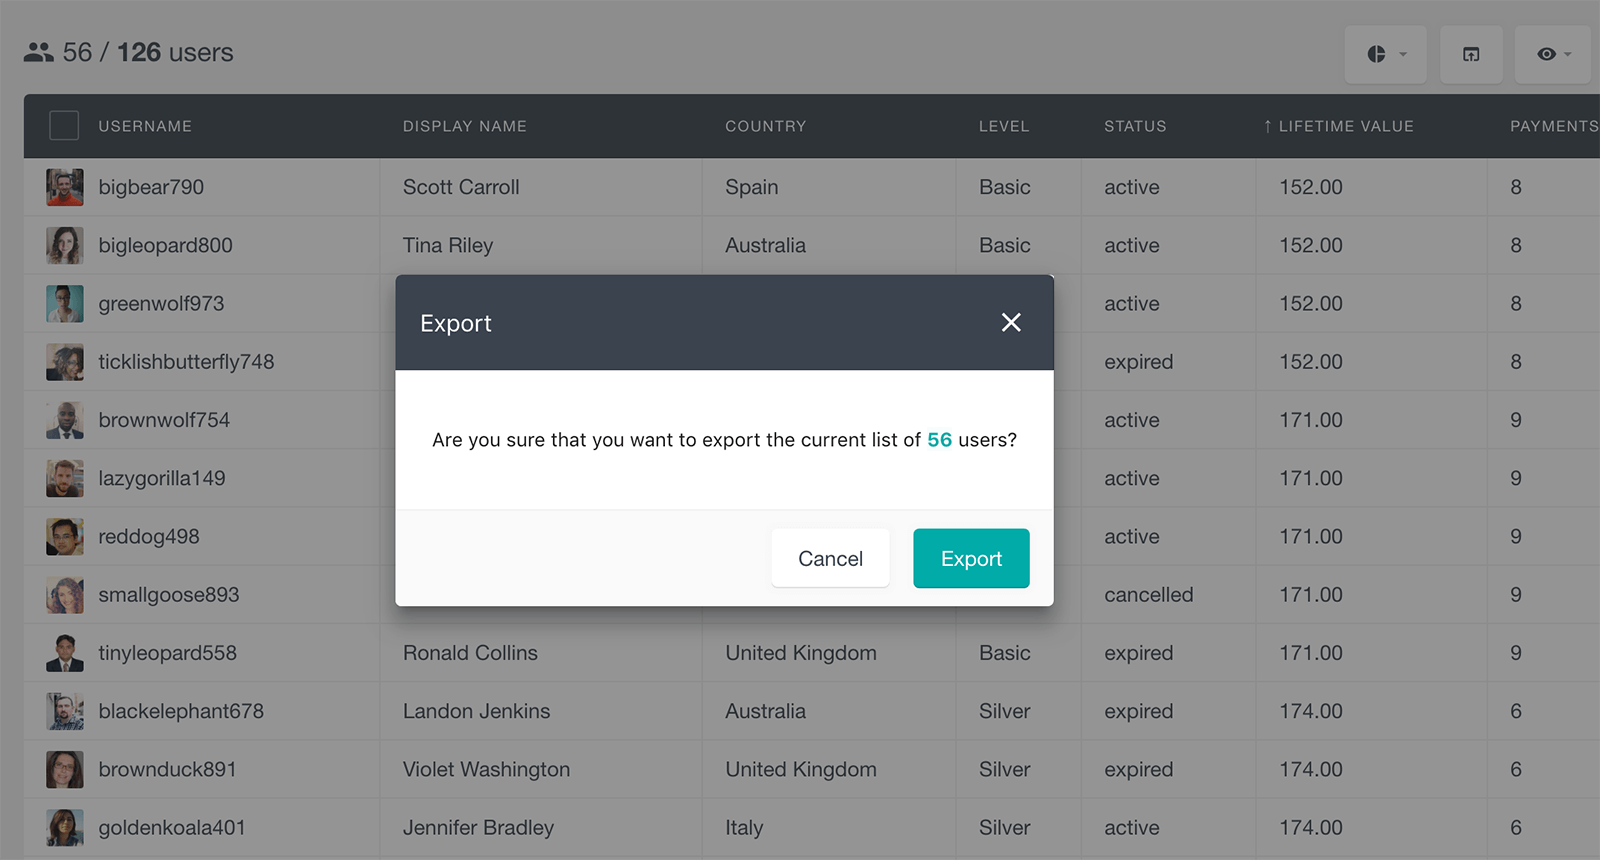
After you confirm the export, a CSV file containing all the data you filtered will be downloaded to your computer.
Real world applications
Now that we’ve seen how the exports work, let’s take a look at some examples of different scenarios to export the Paid Memberships Pro user data. In most cases you will most likely need to export the members, so you can import them to an email campaign service. In other cases, you might want to use the export file in a spreadsheet, such as Excel or Google Docs, so you can extract some metrics and stats from the data. There are really many different ways in which CSV exports of your members data will be useful, so let’s take a look at some more common examples.
E-mail members who have cancelled their memberships within a given period
Every membership site will have some cancelled memberships sooner or later. However, you could still benefit from those memberships. One reason to contact your cancelled subscribers is to ask them for a feedback, so you can better understand their reason to cancel. Your members can often provide invaluable feedback that help you improve your products and services.
Other times you might just want to promote a new feature to incentivize your members to renew their membership. Let’s say, for example, that you had a big feature released 6 months ago and you want to email only the members who have cancelled their membership before the feature was released.
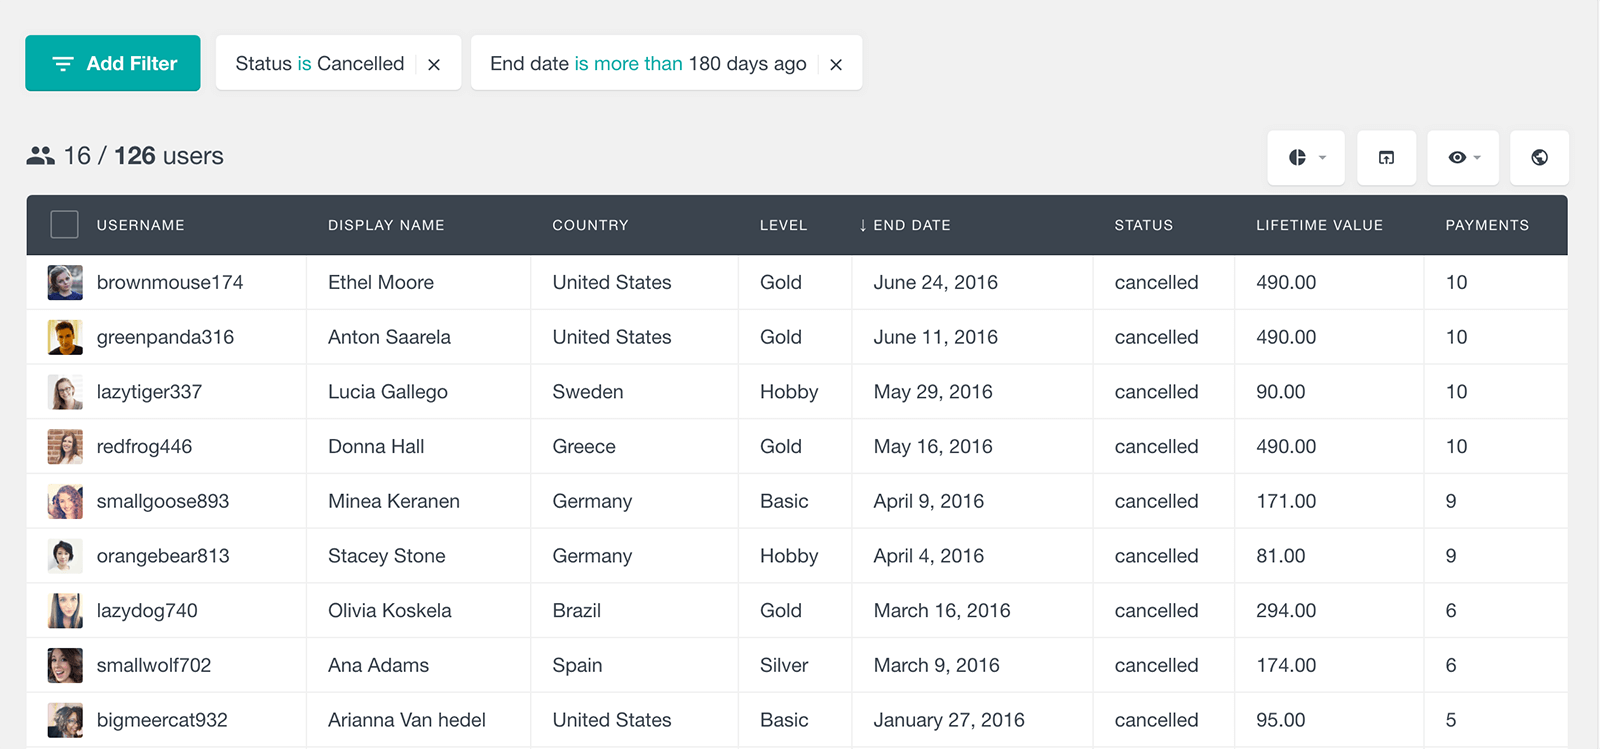
To do this, you can combine the Status and End Date filters. The first one will be used to get the records of all the users who have cancelled their subscriptions, which means their status is set to “Cancelled”. The second will be used to set a threshold of the date at which the user cancelled their subscription. After adding the two filters, your output should look something like this:
After this, just make sure that you have the email column visible and click the Export button. After exporting this information, you can import the Paid Memberships Pro users to your favourite email service. For more information on how to do that, you can check our MailChimp and Campaign Monitor import guides.
Export basic level members to send them upgrade coupons
If you have users who have been using and supporting your website for a long time, there is a high chance that they might want to upgrade their membership. To provide an incentive for them to do so, you could send them discount coupons for membership upgrade.
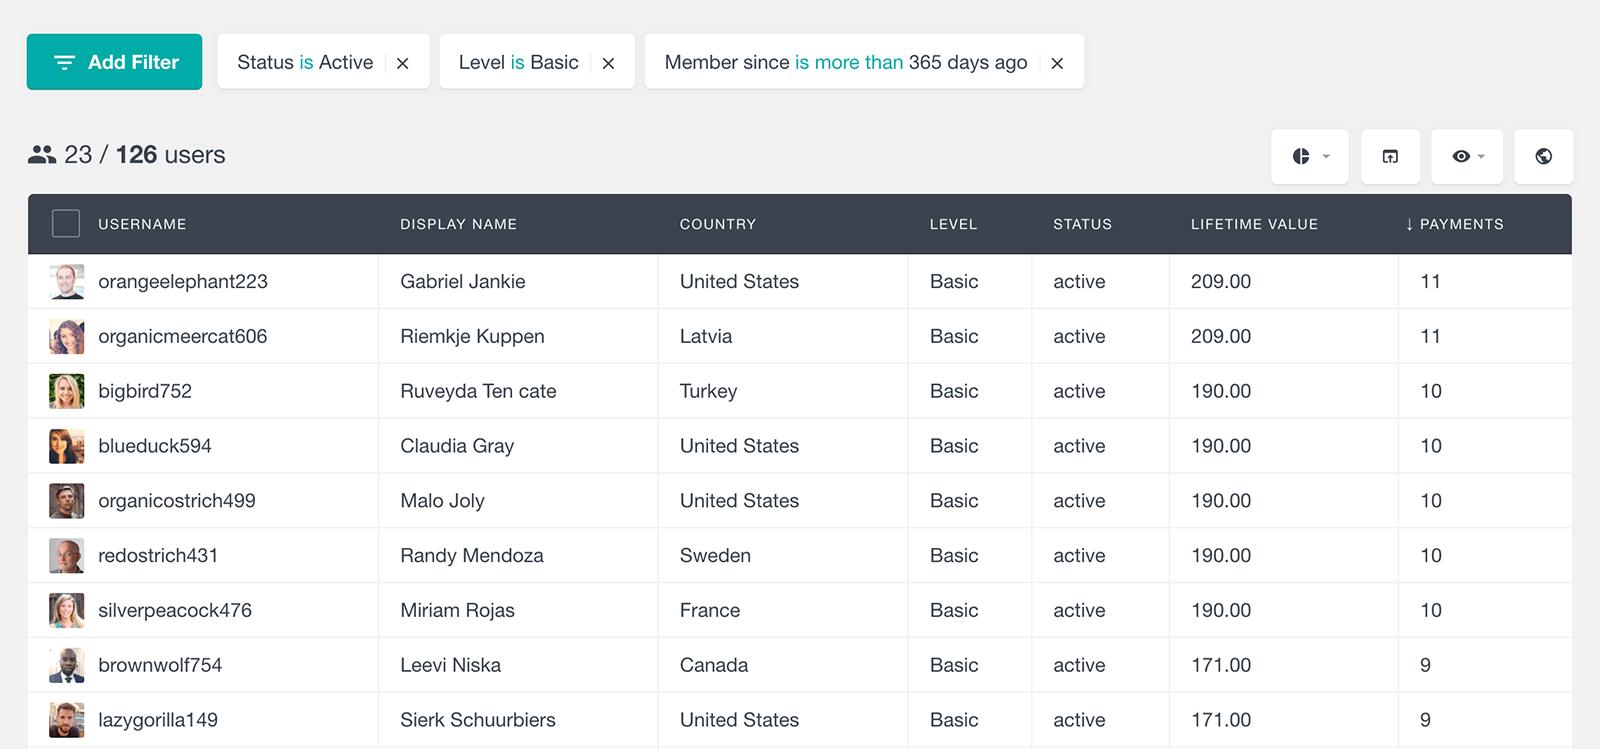
You can accomplish this by combining three different filters. First, to find all the users with an active membership, apply a “Status is Active” filter. Then segment the users by their level, such as “Basic”. In this way you will sure that you don’t include users who have already upgraded to a higher level. And finally, to target long-term users only, we’ll apply a Member since filter. You can either filter by “more/less X days ago” or you can select a particular date, such as “is before/after X date”.
After doing this, your filters will look similar to this:
You can once again use the exported e-mail addresses to send those coupons to the selected users.
Exporting Paid Memberships Pro members based on their location
Many times you might want to export your members based on where they are located. For example, you might need to compare the memberships performance based on the countries of the users. Or you might want to send a greeting or a promotion to all the users on their country’s national day.
With Users Insights there are two different ways to filter your users based on their location. If you request your members to enter their address upon checkout, you can use the PMPro Billing Country, Billing City and Billing Region fields. Or if you are using the Geolocation module of Users Insights, you use its Country, Region and City fields.
In the following example we are going to use the Paid Memberships Pro Billing Country field. We are also going to combine it with the Member Since field to find only the most recent members:
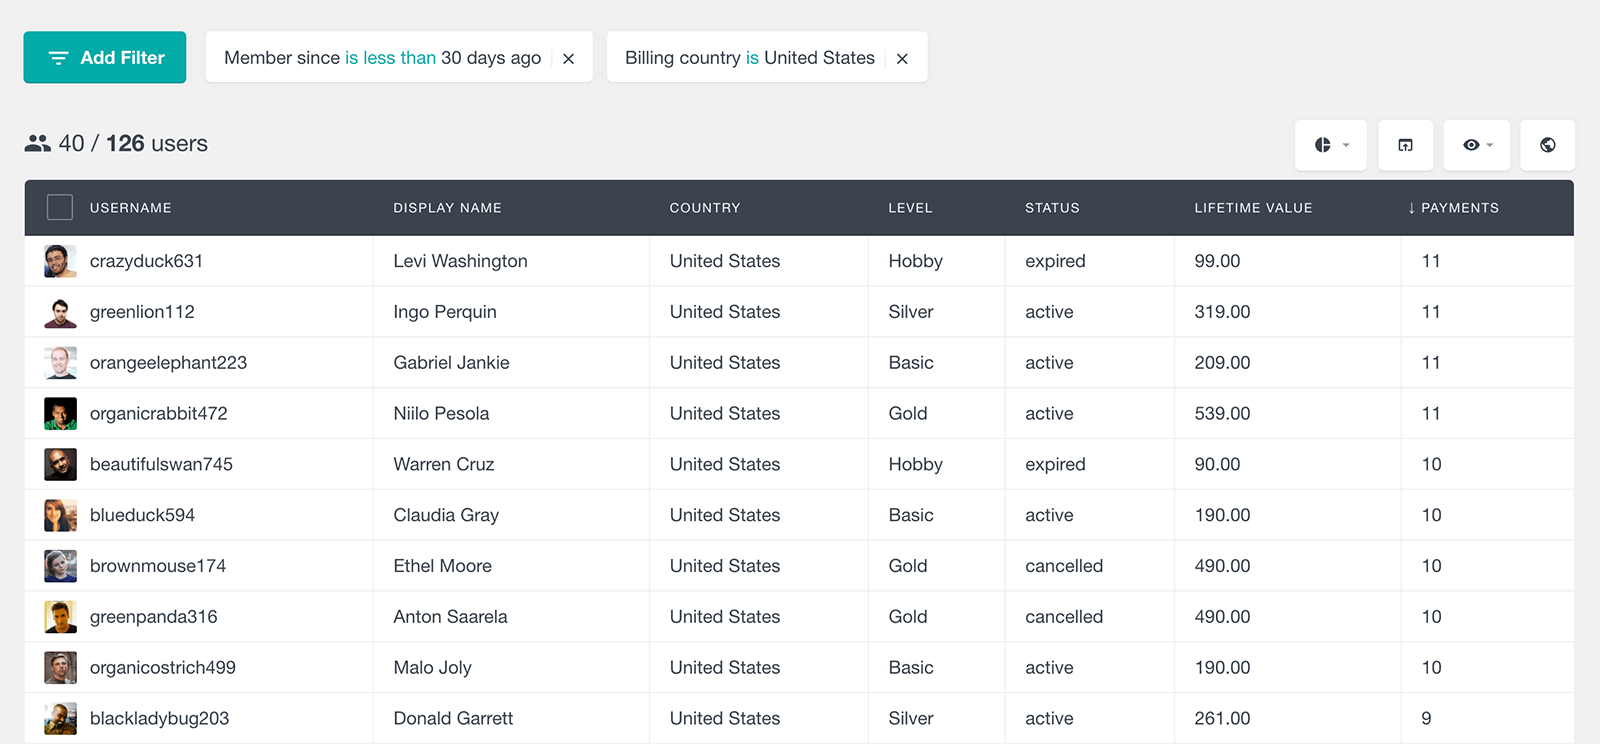
After exporting these results, you can record the user data for statistical analysis or data mining. You can also send notifications to these users with guides on how to get the best out of your website.
Conclusion
In this article, we learned the type of data the PMPro module of Users Insights detects and went on to understand how filters can be used to generate customized outputs from the users table. We also learned how those outputs can be exported in the form of a CSV file and used independently to either store the records, create reports or transfer the data from one system to another.
We hope you enjoyed the article, and see you again next time!