Gravity forms lead capture and management
In this tutorial, we are going to see how you can set up your own Gravity Forms lead capturing system on your WordPress site, as well as how to manage and segment your leads with Users Insights.
Collecting and managing leads is a crucial part of the sales funnel for many businesses. A common way of building an email list is to offer something free to potential customers in exchange for their email address and contact info. Although this seems like a simple process there isn’t a straightforward way of doing it with WordPress.One of the better ways to capture leads in WordPress is with the help of Gravity Forms.
Our main topics of discussion are:
- Planning the form fields
- Gravity forms lead capture form setup
- Creating the Gravity Forms lead capture page
- Evaluating your leads
So let’s get right into it!

Planning the form fields
Gravity forms is a great tool for creating forms in WordPress. In addition, these forms can be used for different purposes, such as registering new WordPress users. For that you just need to make sure you have the User Registration add-on active.
Before creating your form, it’s good to know what information you want to collect. Although it’s easy to edit your form later, once some users are registered you might not be able collect their data again (unless you send them the updated form).
Overall, you’ll want to collect all the information you need to decide whether or not that user is a good lead for you. Information such as business size, job title, industry, location, budget and many others are good to help you on that.
Gravity Forms lead capture form setup
It’s time to create your Gravity Forms lead capture form. First make sure you have Gravity Forms and the User Registration add-on active. Then go to Forms > New Form and create your lead capture form. In our case we’ve added the regular registration fields (name, email, password) and another 3 custom fields.
Actually, you can add as many fields as you want to, but here is how our form looks like:
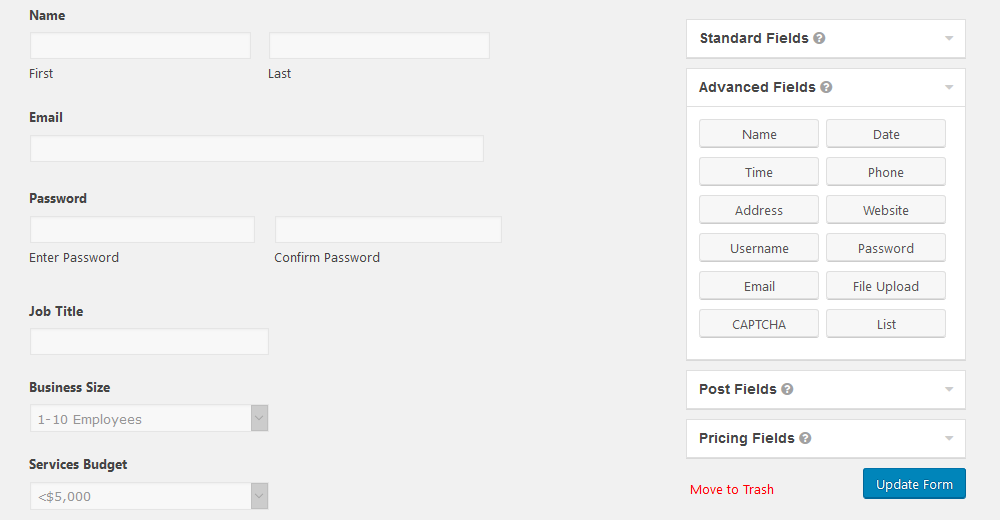
The “Name”, “Email”, and “Password” fields are in the advanced fields group. The others are simple text fields or dropdown fields.
Next, we need to tell Gravity Forms what to do with this information, which is creating a new user. This can be done under Form Settings > User Registration. In this section you can set your form to create new users or update existing ones.
This is also where you’ll need to set up which fields correspond to which user data. Here is how our example is going to look like:
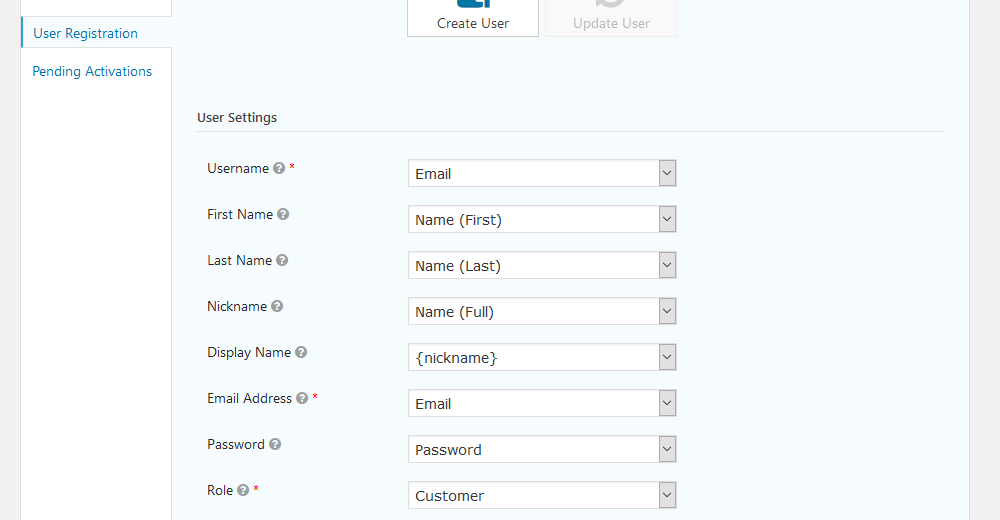
You may notice that we are using the username field as the email field. That’s to simplify things for your user, you don’t need to ask for this information as the email works just fine in the username field.
In addition, you’ll need to set up the custom fields. You can add them all in the user meta section, just make sure to pick a key for your custom fields that doesn’t contain spaces or special characters.

And that’s it, your Gravity Forms lead capture form is ready! It’s time to add it to page and start collecting your leads.
Creating the Gravity Forms lead capture page
The process of getting the user to sign up is a whole new story. There are many different lead sources that you can use. You can offer them ebooks, courses, coupons, newsletters. You can even offer free trials or other perks.
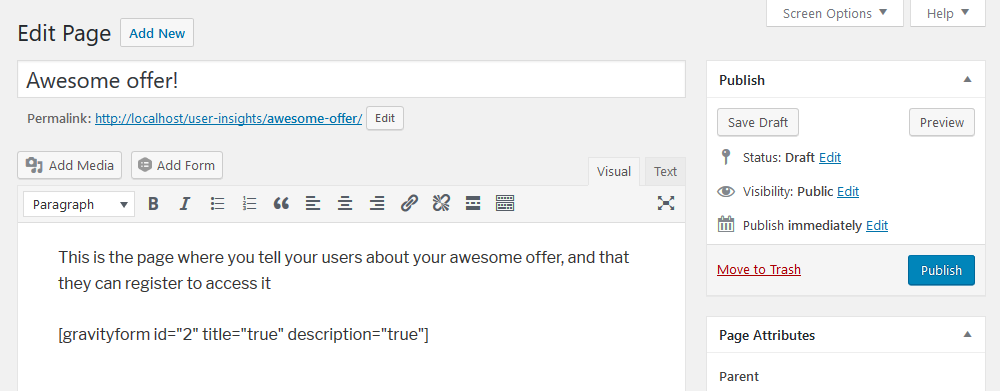
Once you’ve got your offer in place, it’s time to add your shortcode to a page. Just add the shortcode to your desired registration page and it’s time for some gravity forms lead generation.
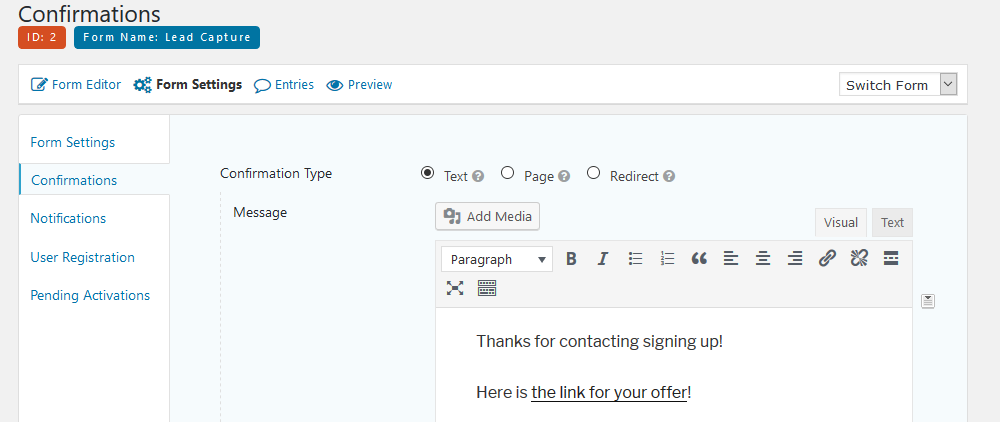
If you want to offer something for download after your users complete the form, you can add the download link or the offer itself under the form’s Settings > Confirmations section:
To summarize, the Gravity Forms setup requires you to create a form, set up the fields you want, add the form shortcode in a page, and then add the offer in the confirmation message. Now after you’ve got some registered users, let’s see the different ways to manage them.
Evaluating your leads
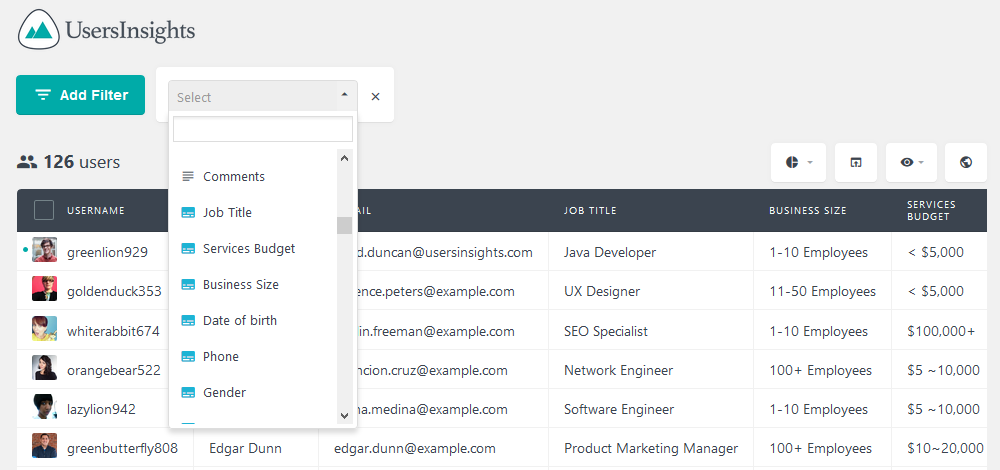
All your registered users have the requested information as custom fields. Since Users Insights has a Gravity Forms module, you can automatically see these fields in your filtering and column options.
This is how our filters settings look like after saving our form:
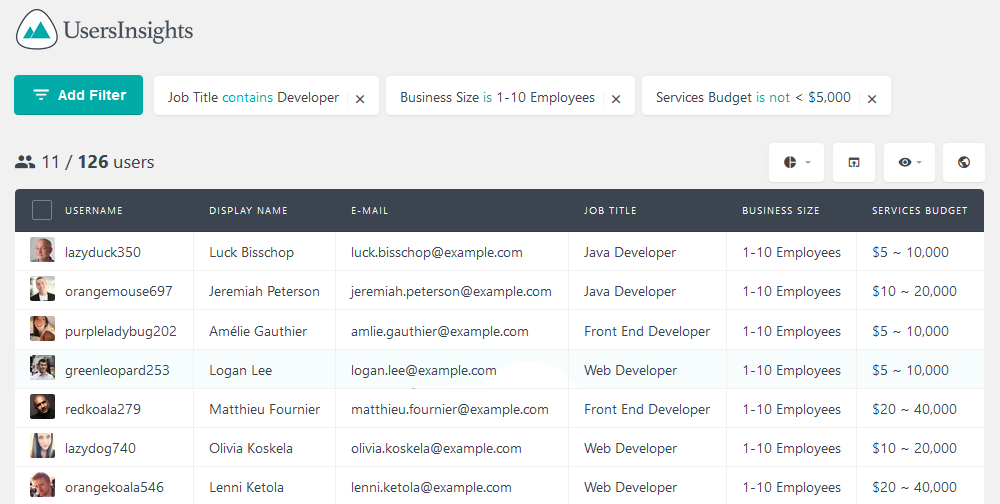
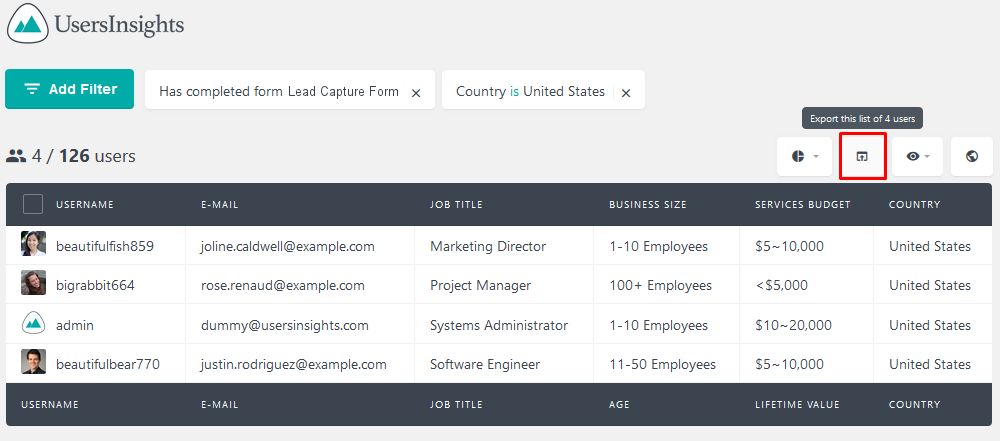
You can use many different methods for lead scoring, so you’ll know which customers have a higher chance of buying. For example, if you know that your ideal customer is a developer who has a services budget of $5,000 or more and works in a company with 1 to 10 employees you can filter only leads that match that criteria:
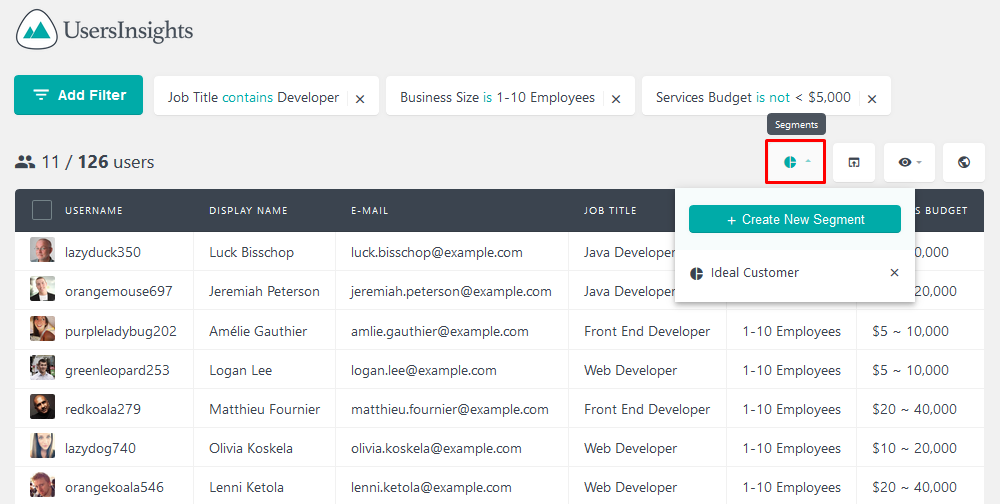
Also, if this is a key criteria for you, it’s possible to save that search criteria in particular for later use. You can save them using the segments button.
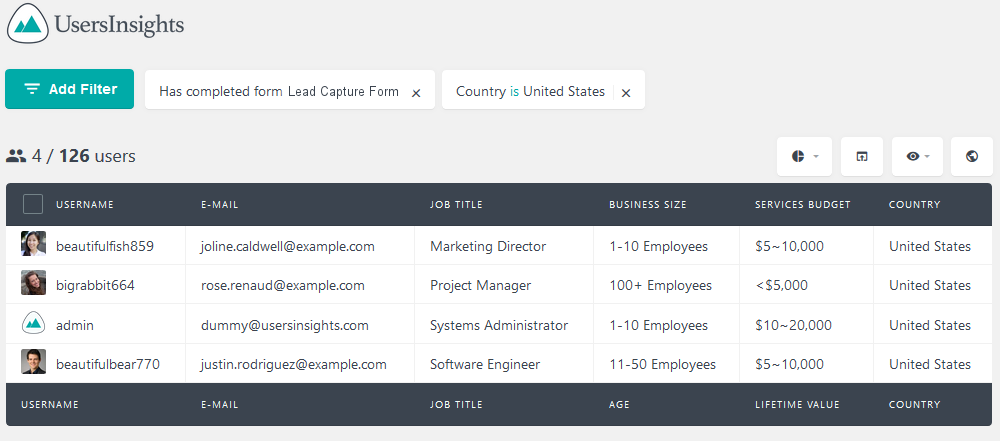
In addition to filtering the default fields, you can combine them with geolocation data and data coming from other plugins. In this way it’s possible to better analyze your captured leads by other demographic aspects such as location and language.
Now you just need to export these users so you can email them. We have some guides on how to use Users Insights in combination with MailChimp or Campaign Monitor, in case you want to dig deeper. But in short you just need to use the export button and then import the CSV files in your desired software:
Conclusion
Today we looked into how you can use the Gravity Forms plugin in combination with Users Insights for lead capturing. We saw different methods and aspects of the lead generation and management. We also learned how you can use offers on signup and other offers later on to turn leads into customers.
By the end of the day you should be able to run your own lead capture campaign and gather important user information for later use.
We hope you enjoyed it and see you again next time!