4 ways to add WooCommerce product categories to the menu
This tutorial explores how to add WooCommerce product categories to the navigation menu, offering guidance on both the programmatic method and the user-friendly approaches through the WordPress dashboard and site editor. Whether you lean towards code-based solutions or prefer intuitive interfaces, we cover both methods, providing flexibility in seamlessly integrating product categories into your navigation menu. We’ll cover the following approaches:
- Adding categories from the dashboard for non block-based themes
- Adding categories from the dashboard for block-based themes
- Adding categories programmatically
- Adding categories using a plugin
Starting with the manual way through the dashboard is ideal when you want direct control over specific menu configurations. This method allows for immediate adjustments and is preferred if you prefer a hands-on approach to managing your menu. However, the programmatic method is recommended if you aim for a dynamic solution that automatically reflects changes in your product categories without manual updates.

How to add WooCommerce product categories to the menu from the dashboard
To add WooCommerce categories to your menu, go to Appearance > Menus page of your WordPress dashboard.
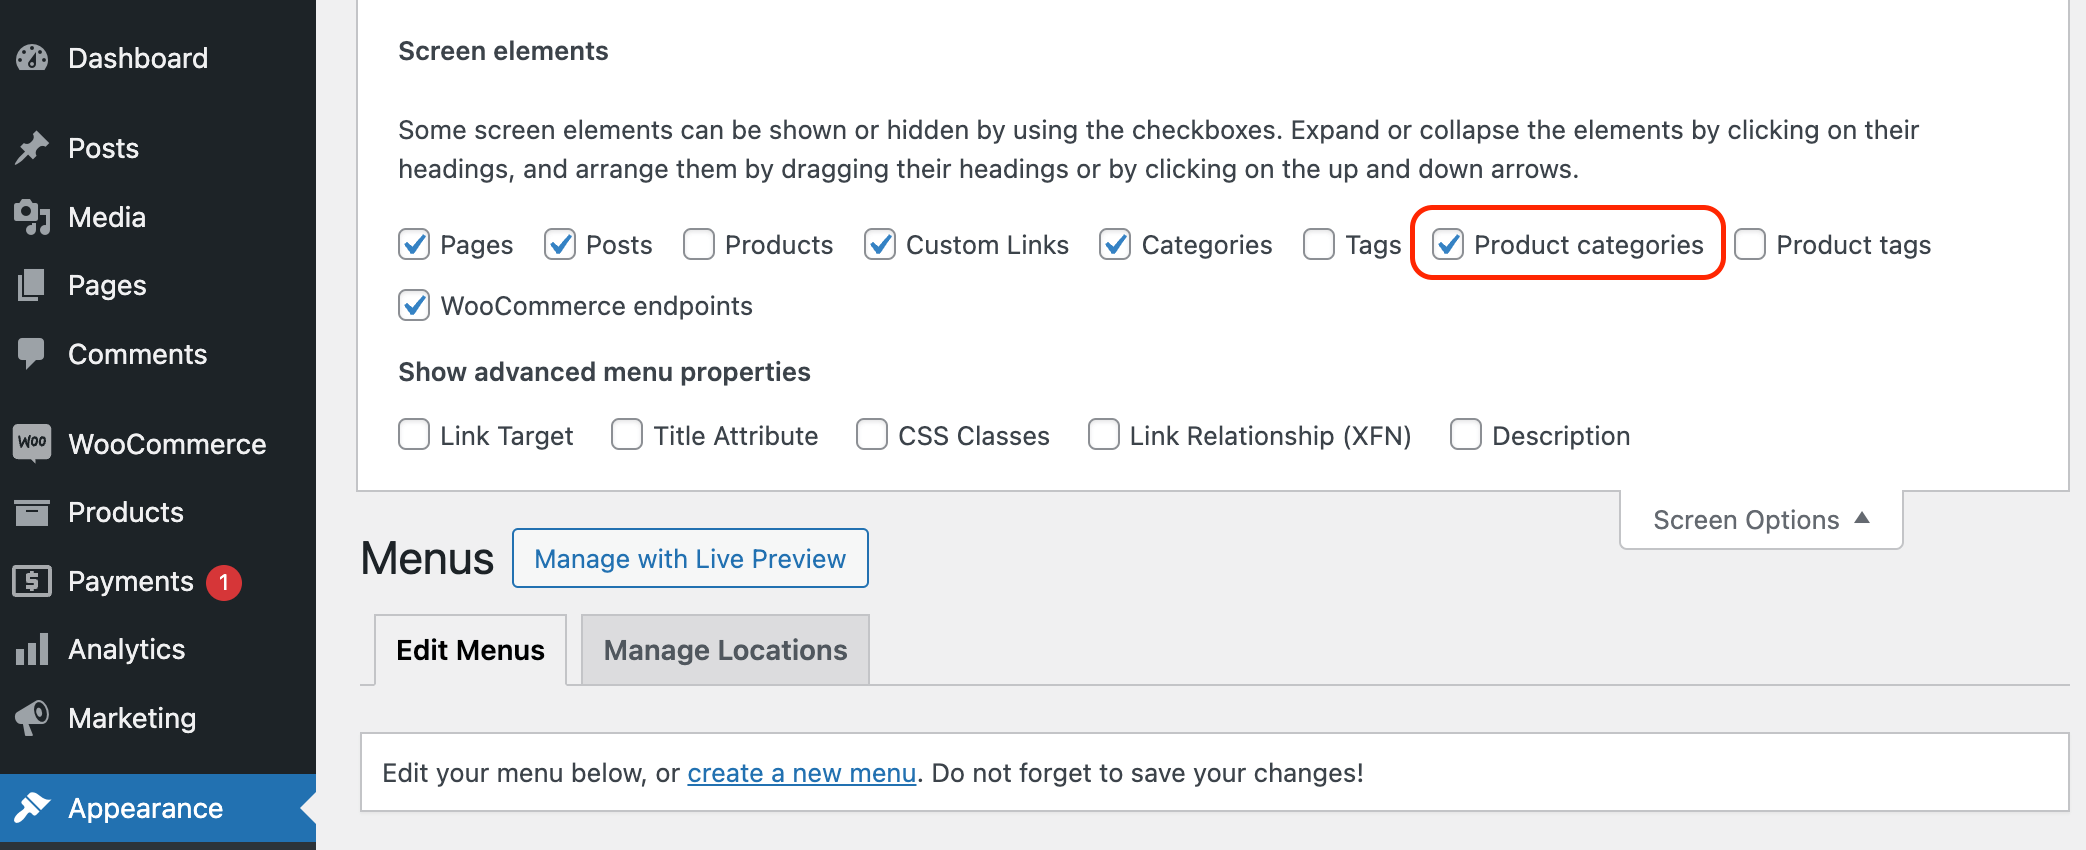
Once you’re in the menu editor, click “Screen Options” at the top-right corner of the screen to ensure that Product Categories are enabled. Then, check the box next to “Product Categories” to make them visible for selection.
You should see a new “Product Categories” section in the left column. Expand this section and find a list of available product categories. Check the boxes next to the categories you want to add to the menu.
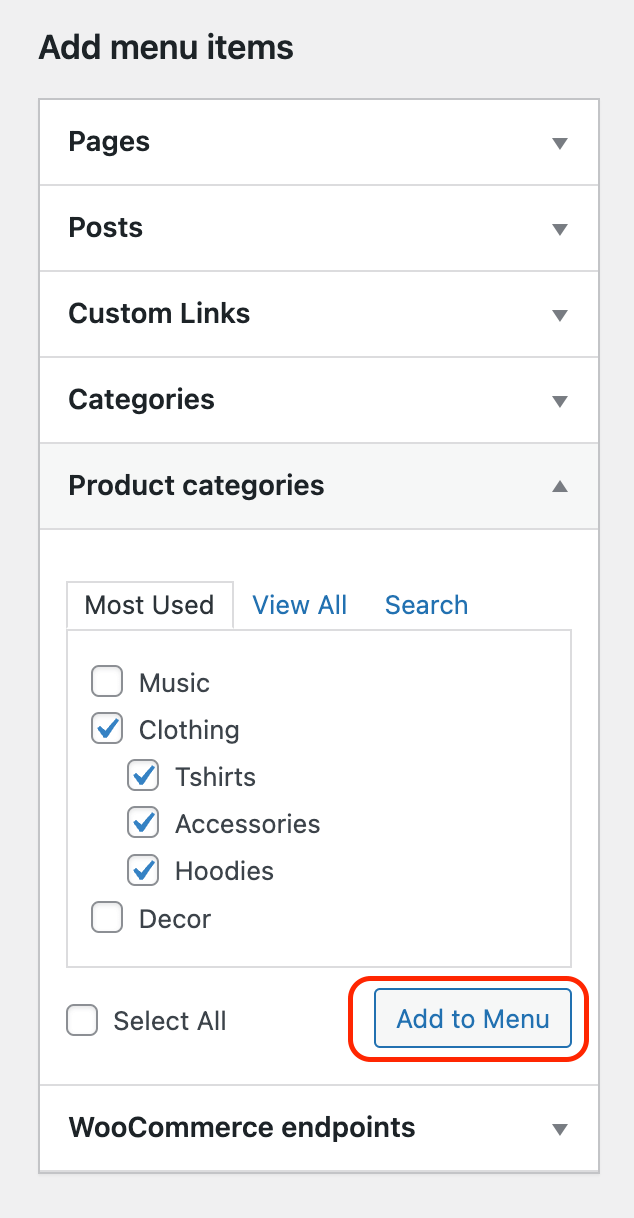
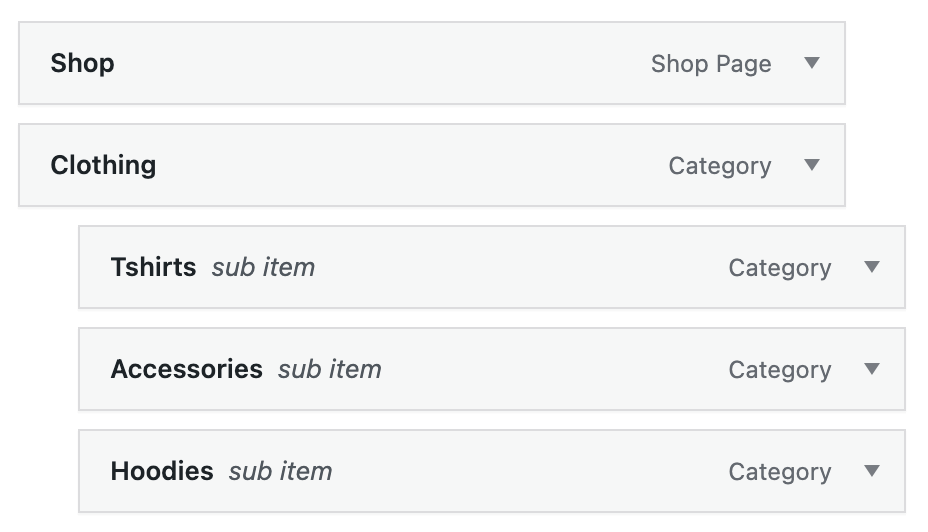
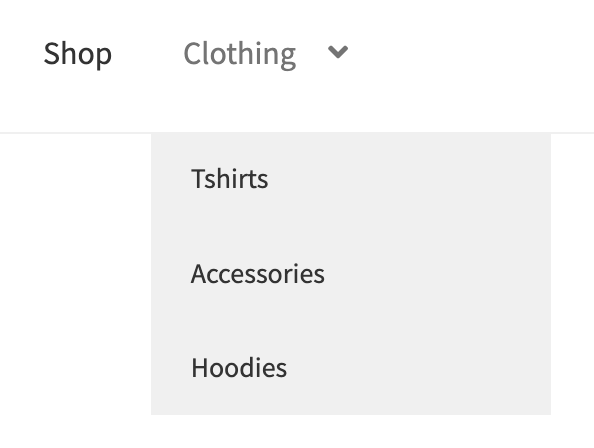
After selecting your desired categories, click the “Add to Menu” button. The selected categories will appear in the menu structure on the right. You can arrange their order by dragging and dropping them into the desired position. You can also nest the categories to create a hierarchy, which can be displayed as a drop-down menu depending on your theme.
Finally, click the “Save Menu” button to apply the changes. Your WooCommerce categories should now be included in your menu, providing easy navigation to each product category page.
How to add product categories to the menu using Site Editor
If you are using a block-based theme, the Appearance > Menus section will not be available, and in that case, you will need to add product categories using the WordPress site editor.
To add WooCommerce categories to your menu using the Site Editor, navigate to Appearance > Site Editor. Once inside the Site Editor, click on your navigation menu so that the Navigation block opens on the right side of the screen.
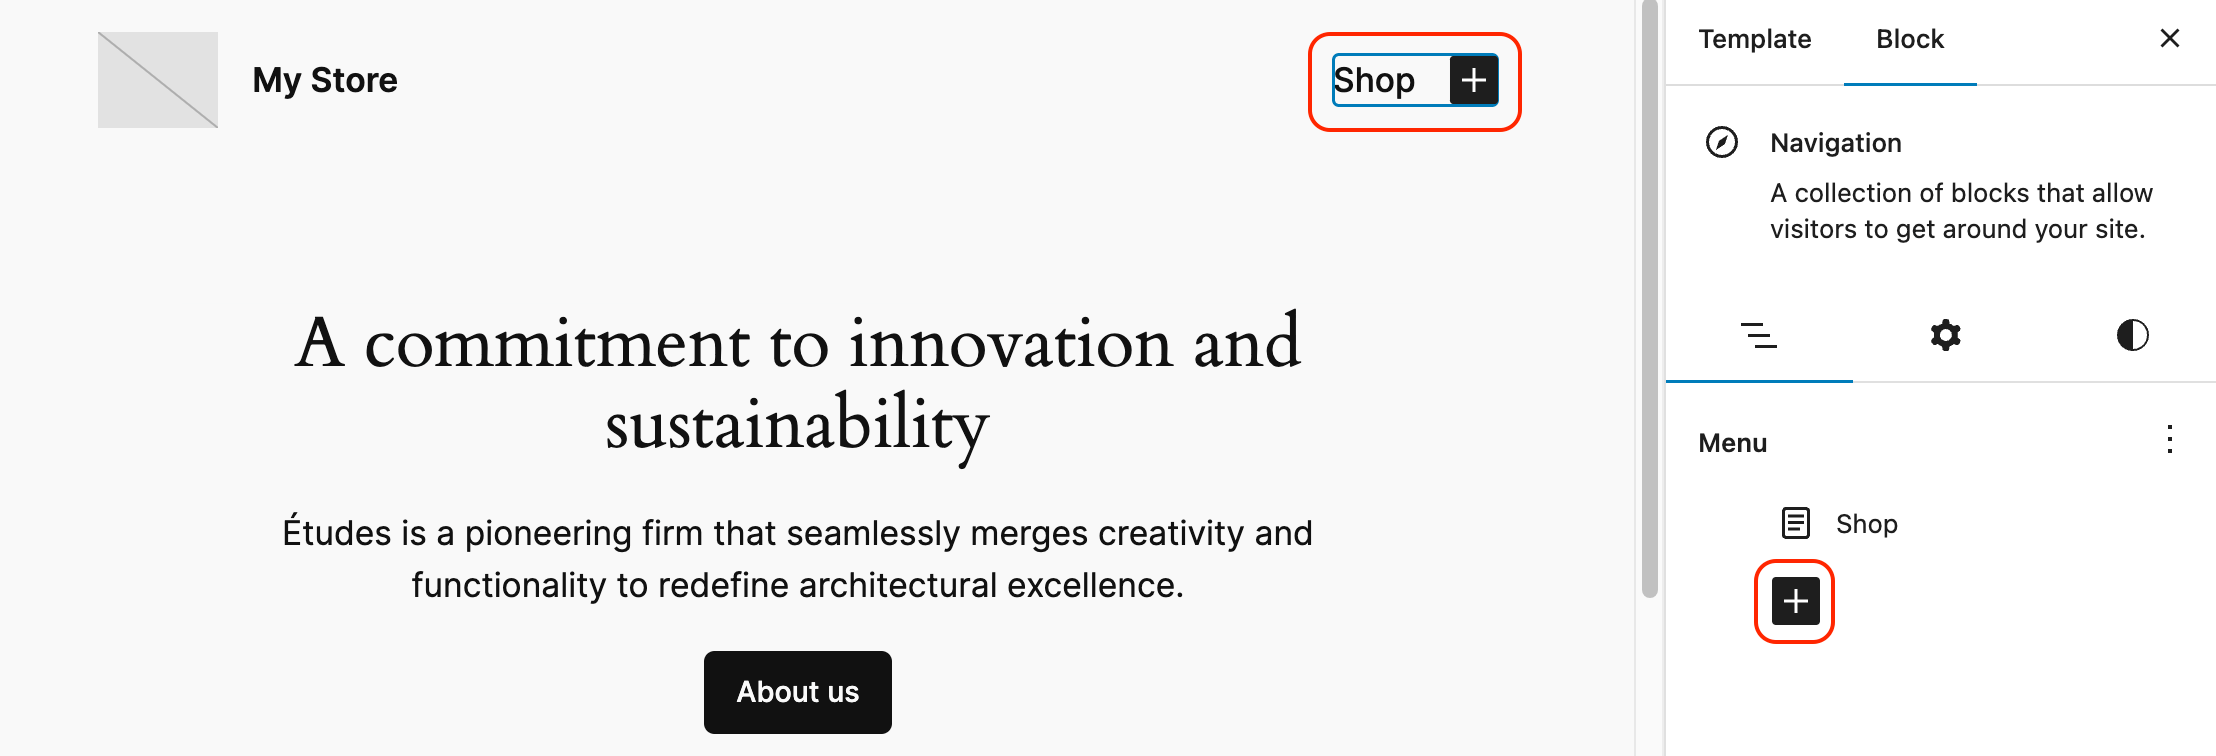
In the Menu section, locate the “plus” button and click on it to add a new item to the menu.
A window displaying available link types will appear. If “Product Category” is not visible, use the search box to find it.
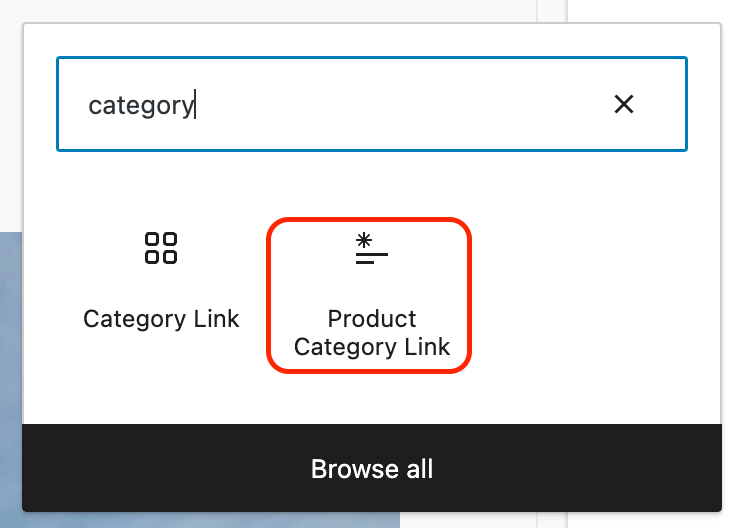
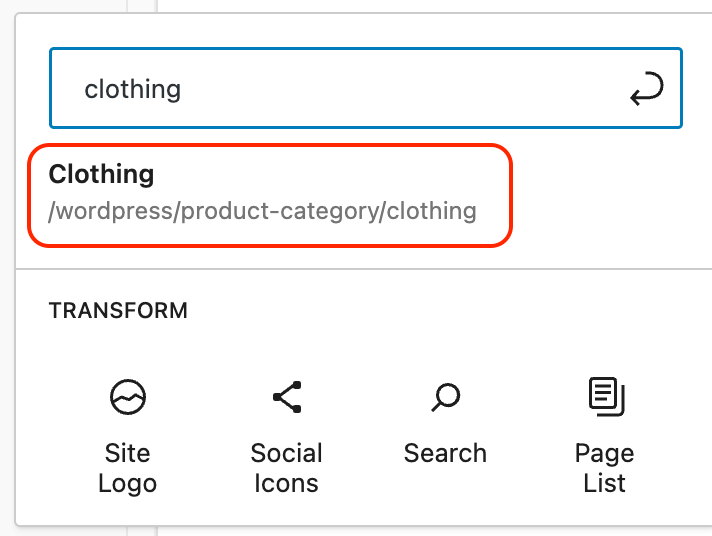
Select the “Product Category” link item, search for the specific category you want to add, and click on it to add it to the menu.
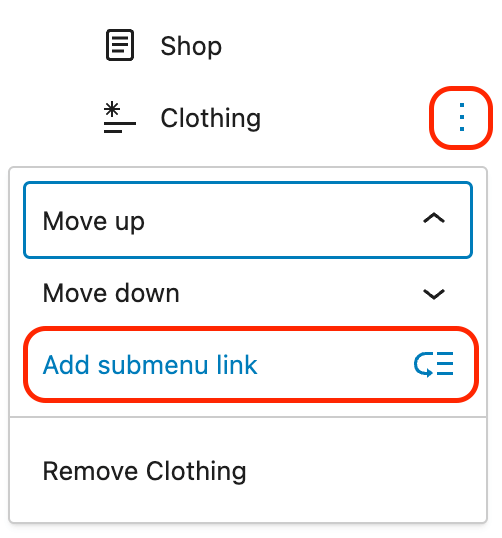
If you wish to add a submenu item, click on the three dots next to the parent item and select the “Add submenu link” option. Follow the same process as mentioned above to add the desired category. Submenu items may be displayed as drop-downs in your WooCommerce menu, depending on your theme.
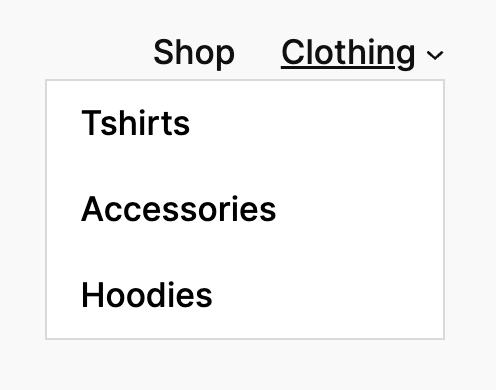
Once you’ve made all your selections, save your changes. Here is an example of how the menu looks like in the Twenty Twenty-Four theme:
How to programmatically add WooCommerce product categories to the menu
To dynamically add WooCommerce categories to the menu, you can use the wp_nav_menu_objects filter. The following code snippet illustrates how to achieve this:
function add_dynamic_menu_items($items, $args) {
  if ($args->theme_location == 'primary') {
    $categories = get_categories( array('taxonomy' => 'product_cat') );

    foreach($categories as $category){
      $menu_item = (object) array(
        'ID' => 10000000 + $category->term_id,
        'title' => $category->name,
        'url' => get_term_link($category),
        'menu_order' => 9999,
        'menu_item_parent' => 0,
        'type' => 'taxonomy'
      );

      $items[] = $menu_item;
    }
  }

  return $items;

}
add_filter('wp_nav_menu_objects', 'add_dynamic_menu_items', 10, 2);
Let’s break down the key functionalities:
- The code uses the
wp_nav_menu_objectsfilter hook, which allows manipulation of the navigation menu items before they are outputted. $args->theme_location == 'primary'checks if the current menu being processed is the one with the theme location ‘primary’. On this line, you need to set the location identifier of the navigation menu to which you would like to add the categories. The modifications will only occur for the menu with this specific theme location.- After this, we retrieve the product categories using the
get_categories()function with the ‘product_cat’ taxonomy. On this line, you can add additional conditions to the loaded categories – for example, you can include/exclude categories or set a sorting custom order. - Menu Item Creation: The code then iterates through each category and creates a new menu item for each. The menu item is represented as an object with properties such as ID, title, URL, menu order, parent item, and type:
ID: It creates a unique ID for each menu item using a formula (10000000 + $category->term_id). Typically, this ID holds the menu item’s database ID, but since these items are added on the fly, we don’t have a fixed ID. So, we attach a really large number to the category ID. This minimizes the chance of any clashes with existing menu item IDs and guarantees that this item ID will stay constant.title: Sets the title of the menu item as the name of the categoryurl: Sets the URL of the menu item using theget_term_link()function.menu_order: It assigns a fixed order (9999) for the menu items. In this way, they will be added to the end of the menu. You can change this number to your preference.menu_item_parent: It sets the parent item ID to 0, indicating these are top-level items. If you would like to add the categories as submenu items, you can do that by setting the parent menu item ID here.type: It specifies that these are taxonomy items.
- Finally, we add the created menu items to the existing menu items (
$items).
Using a plugin to add WooCommerce categories to the menu dynamically
The Automatically Hierarchic Categories in Menu plugin provides another way to add product categories to your navigation menus. This approach offers the advantage of automatically populating the menu with product categories, eliminating the need for custom coding.
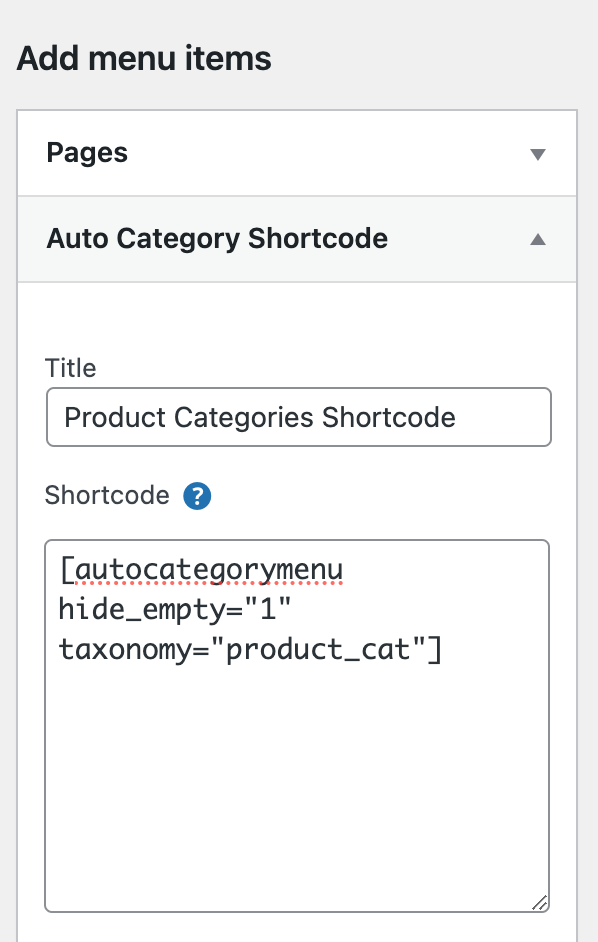
To display product categories in the menus using this plugin, navigate to Appearance > Menus. You will see an “Auto Category Shortcode” element on the left side of the section. In this section, add an item with the following shortcode:
[autocategorymenu hide_empty="1" taxonomy="product_cat"]
Set a descriptive title—you can set any title; it won’t be displayed on the front end.
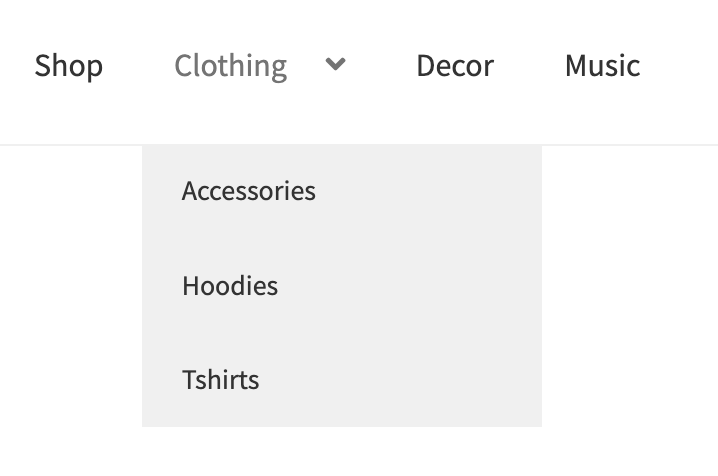
Once you add the shortcode item and save the changes, the WooCommerce categories will be automatically added to your menu. Also, as you can see, the plugin will automatically set the category hierarchy so that subcategories are displayed as drop-down menus of the parent category.
In this shortcode, we have set the hide_empty option to 1, meaning that categories with no products will not be added to the menu. There are also some other shortcode attributes that you can set, such as:
exclude– allows you to set a comma-separated list of category IDs to excludelevel– the maximum hierarchy level. For example, setting the level to “1” will show only the top-level categories

Unlock the Full Potential of Your WooCommerce Customer Data
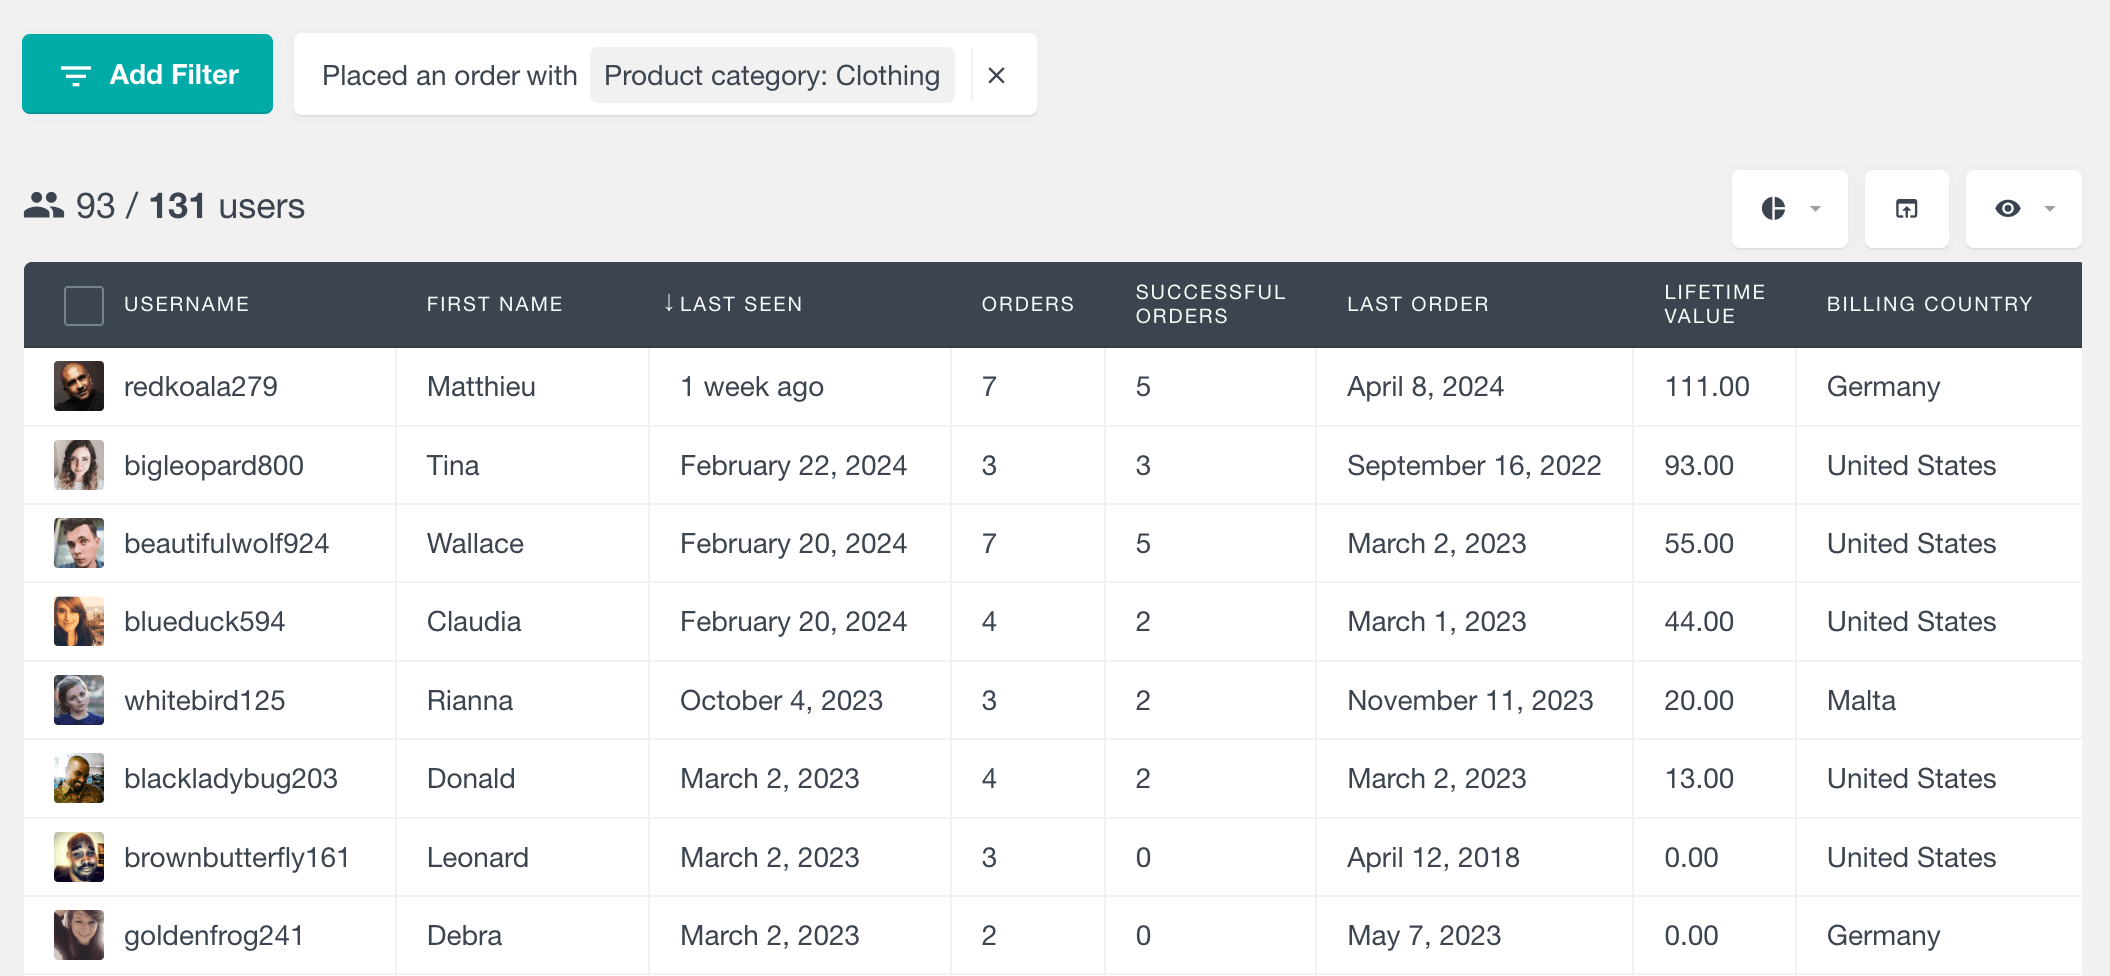
How to filter customers by product category
Product category sales analysis helps you see which categories are performing well so you can feature them in your WooCommerce menu. By focusing on top-performing categories, you can rearrange the menu to make it easier for customers to find popular products, boost sales, and improve the overall shopping experience. You can also hide underperforming categories from your shop to improve conversions.
You can filter users by the product categories they’ve purchased directly from the user table with the Users Insights filters. Choose the “Placed an order” filter, select “product category,” and pick your desired category. Once applied, you’ll see all users who have bought items from that category, including its subcategories.
Product category report
The WooCommerce Product Category reports section offers detailed insights for a selected product category.
Here are the available reports:
- Sales: Monitors the number of sales over time, including orders marked as completed, processing, or on hold.
- Orders by Status: Visualizes orders over time with color-coded segments for each status.
- Items Sold: Shows the total quantity of products sold from the category over time.
- Total Amount of Items Sold: Calculates the total revenue from items sold in the selected category.
- Best Selling Products: Highlights top-selling products from the category, with an option to filter by specific periods.
- Order Status Breakdown: Displays a pie chart breaking down order statuses for a chosen timeframe.
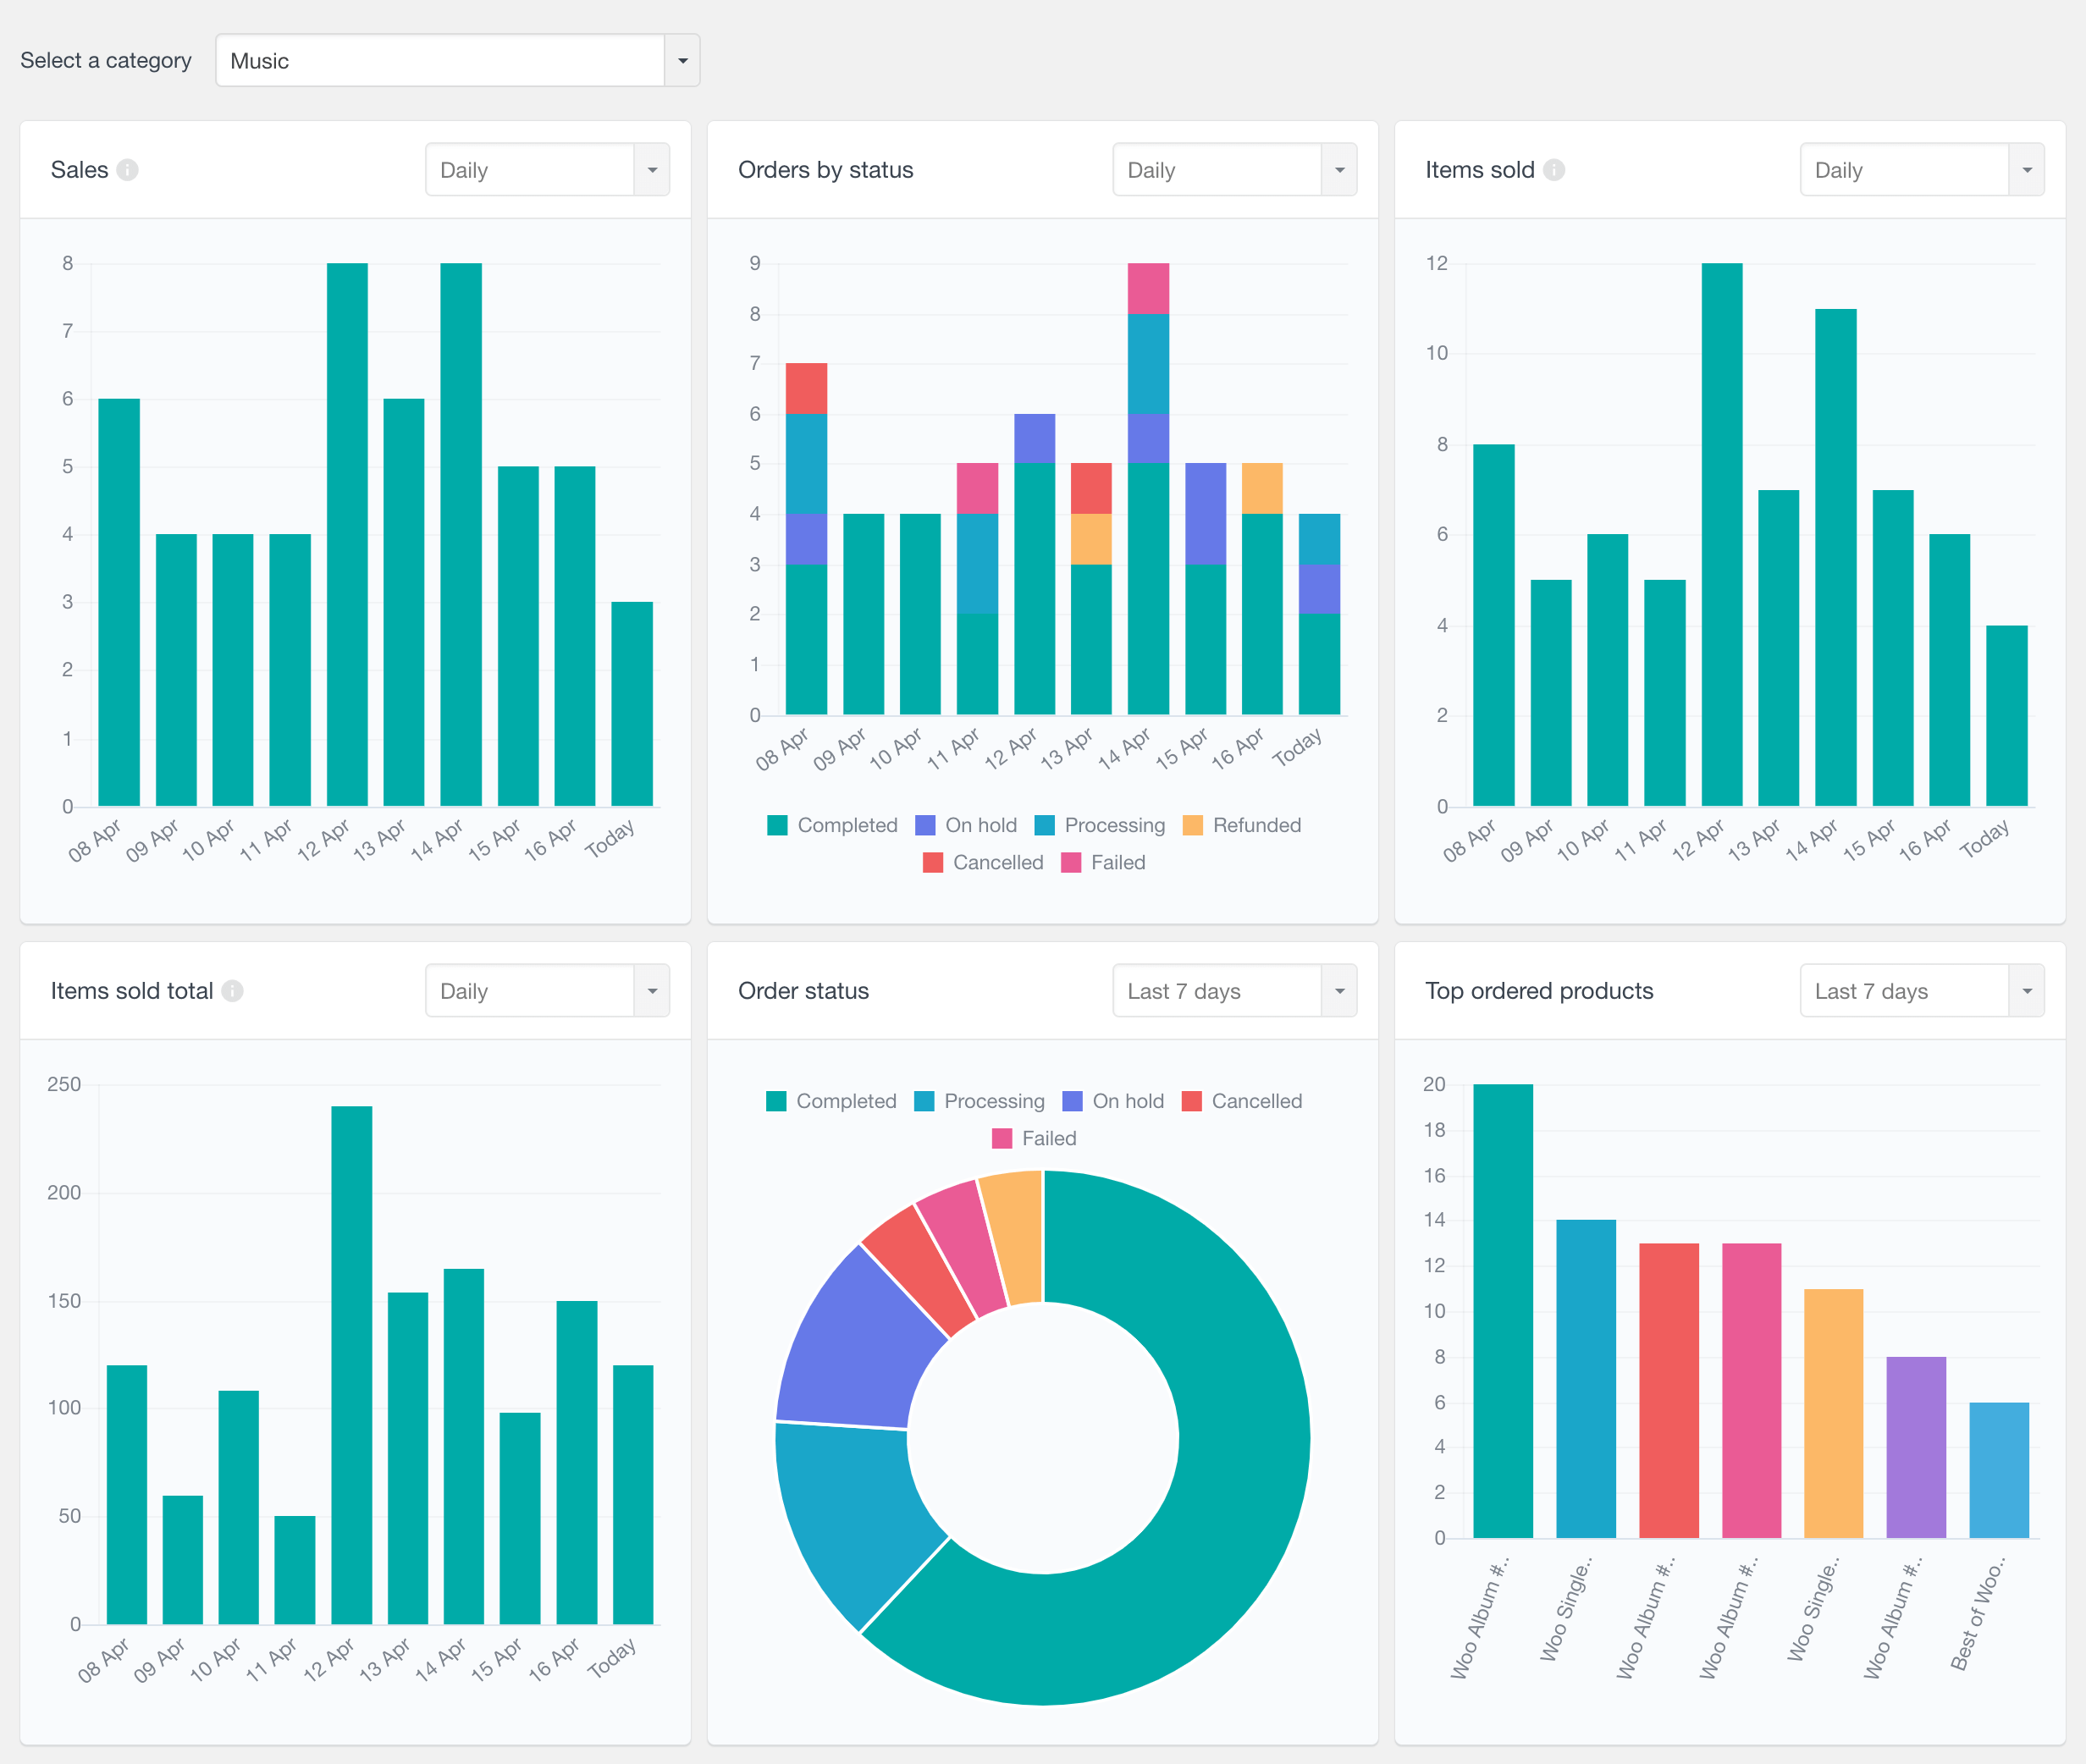
If you select a parent category, the reports will cover all products within that category and its subcategories.
Conclusion
This article explores different ways to add WooCommerce categories to your menu, including those for your best-selling products. If you use a traditional theme, you can easily do it through the dashboard. If your theme uses blocks, you can still manage it conveniently through the Site Editor. There’s also a programmatic way for those who like to get hands-on with code. And if plugins are your thing, there’s an option, too. Whatever your preference, there are a variety of approaches to seamlessly include product categories in the menu, ensuring smooth navigation for visitors to your WooCommerce store.