Users Insights can be easily translated. In order to use it in your own language, you’ll need to translate it as you would with any other theme or plugin. You can use this process as well to change other translations or just overall customize strings in your language.
One important note is that we recommend you sending us your translation so we can add them as community translations and they will be included in future theme releases. This way you won’t risk losing your translation (although we recommend you keeping a safe backup of it anyway).
Setting up a different language
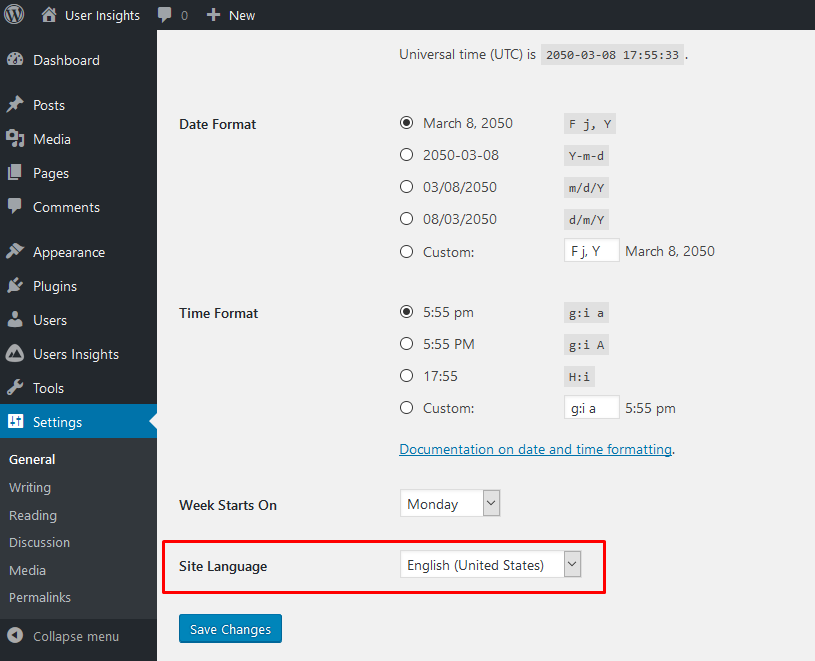
WordPress will look for a pair of files in order to apply a translation, they are .po and .mo files, and WordPress will only load the files corresponding to the current language set under your WordPress Dashboard > Settings > Language:

You first need to set your locale (change your WordPress language) in the previously mentioned section. Also, you can check the WordPress’ guide on how to translate WordPress itself (in case it isn’t in your language already).
Creating your translation files (.po and .mo)
After that, you need to create your own translation file for the plugin. This file has to be named usin-LANGUAGE_CODE.po and usin-LANGUAGE_CODE.mo. In our example we are creating a file for Brazilian Portuguese, therefore the file has to be named usin-pt_BR.po and usin-pt_BR.mo. You can check the list of the WordPress locales on the WordPress Translation page.
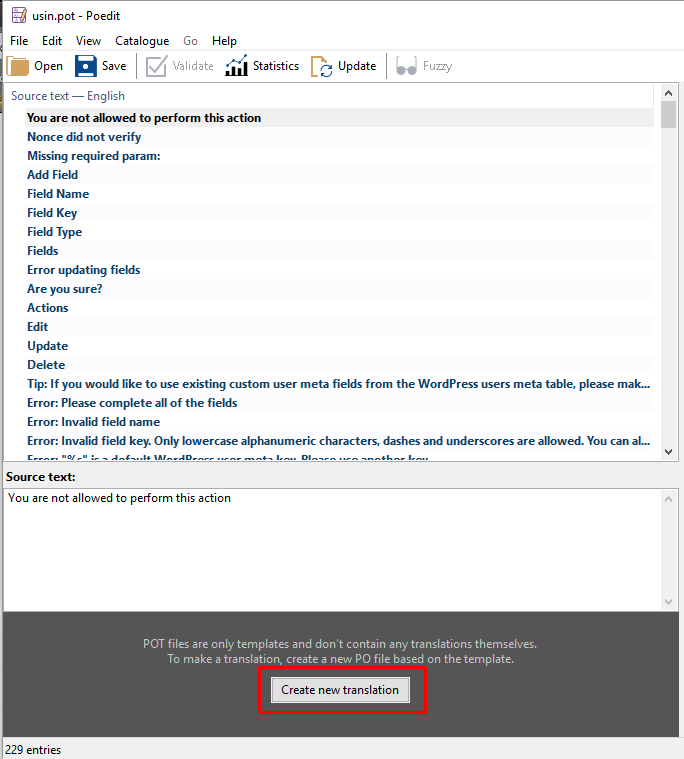
You’ll be able to find a usin.pot file inside of the /lang folder (wp-content/plugins/user-insights). Then open that file using a software like POEdit.
When you open that file with POEdit you’ll be able to start working by clicking the “Create new translation” button:

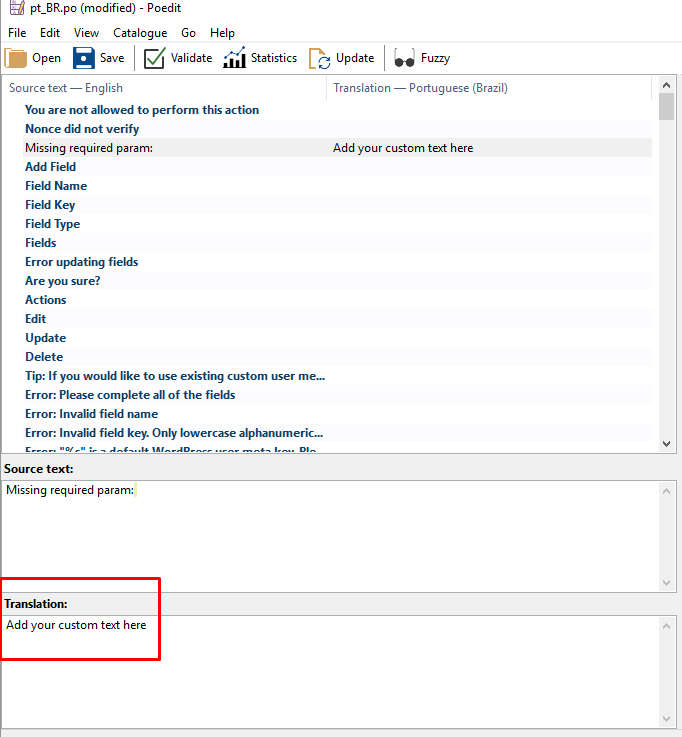
When you do that you’ll be able to translate each of the source texts you see by clicking them and adding the translation in the translation field:

Repeat this process until the entire file is translated (or at least the strings you want to). After that click “Save”, don’t forget to keep the same file name as usin + your locale – and POEdit will add the locale. If you set it to something else WordPress won’t be able to recognize it as a language file for your current language. You’ll also need to move that file to the lang folder of the plugin (if it isn’t there already):

That’s all! Just make sure to keep a safe backup of this file (in case you update your plugin for example) and if possible send that to our team, so you won’t need to reapply the translation in each update.
