How to create and manage event registration with WordPress
Organizing and managing an event can be quite complex. There are so many different moving parts to handle. Additionally creating a system to allow users to register for the events can be tricky and expensive, but luckily WordPress has many tools to help you do this. In today’s article we’ll look into the WordPress event registration process and how to manage events more efficiently in WordPress. Additionally, we dive into the many advantages of this approach to create long-term relationships with your attendees.
For many industries events are integral part of the way business is run. They are used to generate leads, create new content and for marketing new products and services.
For many industries events are integral part of the way business is run.
As everything in life, events have some costs and some benefits. Undoubtedly an online tool can help you improve on both fronts. If we use WordPress event registration and payment we can cut a lot of the costs and simplify our life at the same time.
By using WordPress event registration, everything is handled through your website and inside the same database. This allows you to collect user information like attendees location, profile, past purchases etc. This enables us to go from simple event-to-event management to lifetime relationships.
Without further ado, let’s get into our events setup and processing.

What event registration system should do
Now that we know how good an event registration system can be, let’s go over each of its parts. There are a few key components to help your users understand your site and register.
Our first component is the event itself. Be it the next TEDx event or a local stamp collectors gathering, we need to create a page for it. This page tells our users what they should expect when they get there. This page is one of the most important pieces of communication, as it’s where you actually offer the event.
Often videos and a detailed program should be on this page. Key influencers or speakers could be there as well. The event organizers’ information, as well as other pages (such as a dedicated website), are nice as well.
The next piece for our WordPress event registration site is the event location. A detailed page with the venue map, contact information, and common routes is crucial. It’s always good to include some photos or videos as well, therefore users will know what to expect.
If you want online sales, you need an event registration form, as well as payments handling. These pages should be as simple as possible. Additionally, it’s important that they integrate with your WordPress event registration system. In this way, you can sell tickets in the same page you advertise them.
Finally, we have the event management system as a whole. This is an important part of your strategy, even though your users won’t even see it. It is composed of your events registration WordPress plugin, tickets selling WordPress plugin, and an analytics tool. In our case, it’s the Events Calendar plugin, the Event Tickets plugin and the Users Insights plugin.
Creating Event registration system with WordPress and Events Calendar Pro
Let’s go over the details of actually creating your event registration in WordPress. Therefore, we need to translate everything we mentioned above into an actual WordPress site. As we saw, you need to install:
We should start by the plugin setup. Overall The Events Calendar comes with a good set of predefined rules. But if you want to sell tickets we need to set up a payment gateway. You can do that under Events > Settings > Tickets > Enable Tribe Commerce. Then make sure you set up all the main PayPal configs.
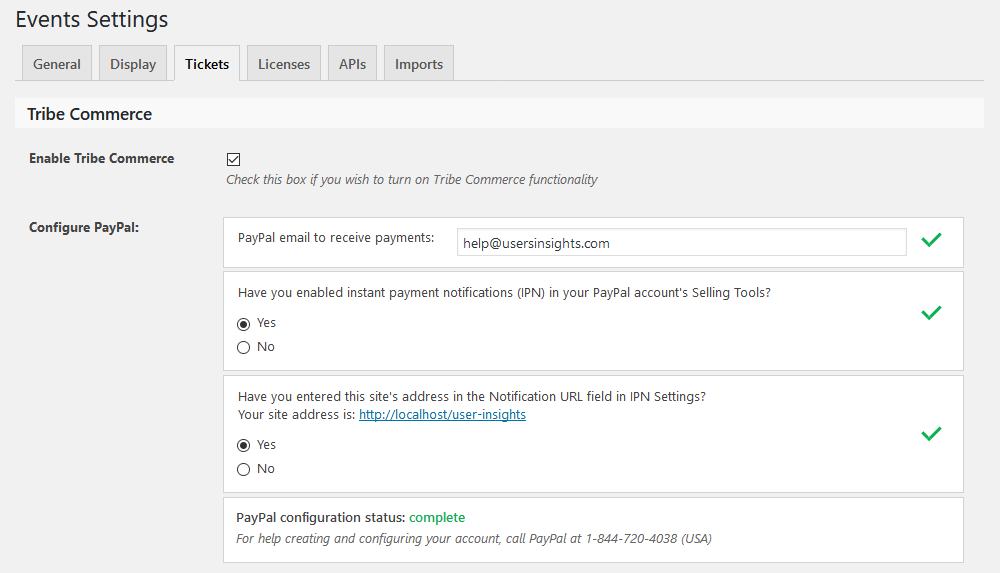
If we don’t do that we won’t even see the ticket sale option in our site.
Next, we create the events page. You can do that under Events > Add New. Make sure to add all your event details, such as date and a nice description.
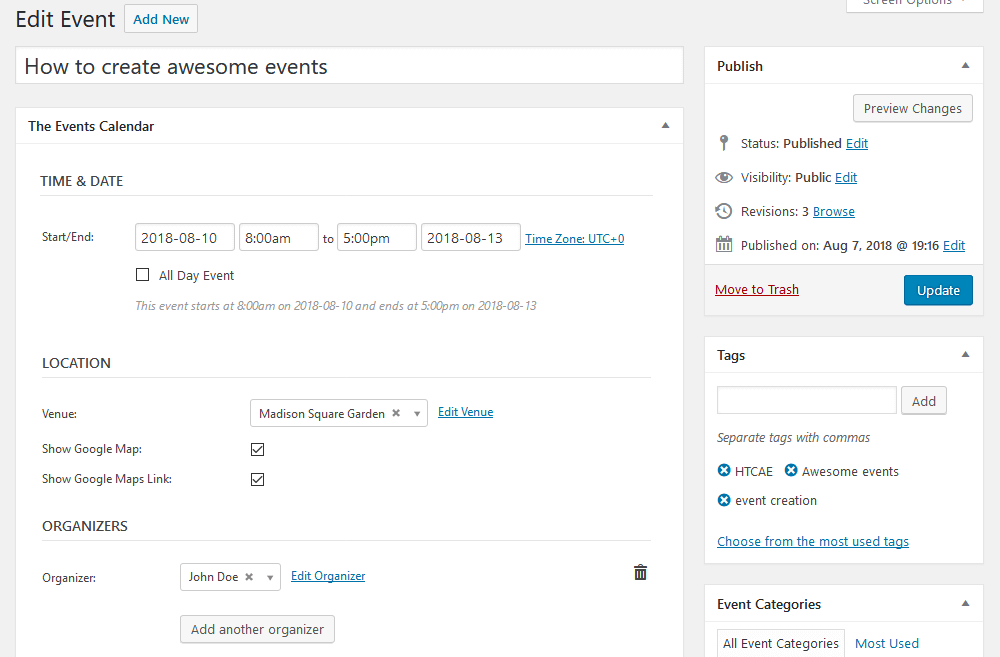
Then under the “Tickets” Option, you can add RSVP or Tickets. The tickets can be sold if you want, and you can add a predefined amount for each ticket tier.
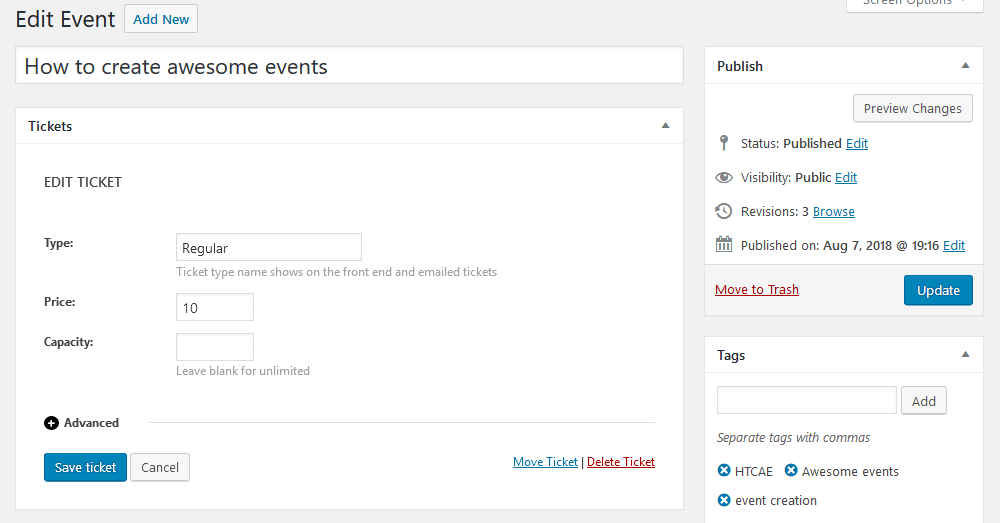
As far as events registration goes that’s all you need. You can too add your Venue details under Events > Venues. Additionally, you have more options for better events display, but now you are ready to sell your tickets!
Once you have some sales or RSVP you can check them by clicking the “View Attendees” or “View Orders” buttons.
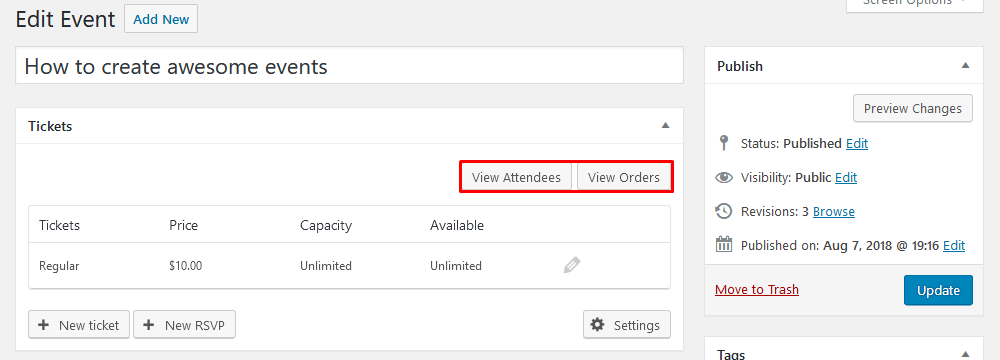
It’s time to see what happens after your sales. We can track down our users and learn more about them.
Managing events attendees with Users Insights
It’s very likely that you are in business for the long run. Therefore, a repeat buyer is something you want to cherish. With Users Insights it’s possible to check many aspects of your WordPress event registration site.
It’s possible to check users who have RSVP’d any events (the amount) or a particular event. This is useful in your event planning as you know which users are going to be there.
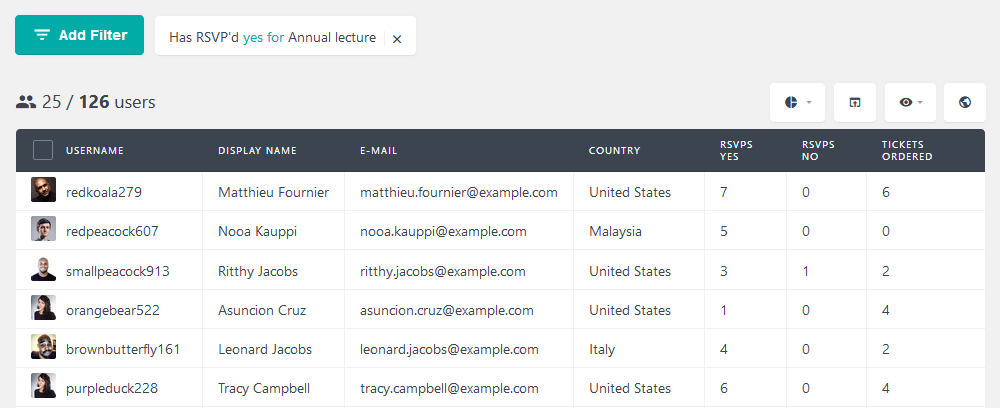
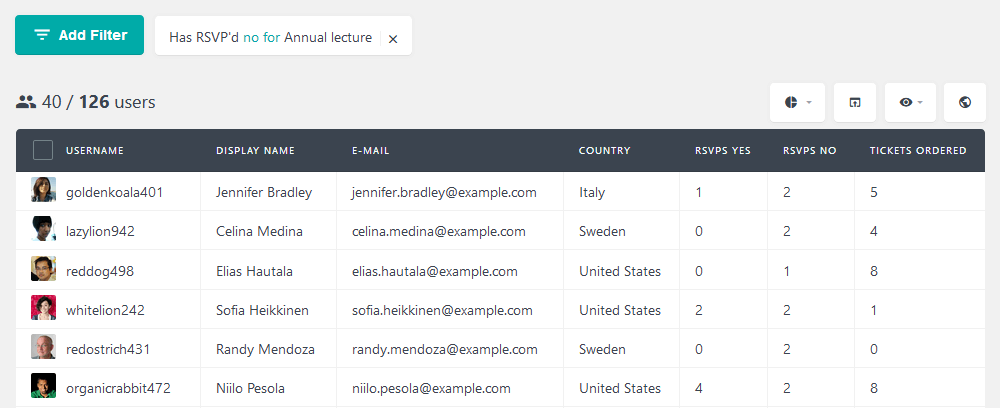
Sometimes more importantly than the ones that are going are the ones that aren’t. In this way, you know if you can pass the tickets to other users. This can be done with the reverse search, “Has RSVP’d no for”:
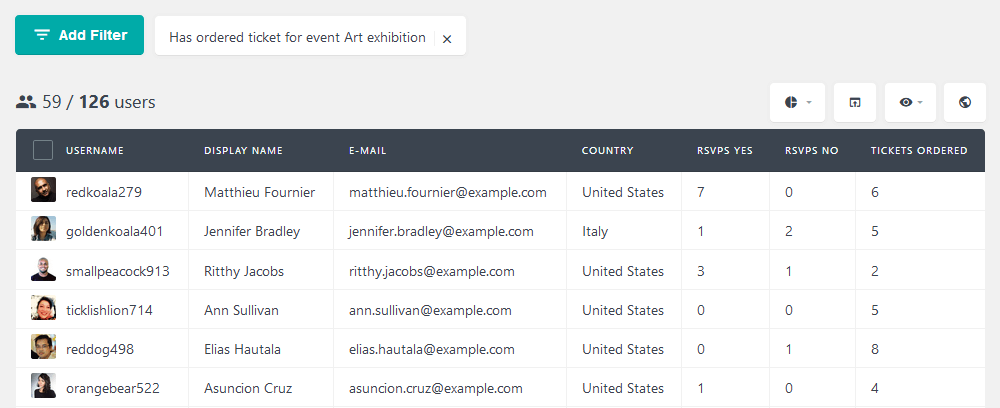
When planning your next event, you may want to check some past data. For example, you can check users who have ordered a similar event and offer them a good deal. This can be done with the “has ordered ticket for event” filter:
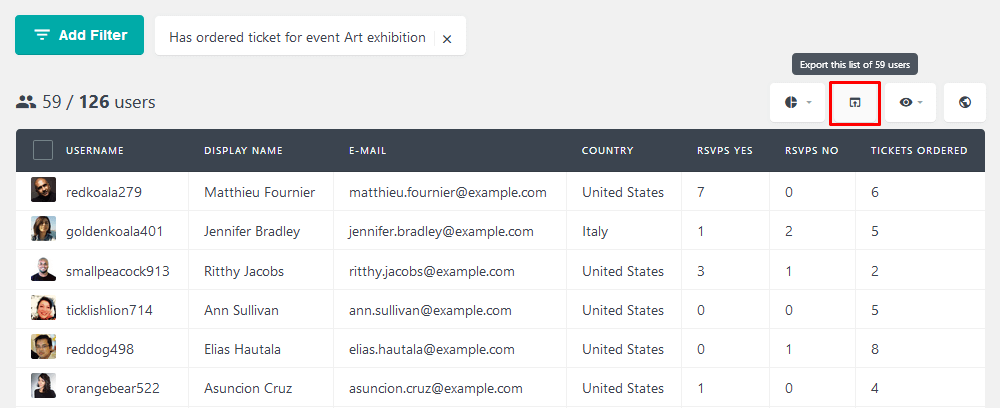
And if you want to get in touch with them using an external tool it’s possible to export your users. If you want to send them an email via Mailchimp, for example.
In case you want to know your customer base, finding your loyal customers is a great first step. For that, we have the “tickets ordered” filter. It allows us to find users with a set number of tickets, or just users with more than X tickets.
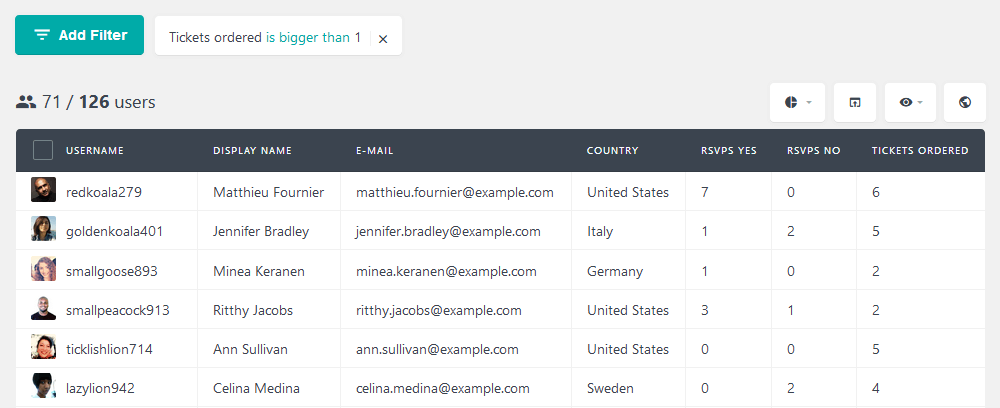
Here is a list of all the possible filters we have at the moment for your WordPress event registration site:
- RSVP yes is / is bigger than / is smaller than X
- RSVP no is / is bigger than / is smaller than X
- Has RSVP’d yes for / no for / any for / none for [event name]
- Tickets ordered is / is bigger than/ is smaller than X
- Has ordered ticket for event [event name]
- Has not ordered ticket for event [event name]
- Events created is / is bigger than / is smaller than X
Conclusion
Today we say how to create a WordPress event registration site. We went from the basics of event sites to which plugins you can use. Additionally, we saw how to create an event registration form in WordPress, and how to sell event tickets. Our final step was filtering and searching our users based on their events ordered or RSVP’d.
We hope you enjoyed and see you again next time!
