How to group your Paid Memberships Pro members for a better organization
Today we’ll talk about how to group your Paid Memberships Pro members for a better organization. We will discuss the benefits of creating and managing groups for your Paid Memberships Pro members. We will also dive into combining group filters with other filters to achieve our desired results and strive for a better organization with great customer experience on your website.
If you are running a site with Paid Memberships Pro installed, you can create public and private social communities for unique interest groups. This is specifically very useful when you are dealing with a large number of users and you want to group them in different categories. The user groups are designed to be used internally, so it’s easier for you and your team to organize and search the users based on their groups.

Creating member groups
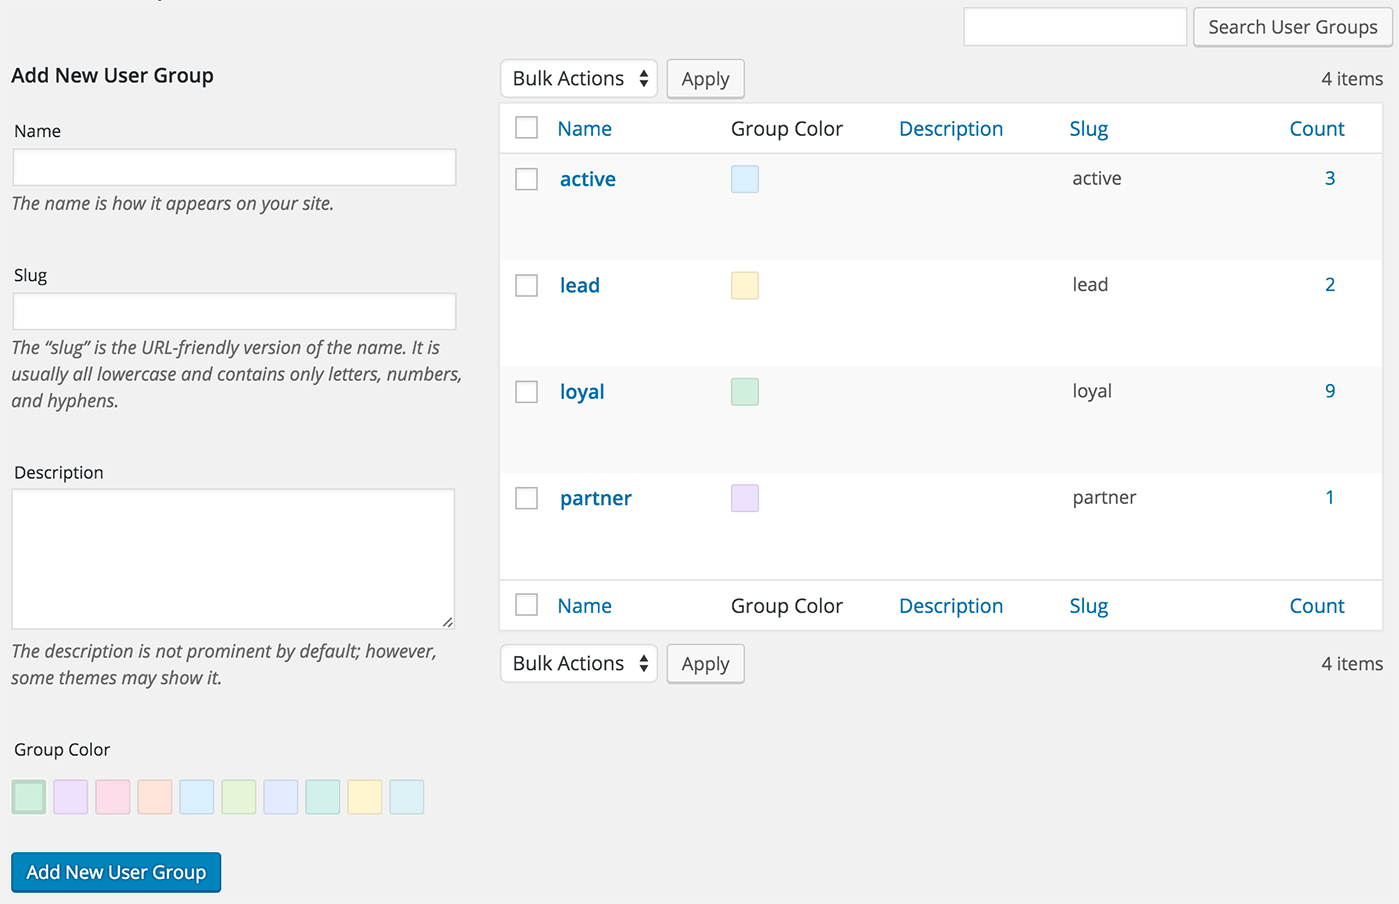
You can create new groups from the Users Insights > User Groups section. You can set a name, color and description for each group you create, so it gets easy for you to visualize the groups in the Users Insights table. This is helpful because you are able to quickly understand which group a user belongs to, just by looking at the group color.
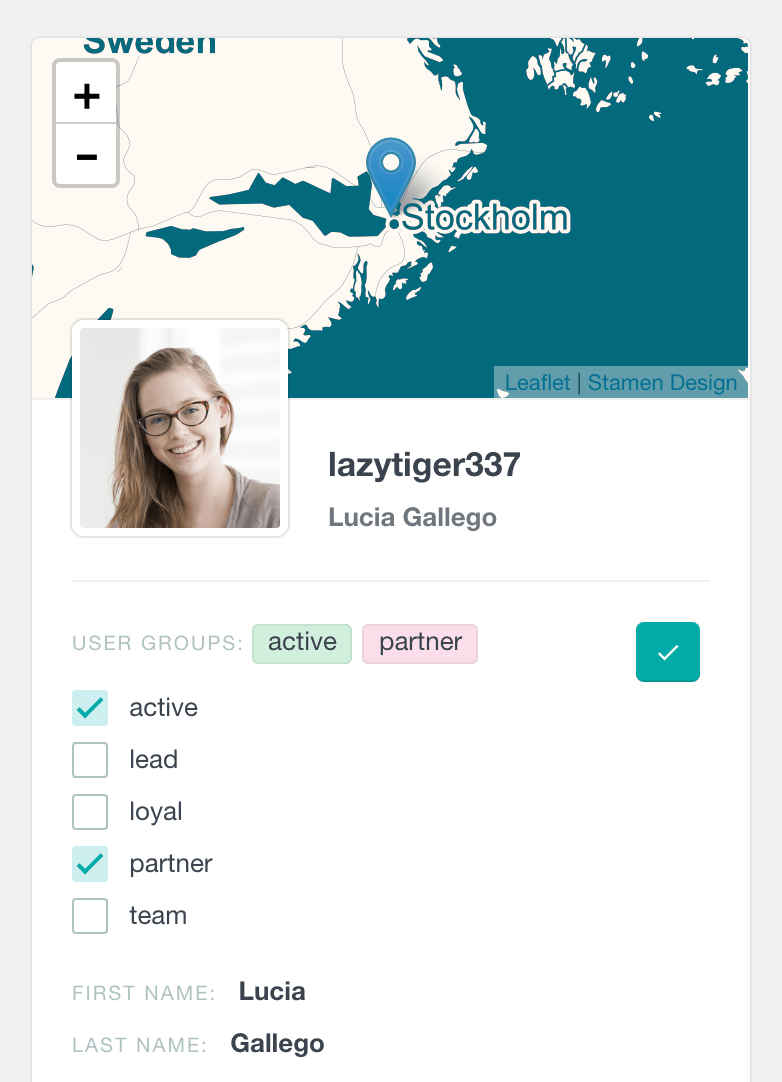
 After you have finished creating the groups, you can modify the group settings for each member in the user profile section of the Users Insights plugin. You can associate a person with more than one groups or remove them from one or more groups.
Bulk assigning members to a group
Instead of assigning members to a group one by one which is a tedious and a monotonous task, you can bulk assign them. This means that you can select multiple users and assign them to a group altogether. To do this, select the users you want to add to a group and click on Bulk Actions > Add to group.
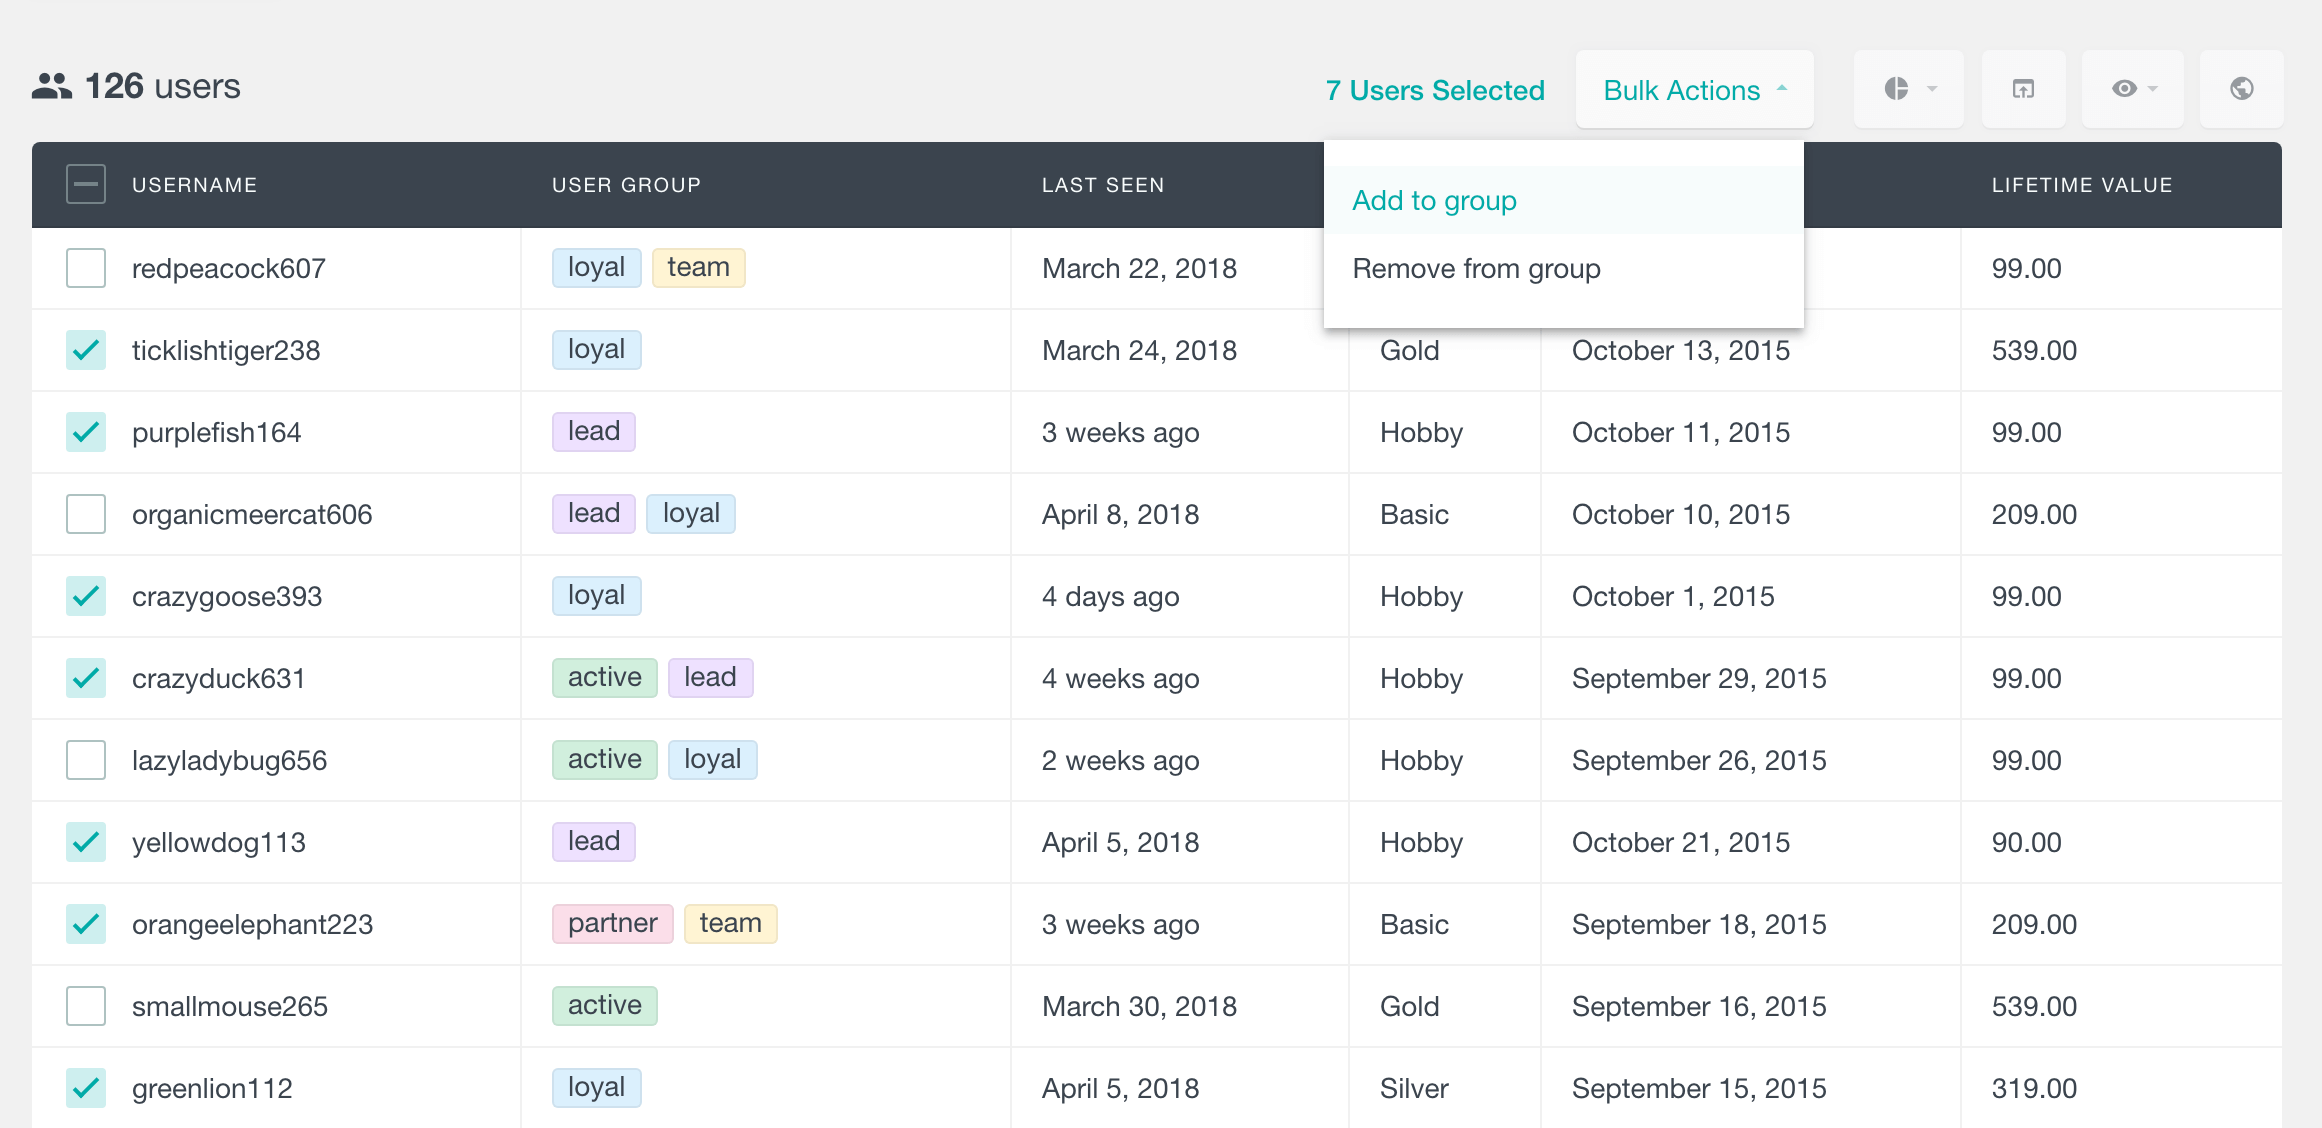
If you want to add all the displayed users to a group, click on the checkbox next to the Username heading on the table and then click Bulk Actions > Add to group.
Filtering members by the group they belong to
Our core purpose for adding the users to groups was so we could filter these members by the group that they belong to. You can do some pretty interesting things by applying filters to see whether the users belong to or do not belong to a specific group. Additionally, you can also apply filters to see the users associated with no groups or find users with at least 1 group assigned.
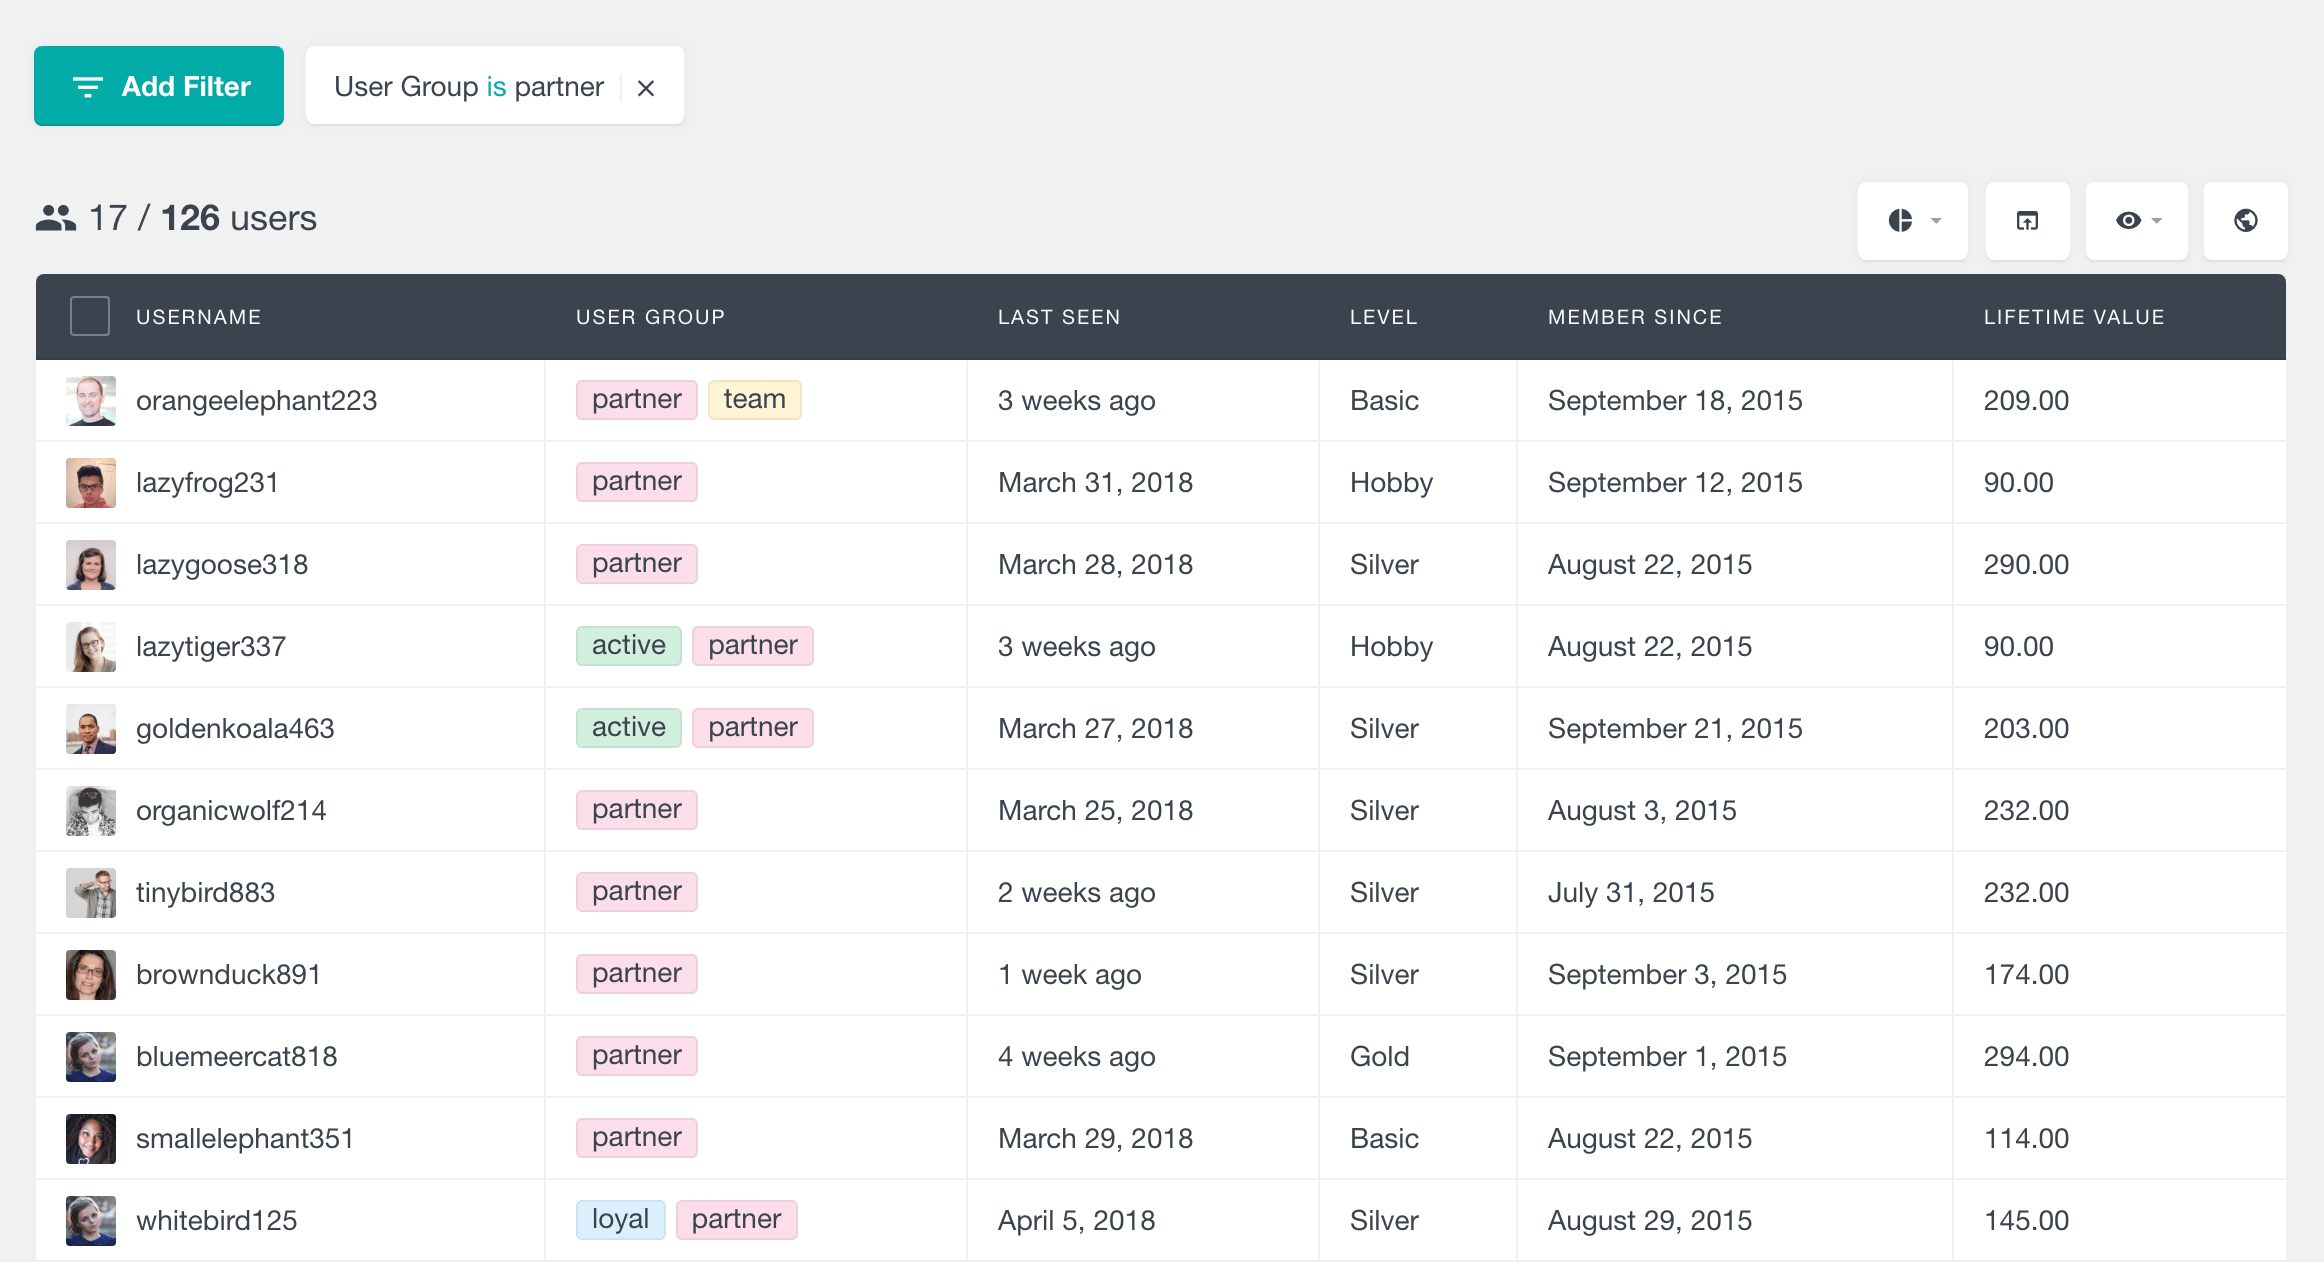
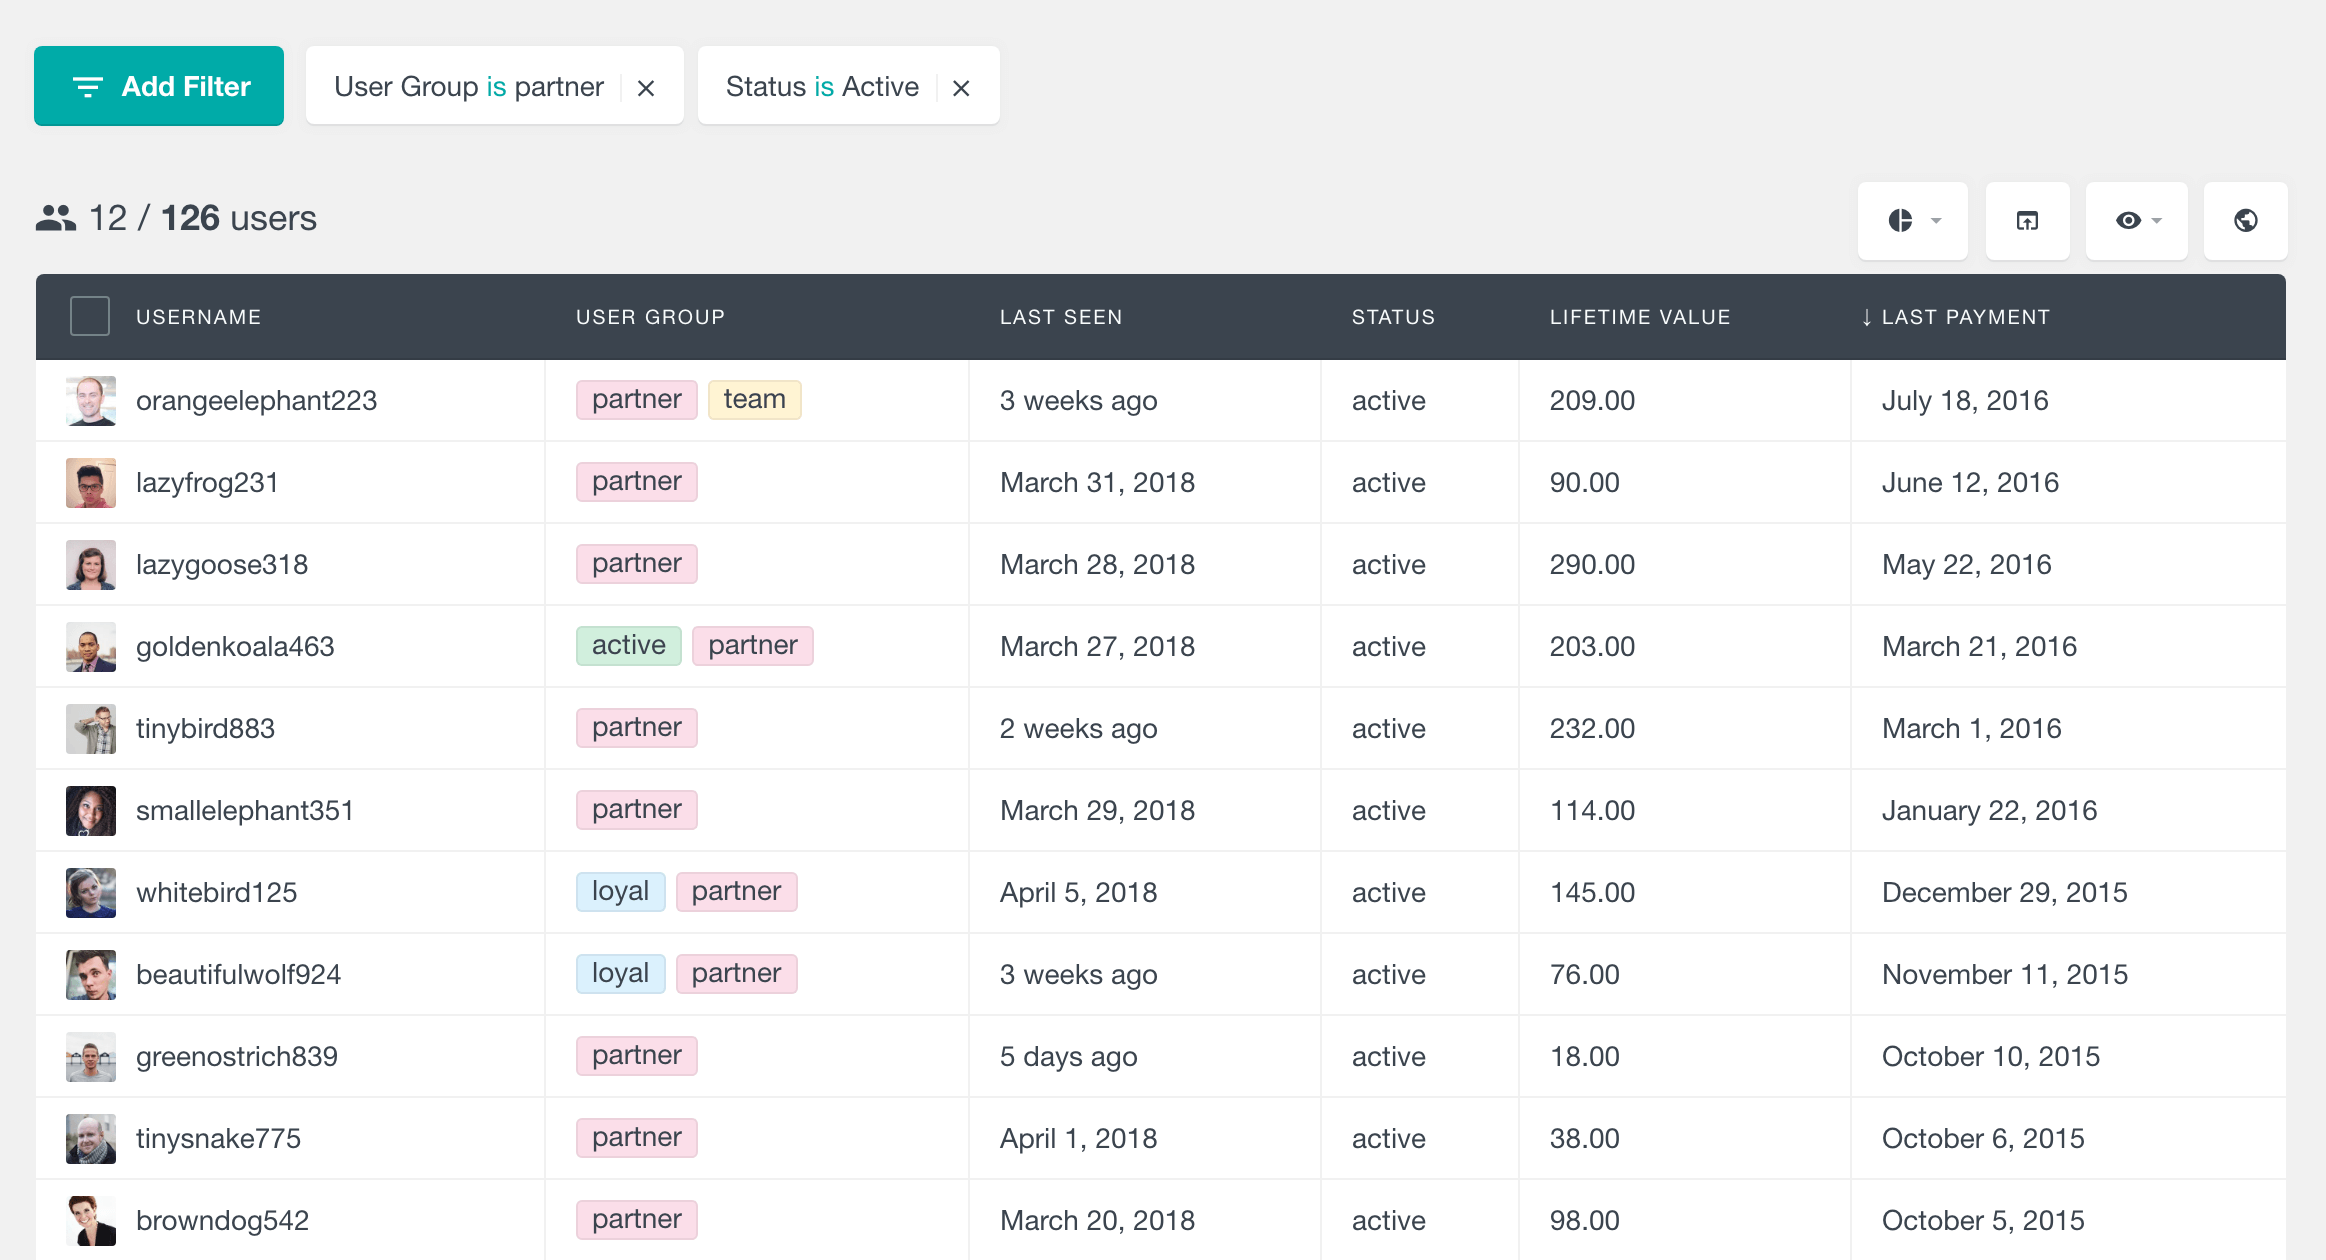
Let’s take a look at that with an example where we want to find all the users assigned to a selected group. We will apply a filter called “User Group is [group name]” that gives us the list of users added to that group.
Let’s play along with the filters a bit to get more specific results. For example, if you need to find all the users from a group, who have an active membership, you can combine the “Status” and “User Group” filters together. We could export these users to so send them newsletters via email or include them in any of our marketing campaigns.
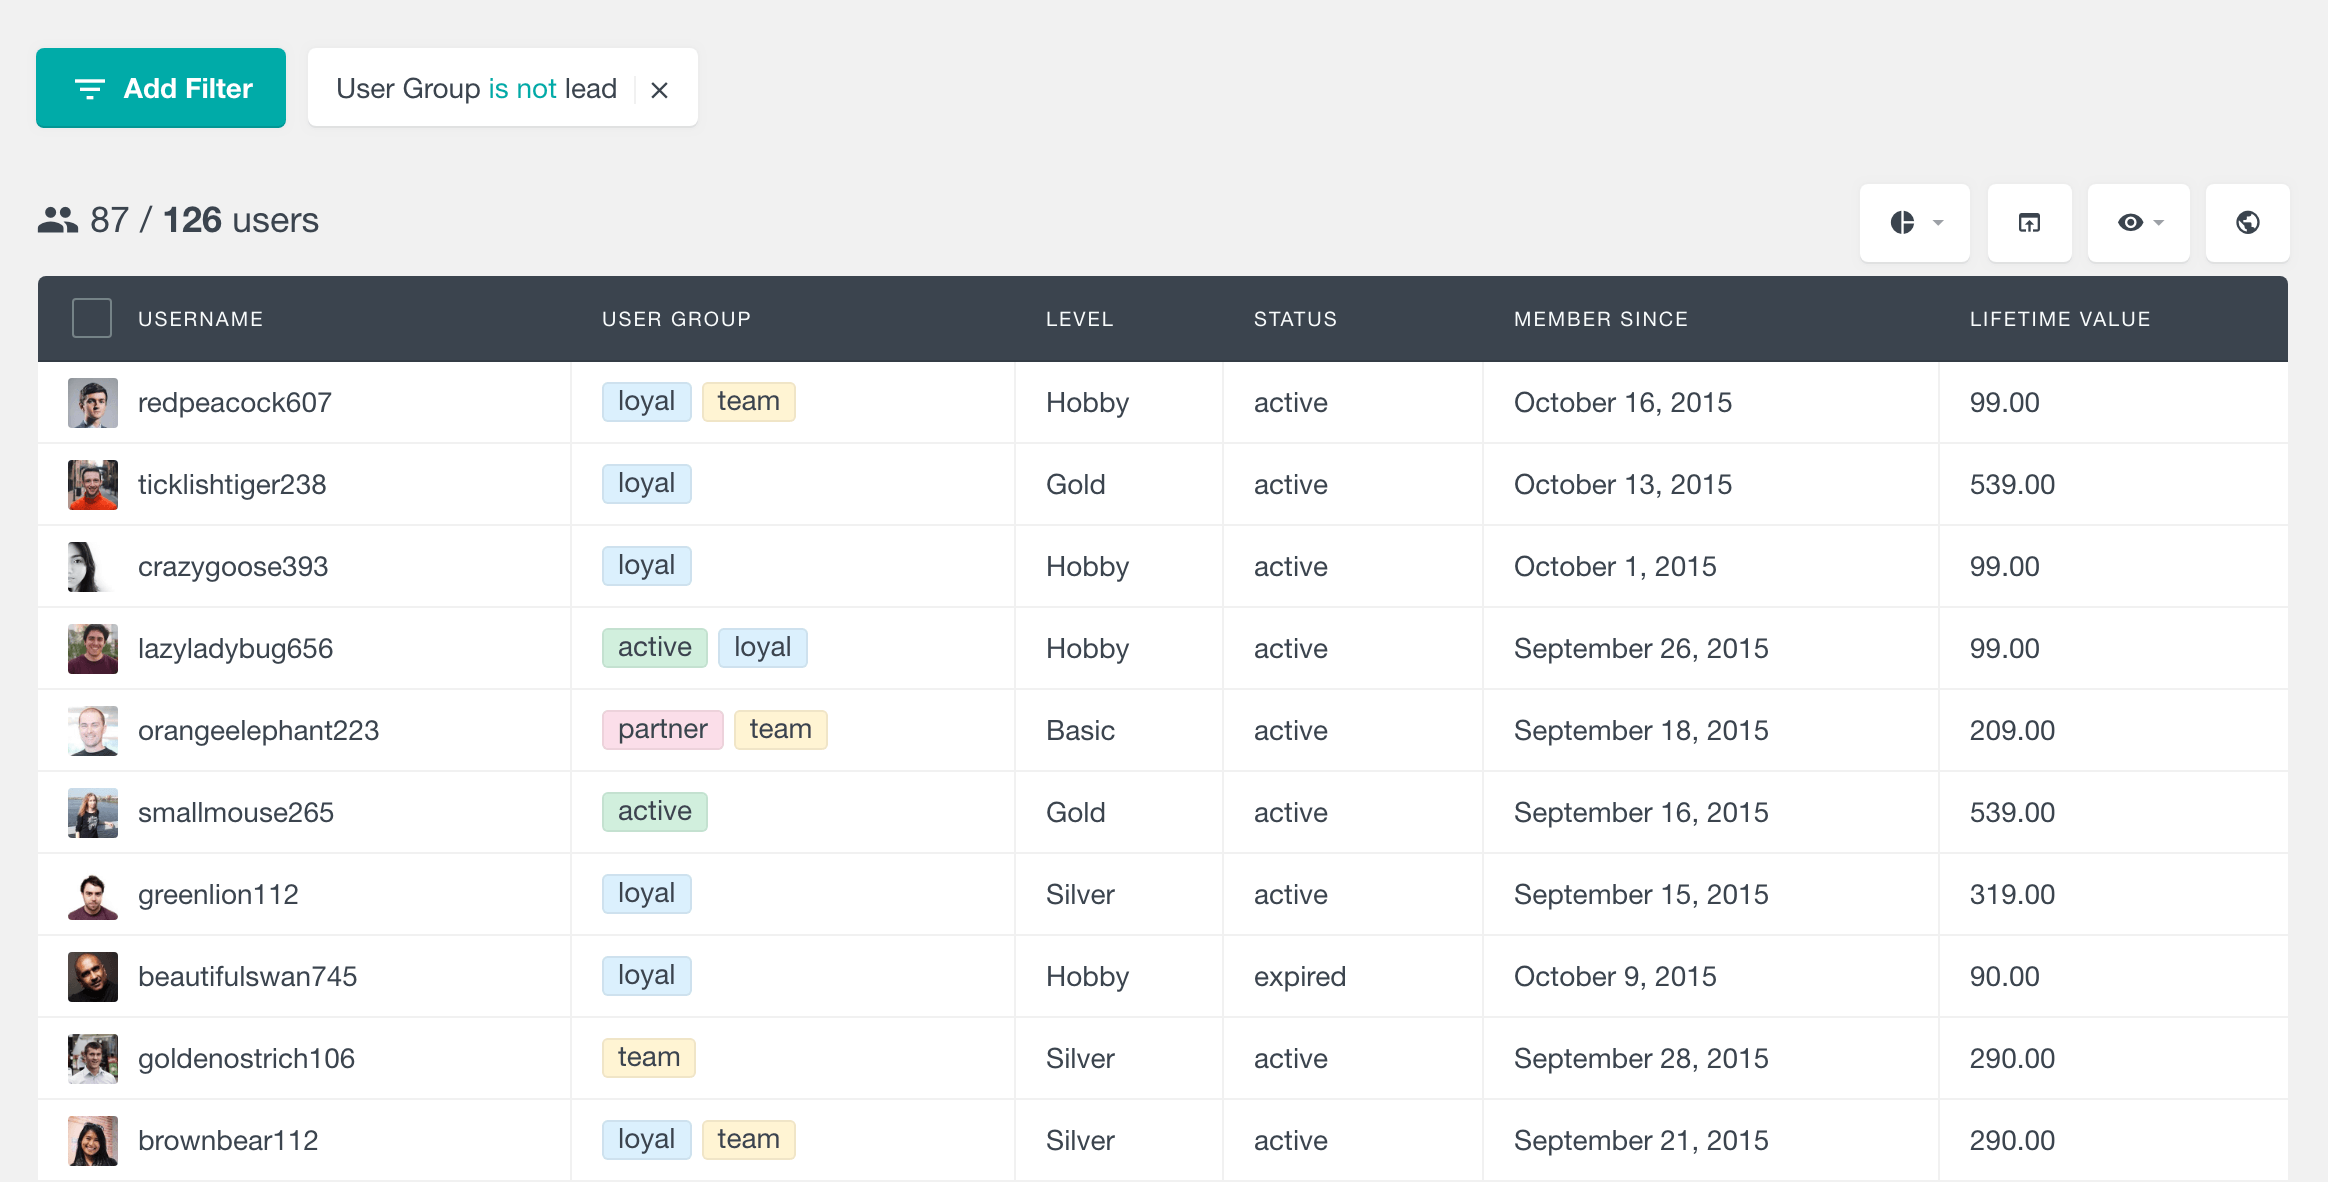
Using the same filter, you can get the list of members who are not assigned to any group.
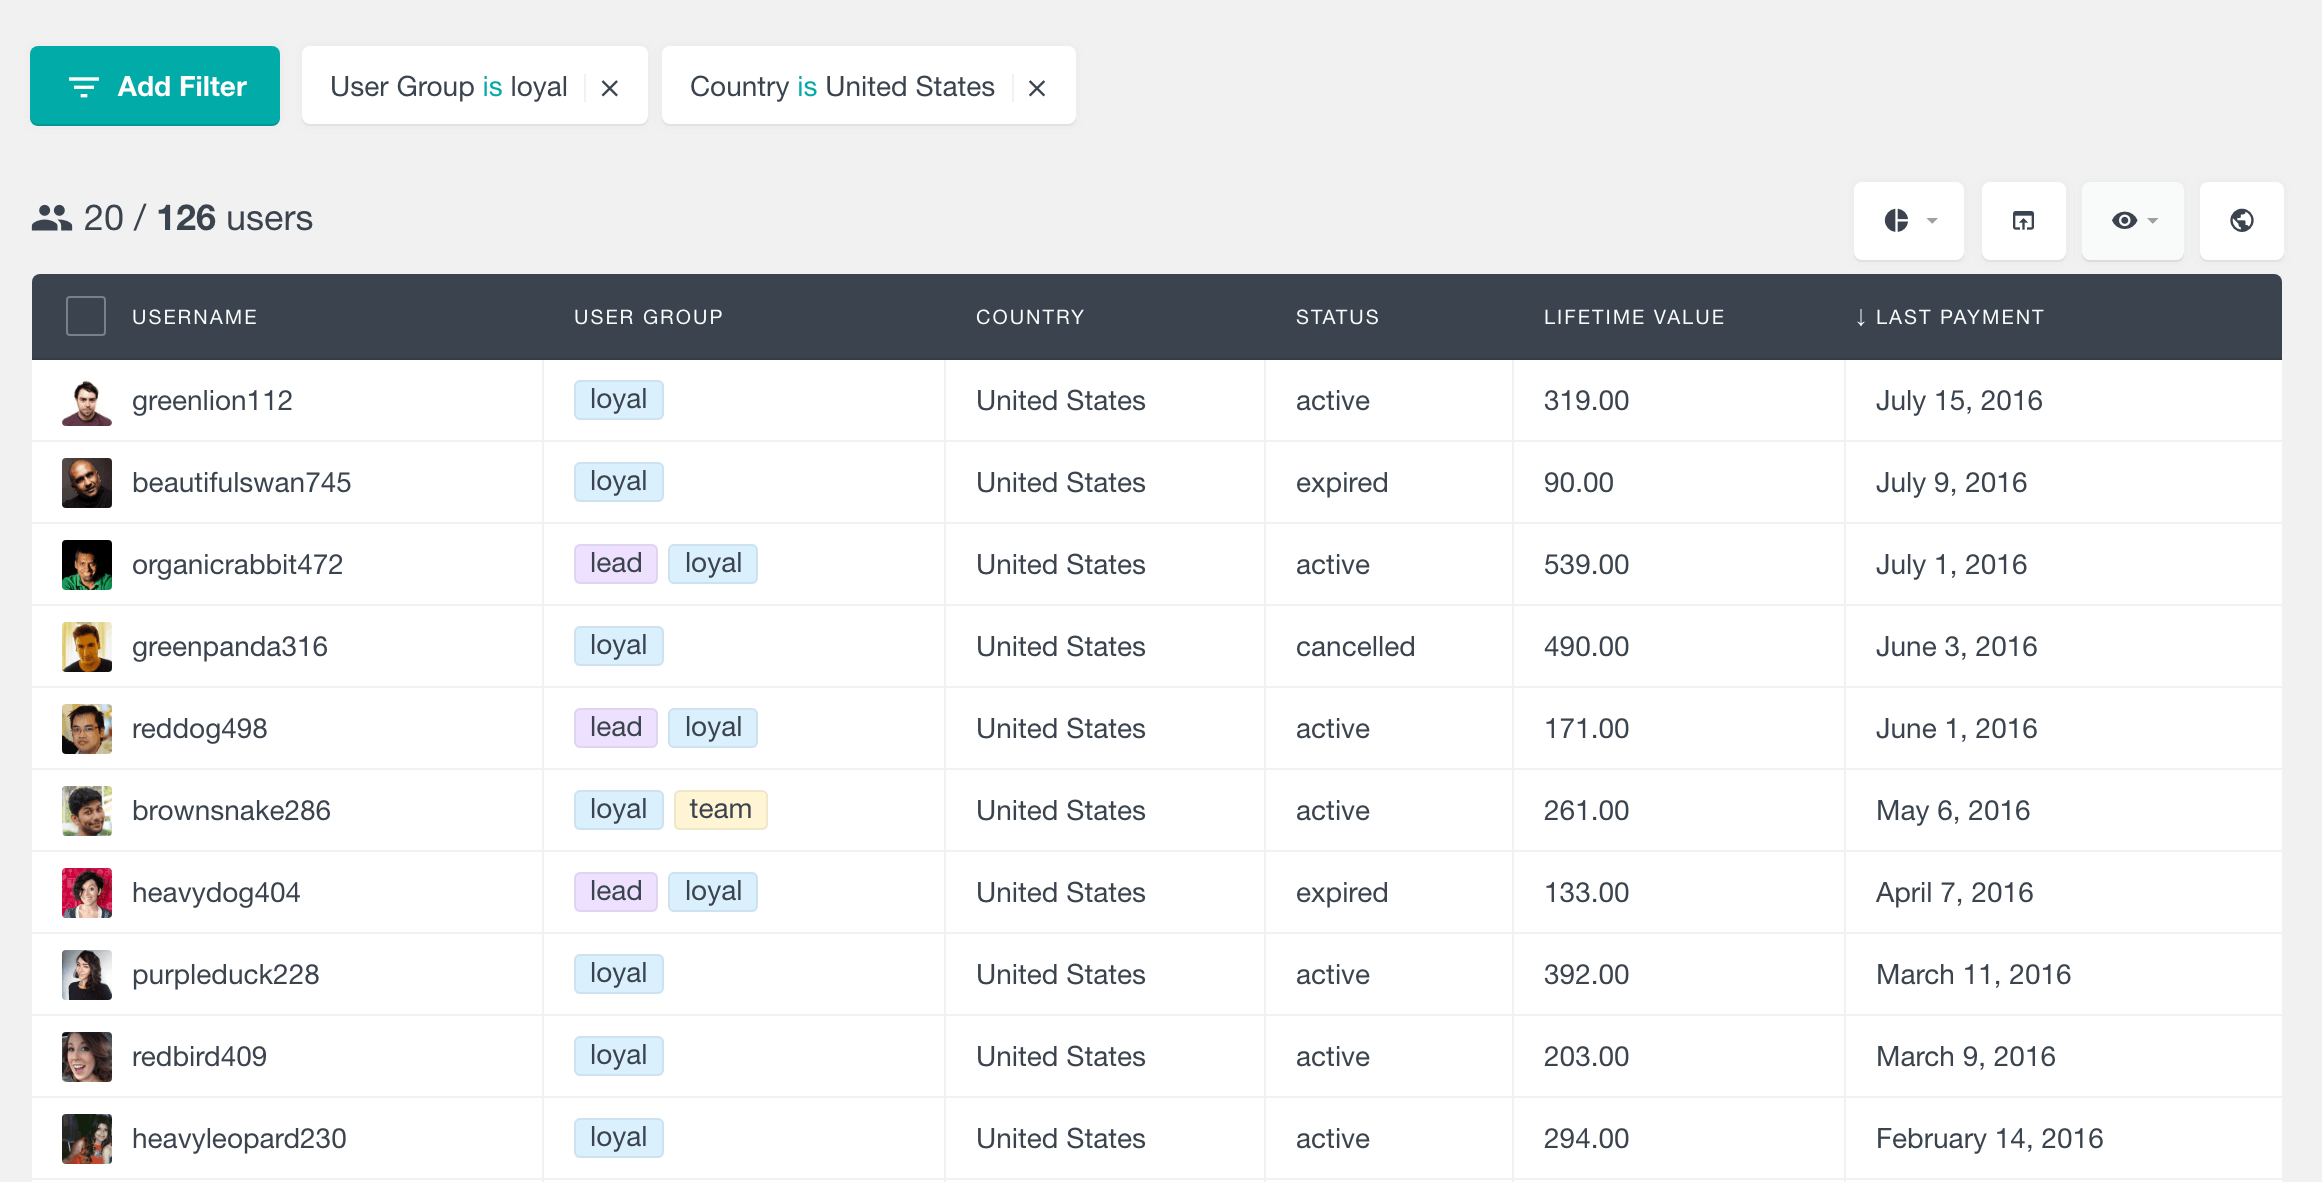
Then you can use this list to add them into a relevant group if you want. Similarly, we can use the group filters with other filter such as the Country filter if we have special offers for the users based on their locations.
Member groups Vs. User segments
Although both these two are closely related in terms of functionality, there is a difference that we will learn here. Member groups are created to bring together the same type of users or to categorize the users in terms of the ways they interact with your membership website. However, user segments is something that lets you save a set of custom smart filters that you can later use, instead of applying the filters every single time.
Another notable difference between these two is that user segments are dynamic. This means that if a new user fulfils the requirements of a specific segment, it will be automatically added to that user segment. However, in groups, you have to manually add a new user meeting the required criteria.
Let’s clarify the difference with the help of an example. While running a membership business, many times you will feel the need to pull out a list of your most active subscribers. This could be because you might want to offer them special subscription packages or engage them in some other offer.
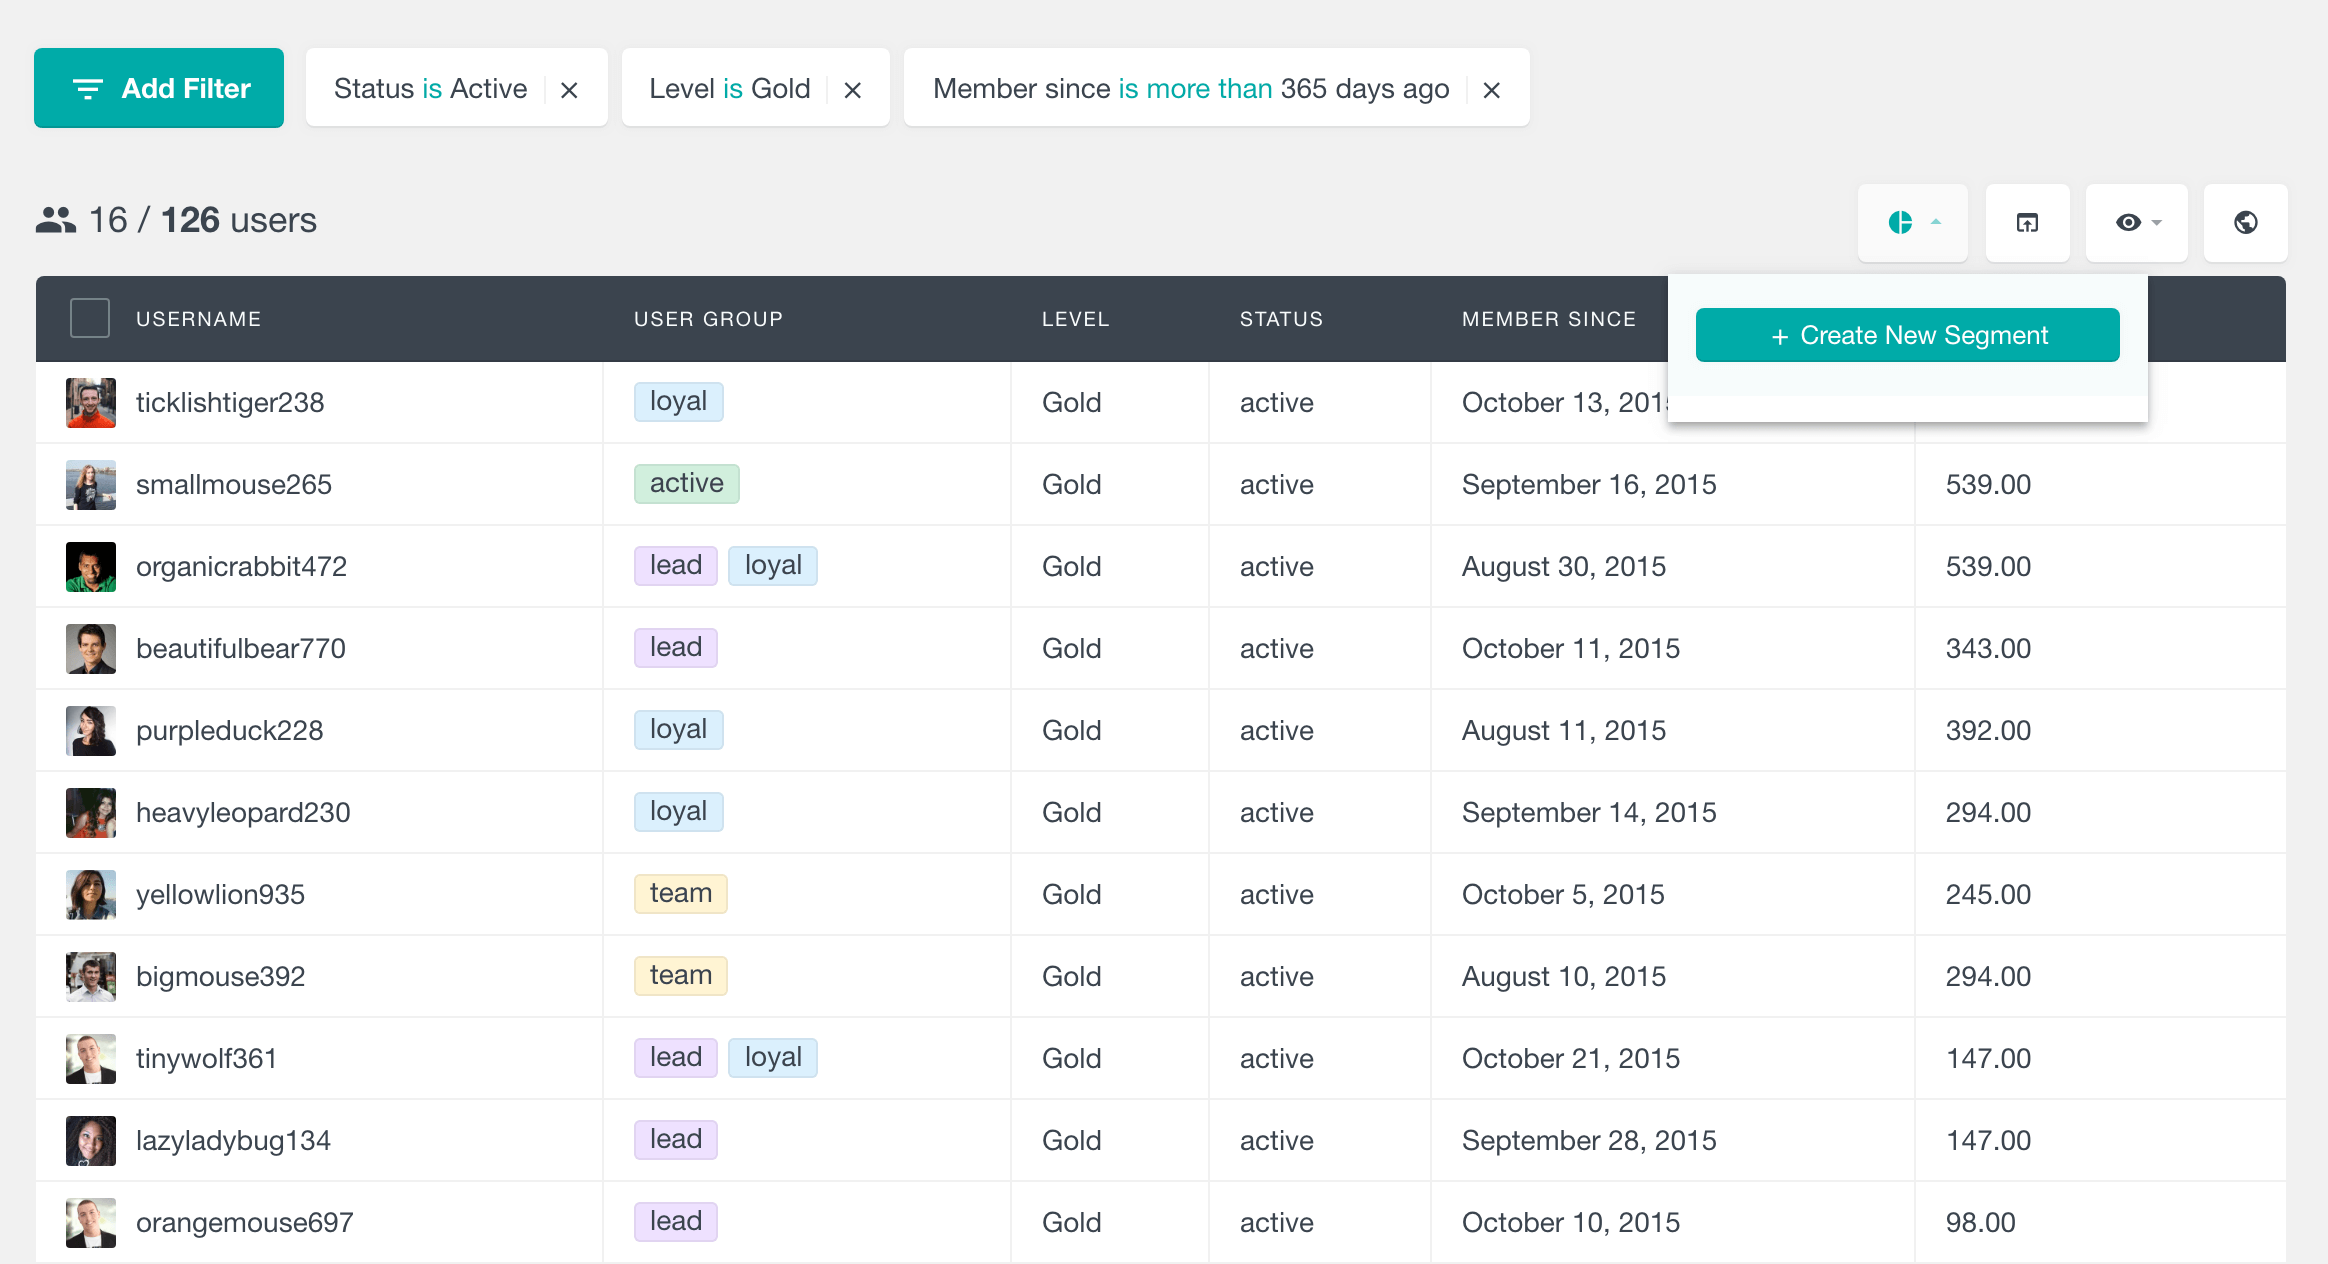
Now, if you have at least one or more filters applied, you can create a segment and name it so that it can be used instantly in the future.
Exporting group members and user segments
If you want to export your group members or user segments, you can easily achieve that by using the Users Insights export feature. You can apply any of the available filters and select which columns to export. Once you are happy with the results displayed on the table, just click on the Export button. This will export the table in its current state in a CSV format. This includes filters (or segments applied), visible columns selected and the current sorting order of the table.
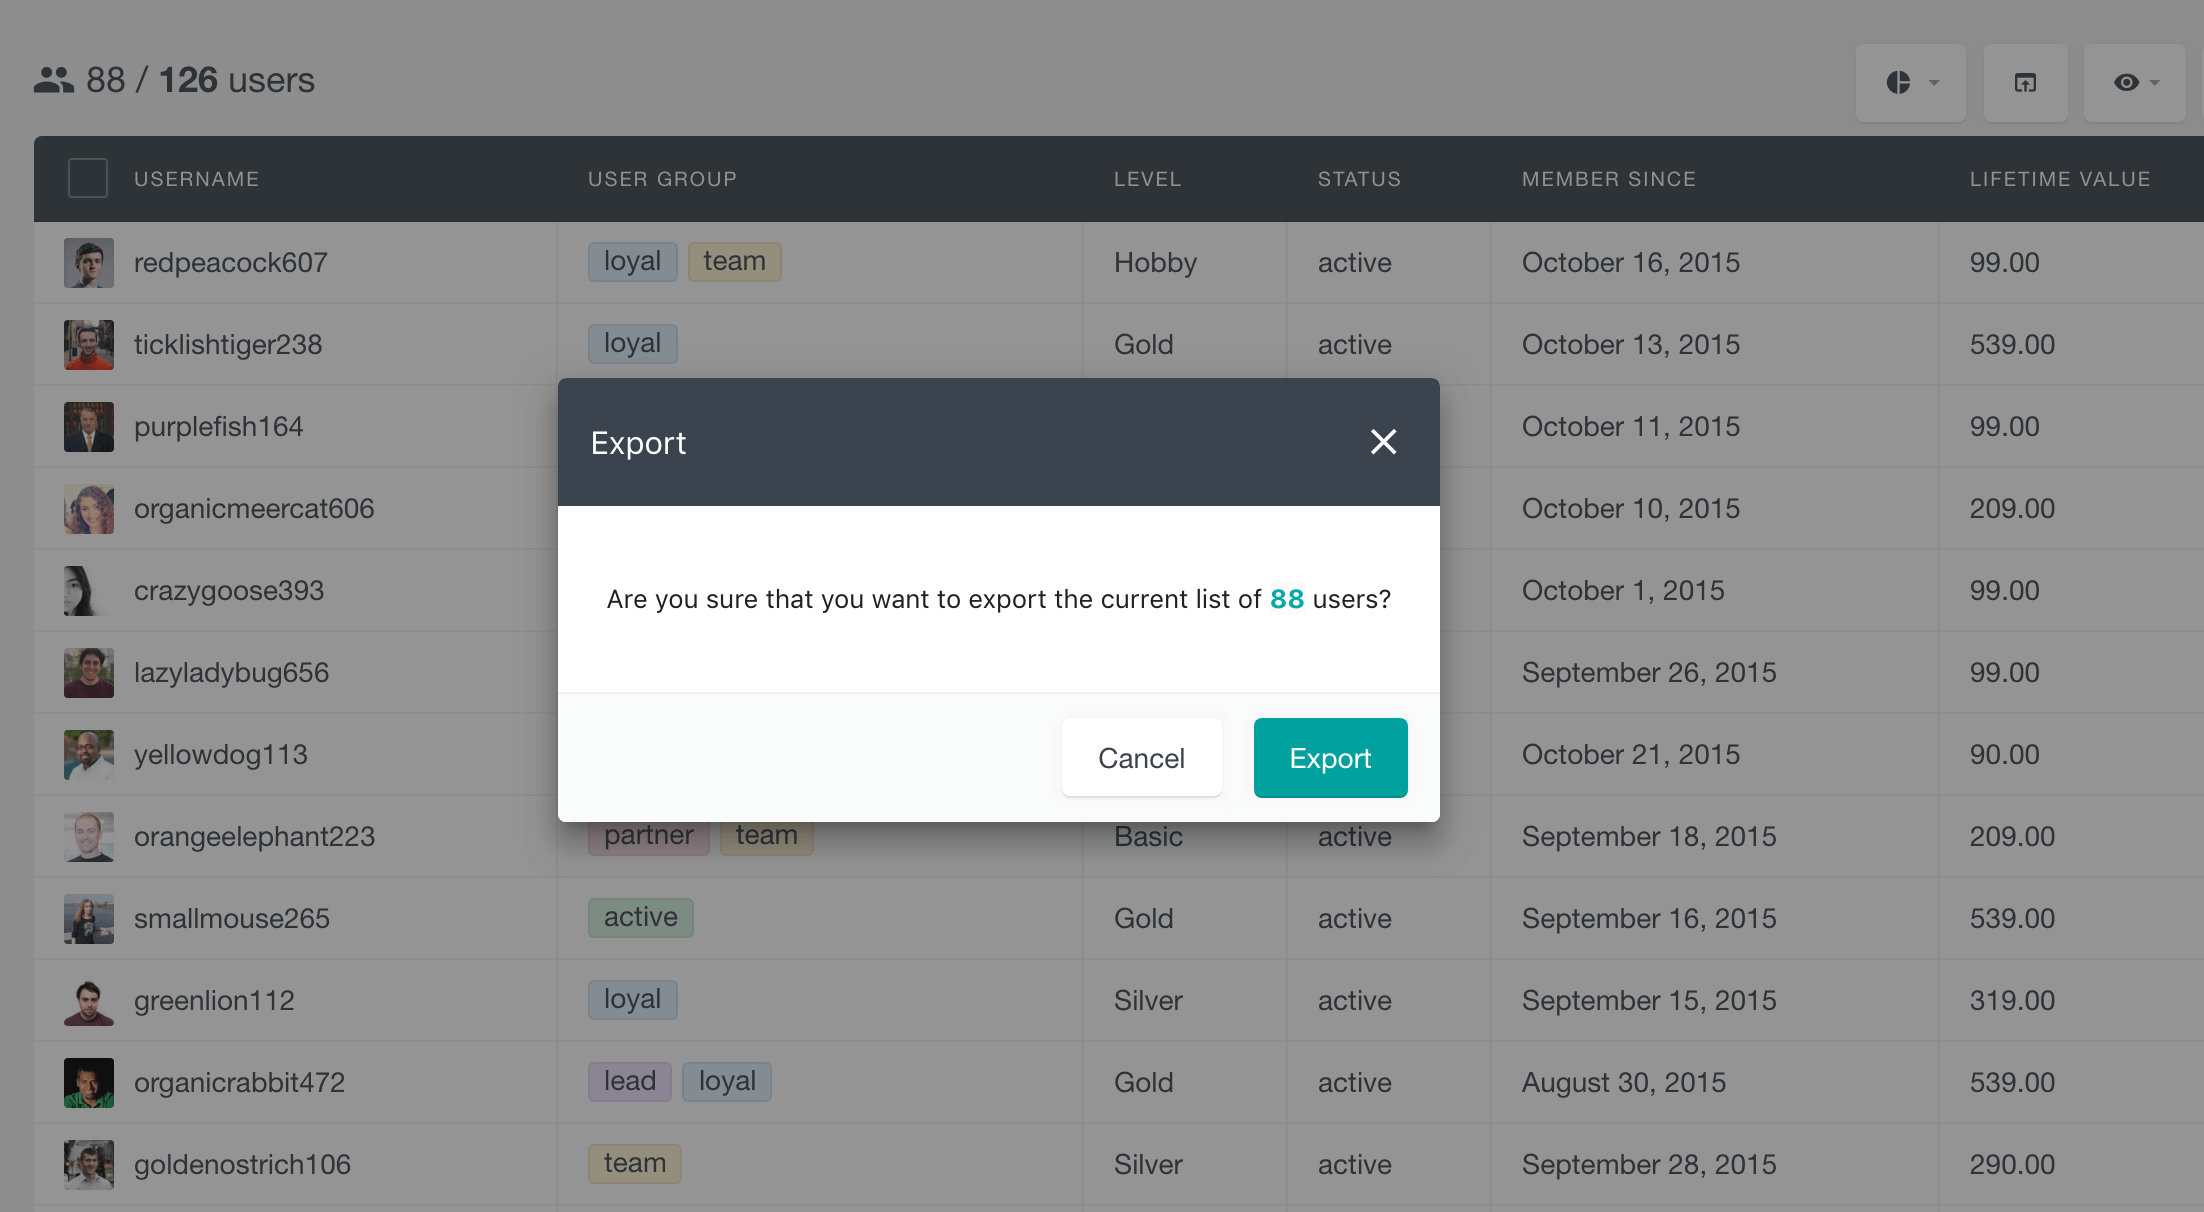
You can then use the exported in many different ways. For example, you can import the users to your favourite email campaign service, so you can send them special offers.
Conclusion
Today we learned how powerful filters, member groups and user segments can be for your membership website. We discussed in detail how you can improve your organization by getting to know your users more. We gave you a head start to play around with group filters combined with other filters, enhance their functionality and engage your Paid Membership Pro members in your offers effectively and smartly. A good management and tracking of your Paid Membership Pro members will definitely be a key to good customer experience and growing your business.