Sometimes, when managing many users, you might need to group them into different categories depending on their type and how they interact with your site. Being able to assign different groups to your users can be beneficial for better organization of your WordPress users list.
The Users Insights user groups feature allows you to easily create custom user groups and assign one or more groups to each WordPress user. After creating and assigning groups to users, you can view the groups assigned to each user in the Users Insights users table. You can also filter your users by the group to which they belong.
Creating Custom WordPress User Groups
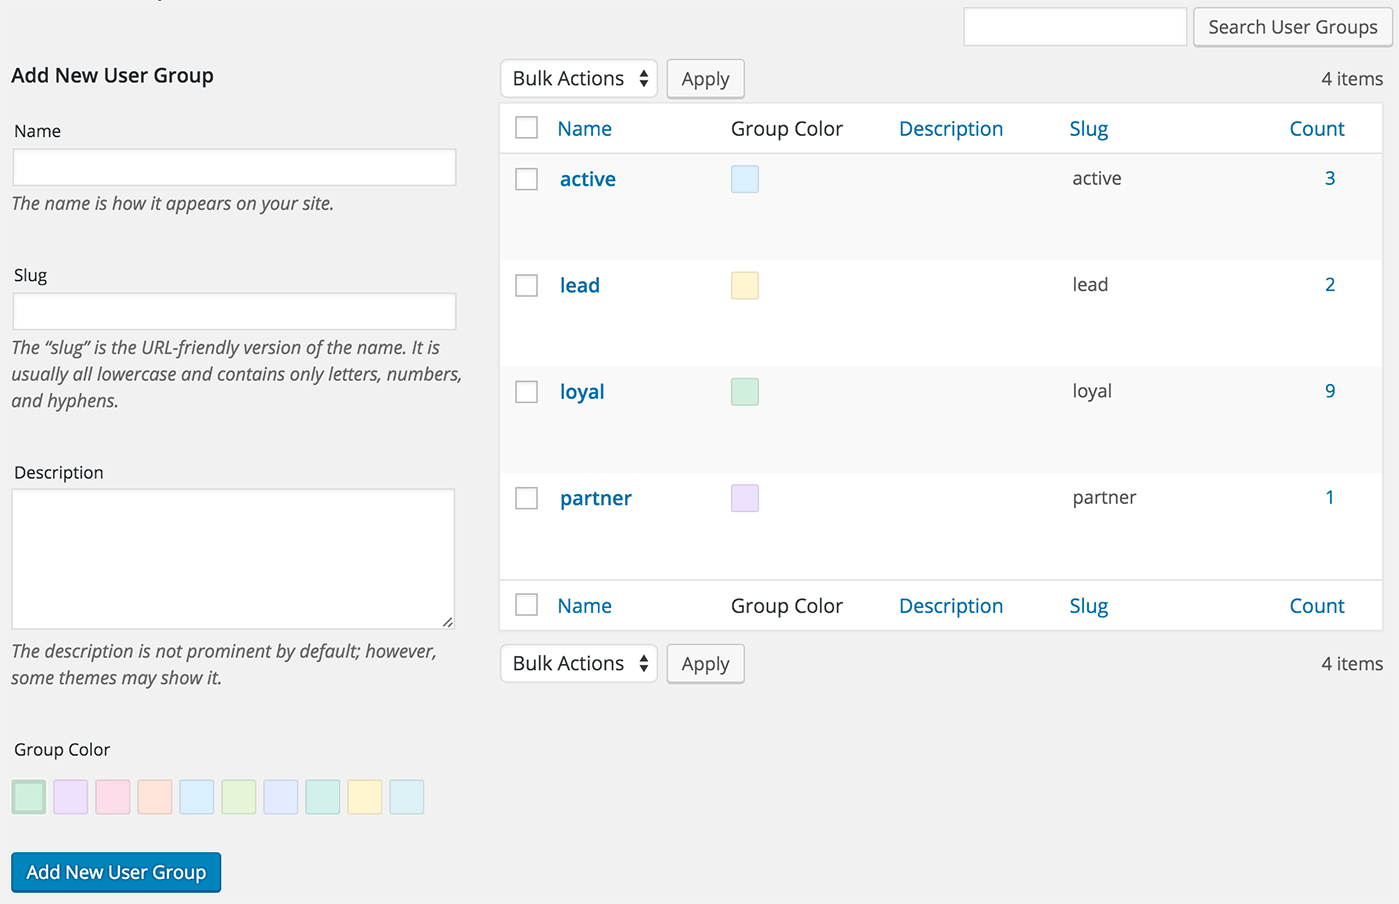
Users Insights includes a user interface allowing you to create new user groups easily. For each group you create, you can set a name and description and select a color for the group via the plugin user interface. Having groups in different colors can help visualize the user groups in the Users Insights table:
Assigning Groups to Users
Once the groups are created, you can change the group settings for each WordPress user in the user profile section of the Users Insights page. You can assign one or more groups, or you can remove existing groups: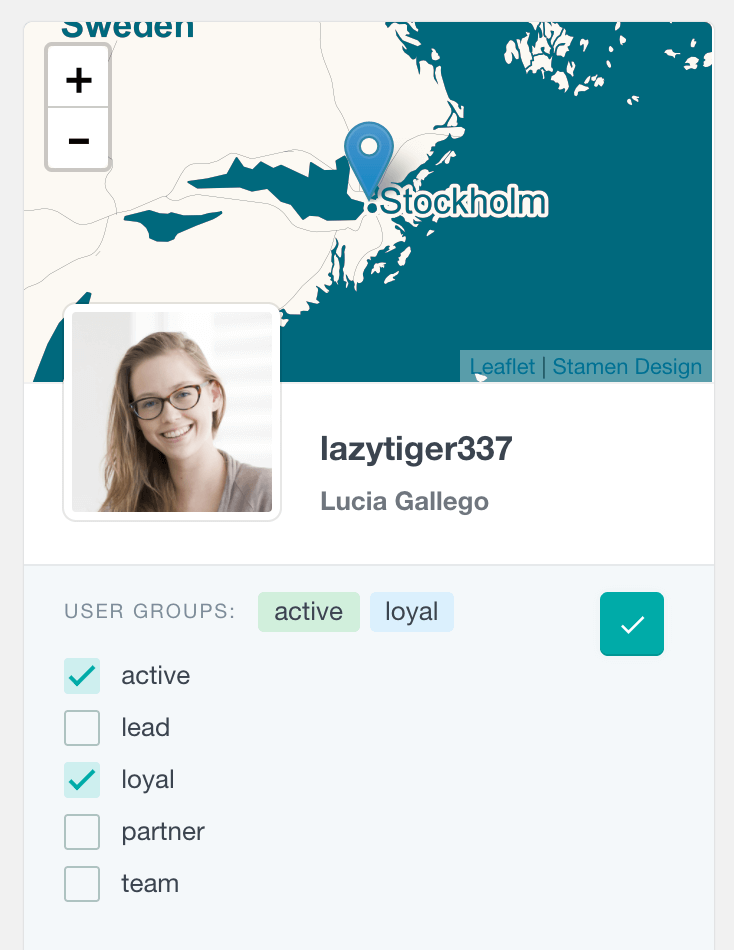
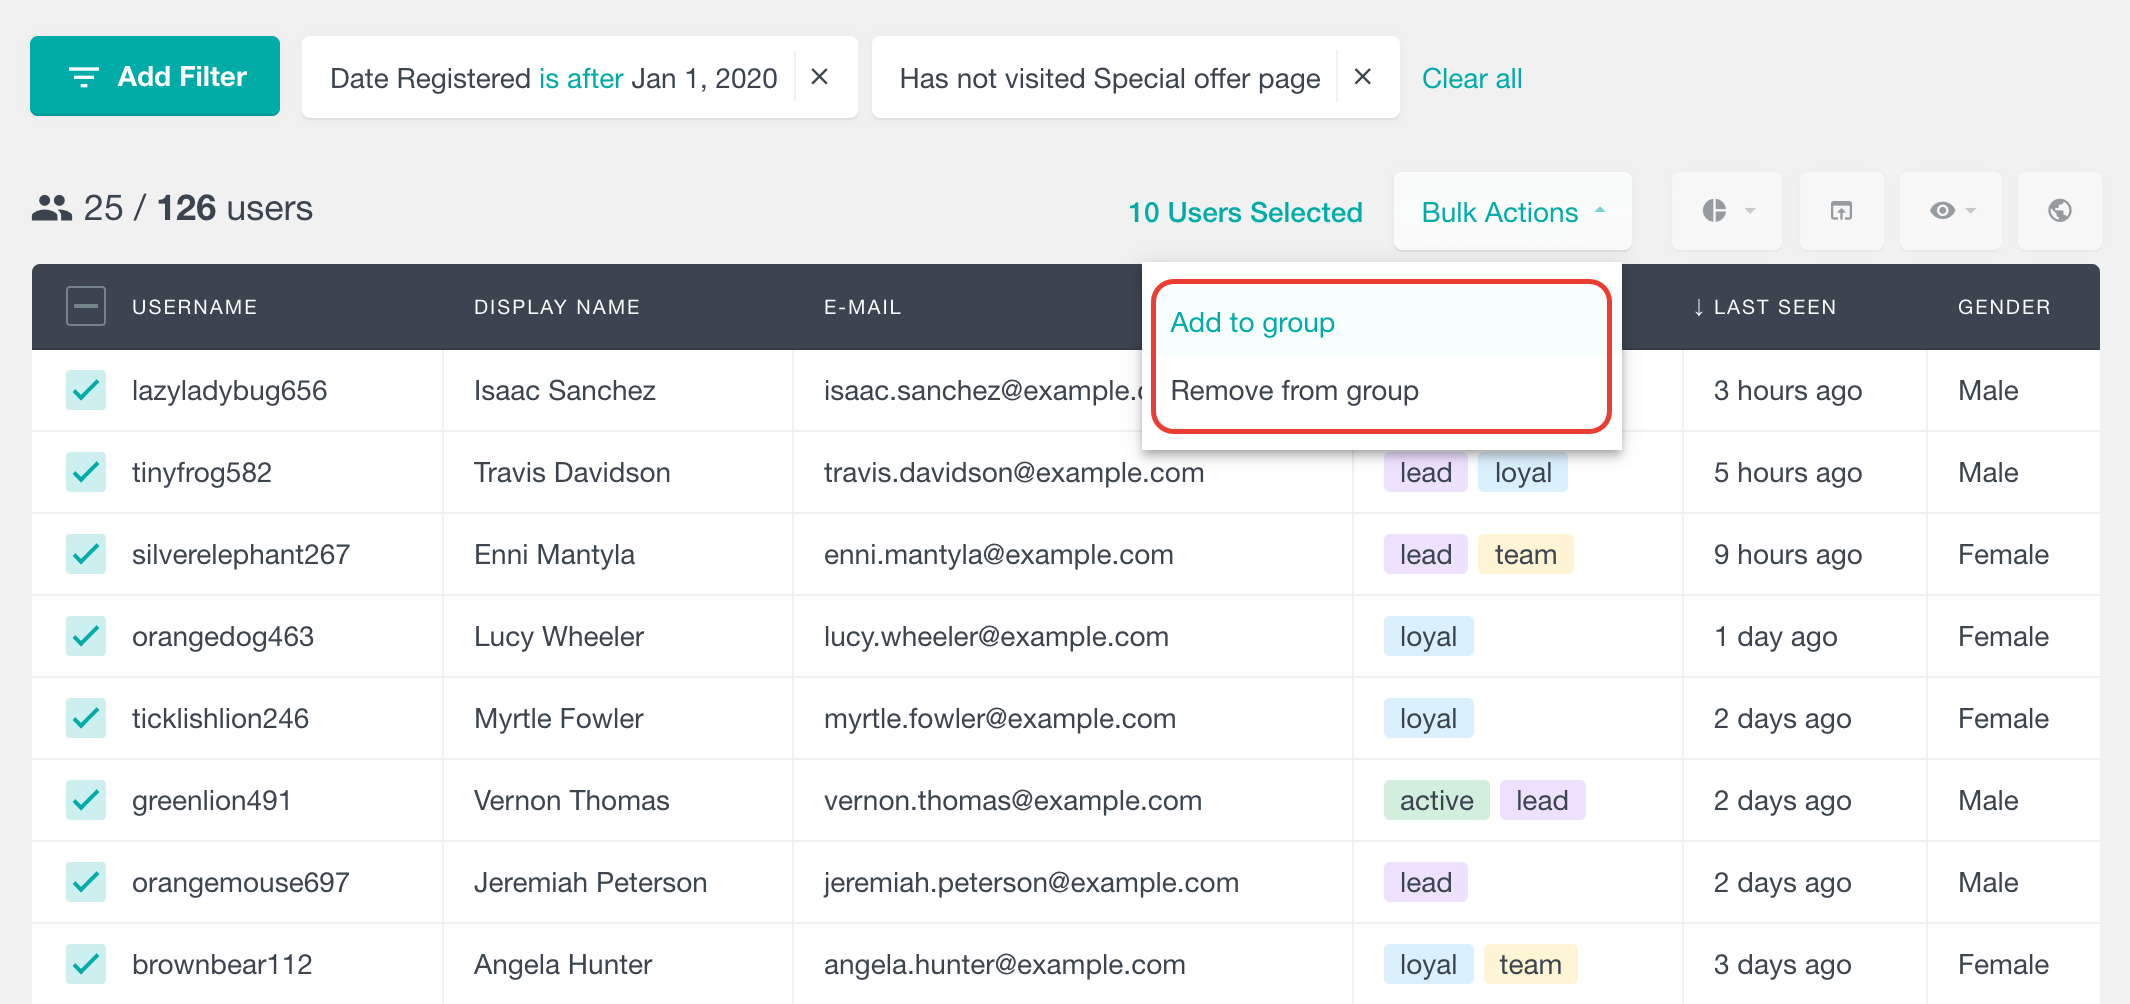
Additionally, you can bulk assign/remove groups to users on the user table. For example, you can apply some filters to find the users whose groups you want to change. Then, you can select the users with the checkboxes next to their usernames and use the “Bulk actions” button to manage the groups for these users.
Displaying the User Groups in the Users Insights Table
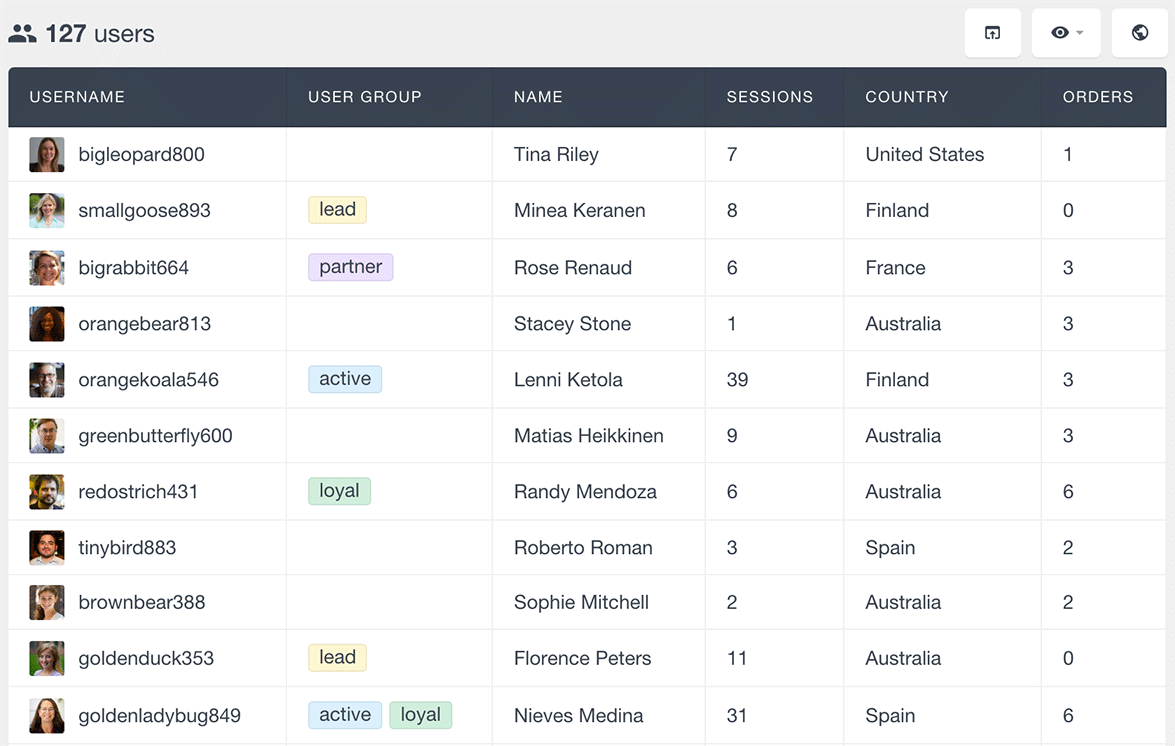
In the users table, you can view the groups assigned to each WordPress user by making the “User Groups” column visible. The User Groups column lists the groups with their color, which helps to see the groups assigned to each user more easily:
Filtering the WordPress users by their group
The Users Insights filters allow you to filter the users by the specific groups they belong to. You can find the users that belong or do not belong to a particular group. You can also find the users that have at least one group assigned, or the ones that don’t have any groups assigned.
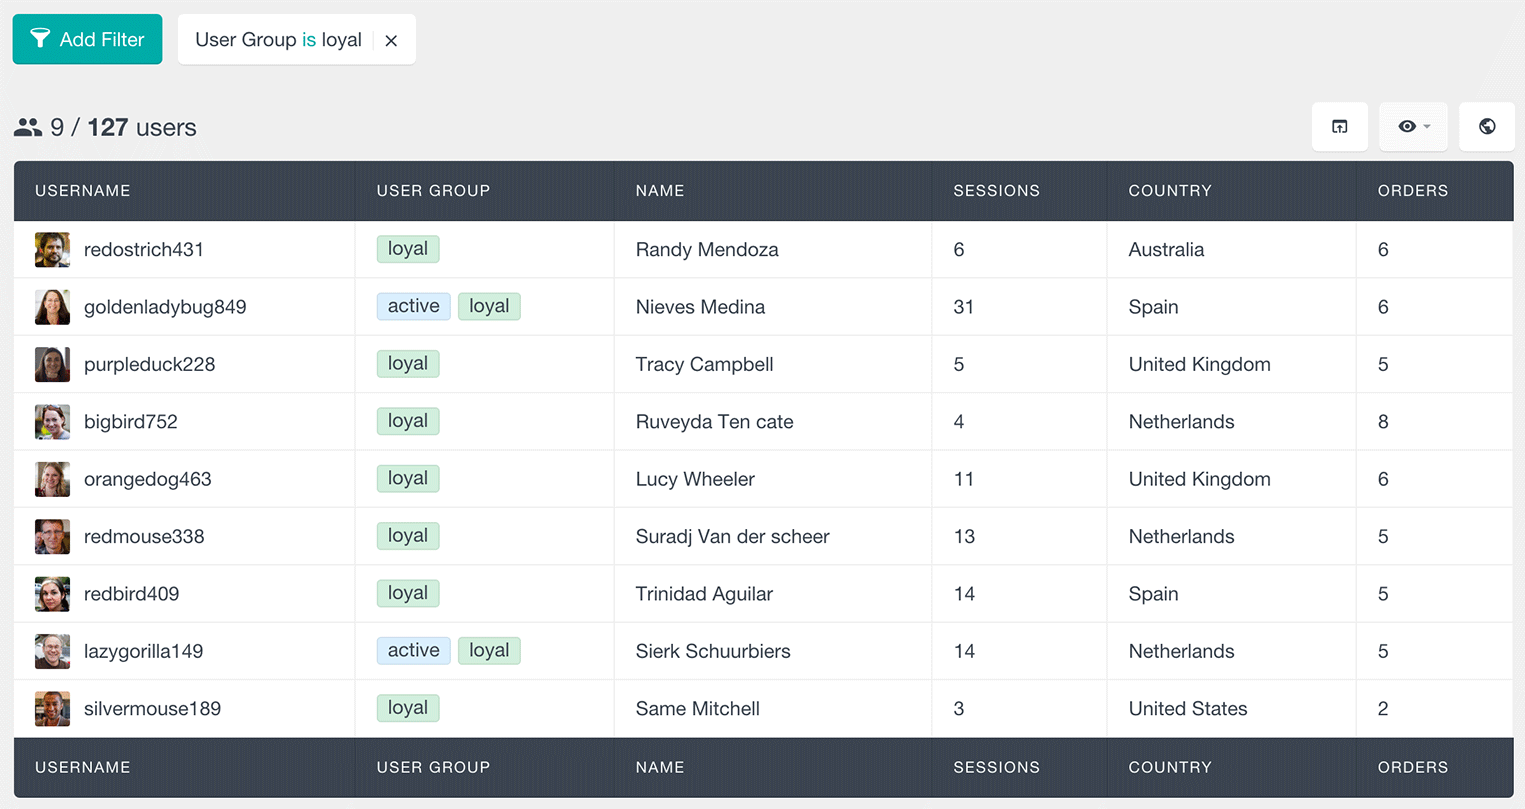
Here is an example of how you can list the WordPress users or WooCommerce customers that belong to the “loyal” group:
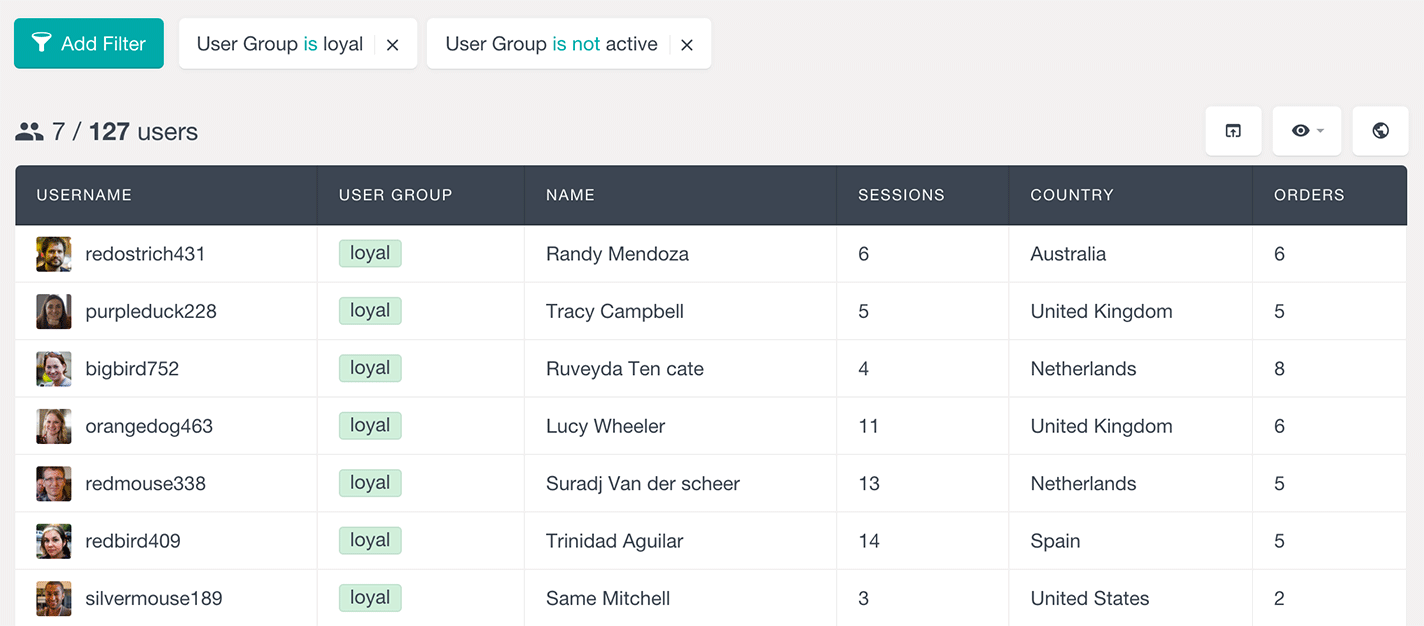
You can also apply more than one user group filter to segment the user list further. For example, you could also apply another filter to exclude the “active” group:
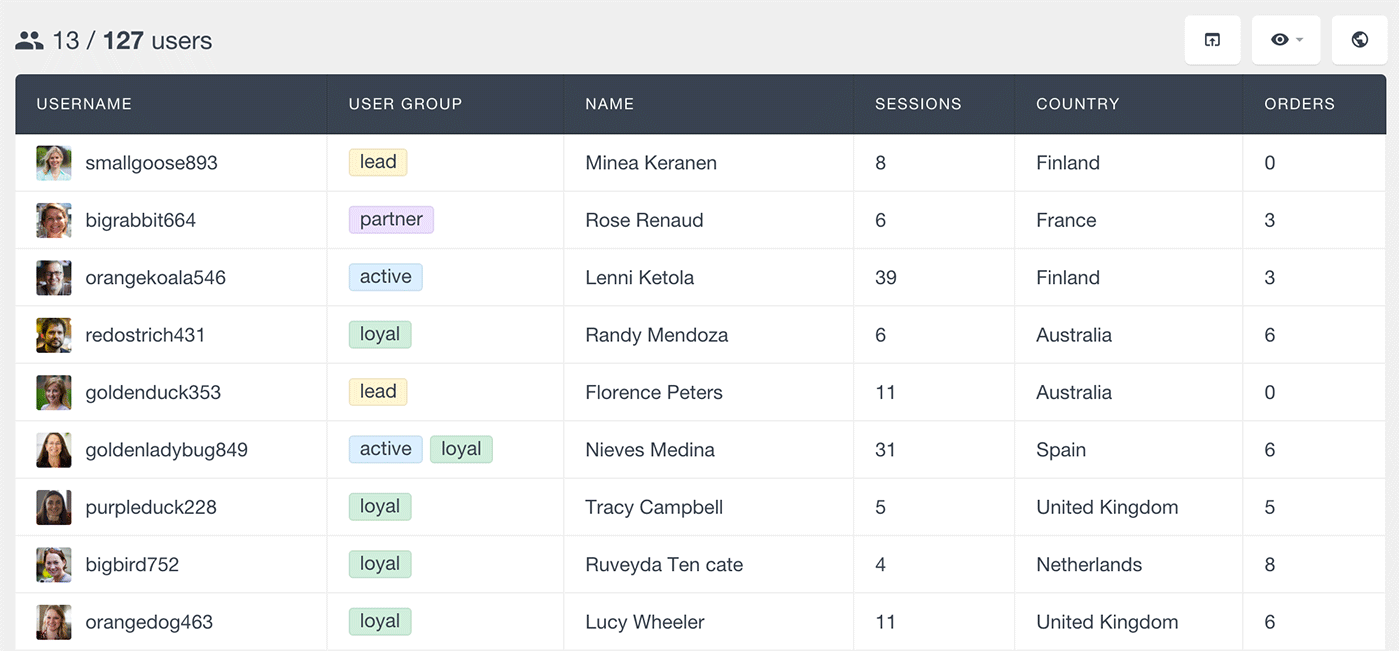
Another group filter that you can apply is to list the users that have at least one group assigned:
Similarly, you can also list the users with no assigned groups.
The User Groups feature seamlessly integrates with other Users Insights functionalities. For instance, you can apply smart filters to group users based on multiple criteria like activity, location, or WooCommerce purchase history, giving you a granular view of your user base.
These combined filters allow for more precise segmentation and analysis, helping you to adjust your interactions with different user groups. You can also link this with geolocation data to see the physical location of different user groups on an interactive map, offering even deeper insights into user behavior across regions.
Here is a short video that shows how to create a user group, how to add users to the group, and how you can filter your WordPress users by the groups they belong to:
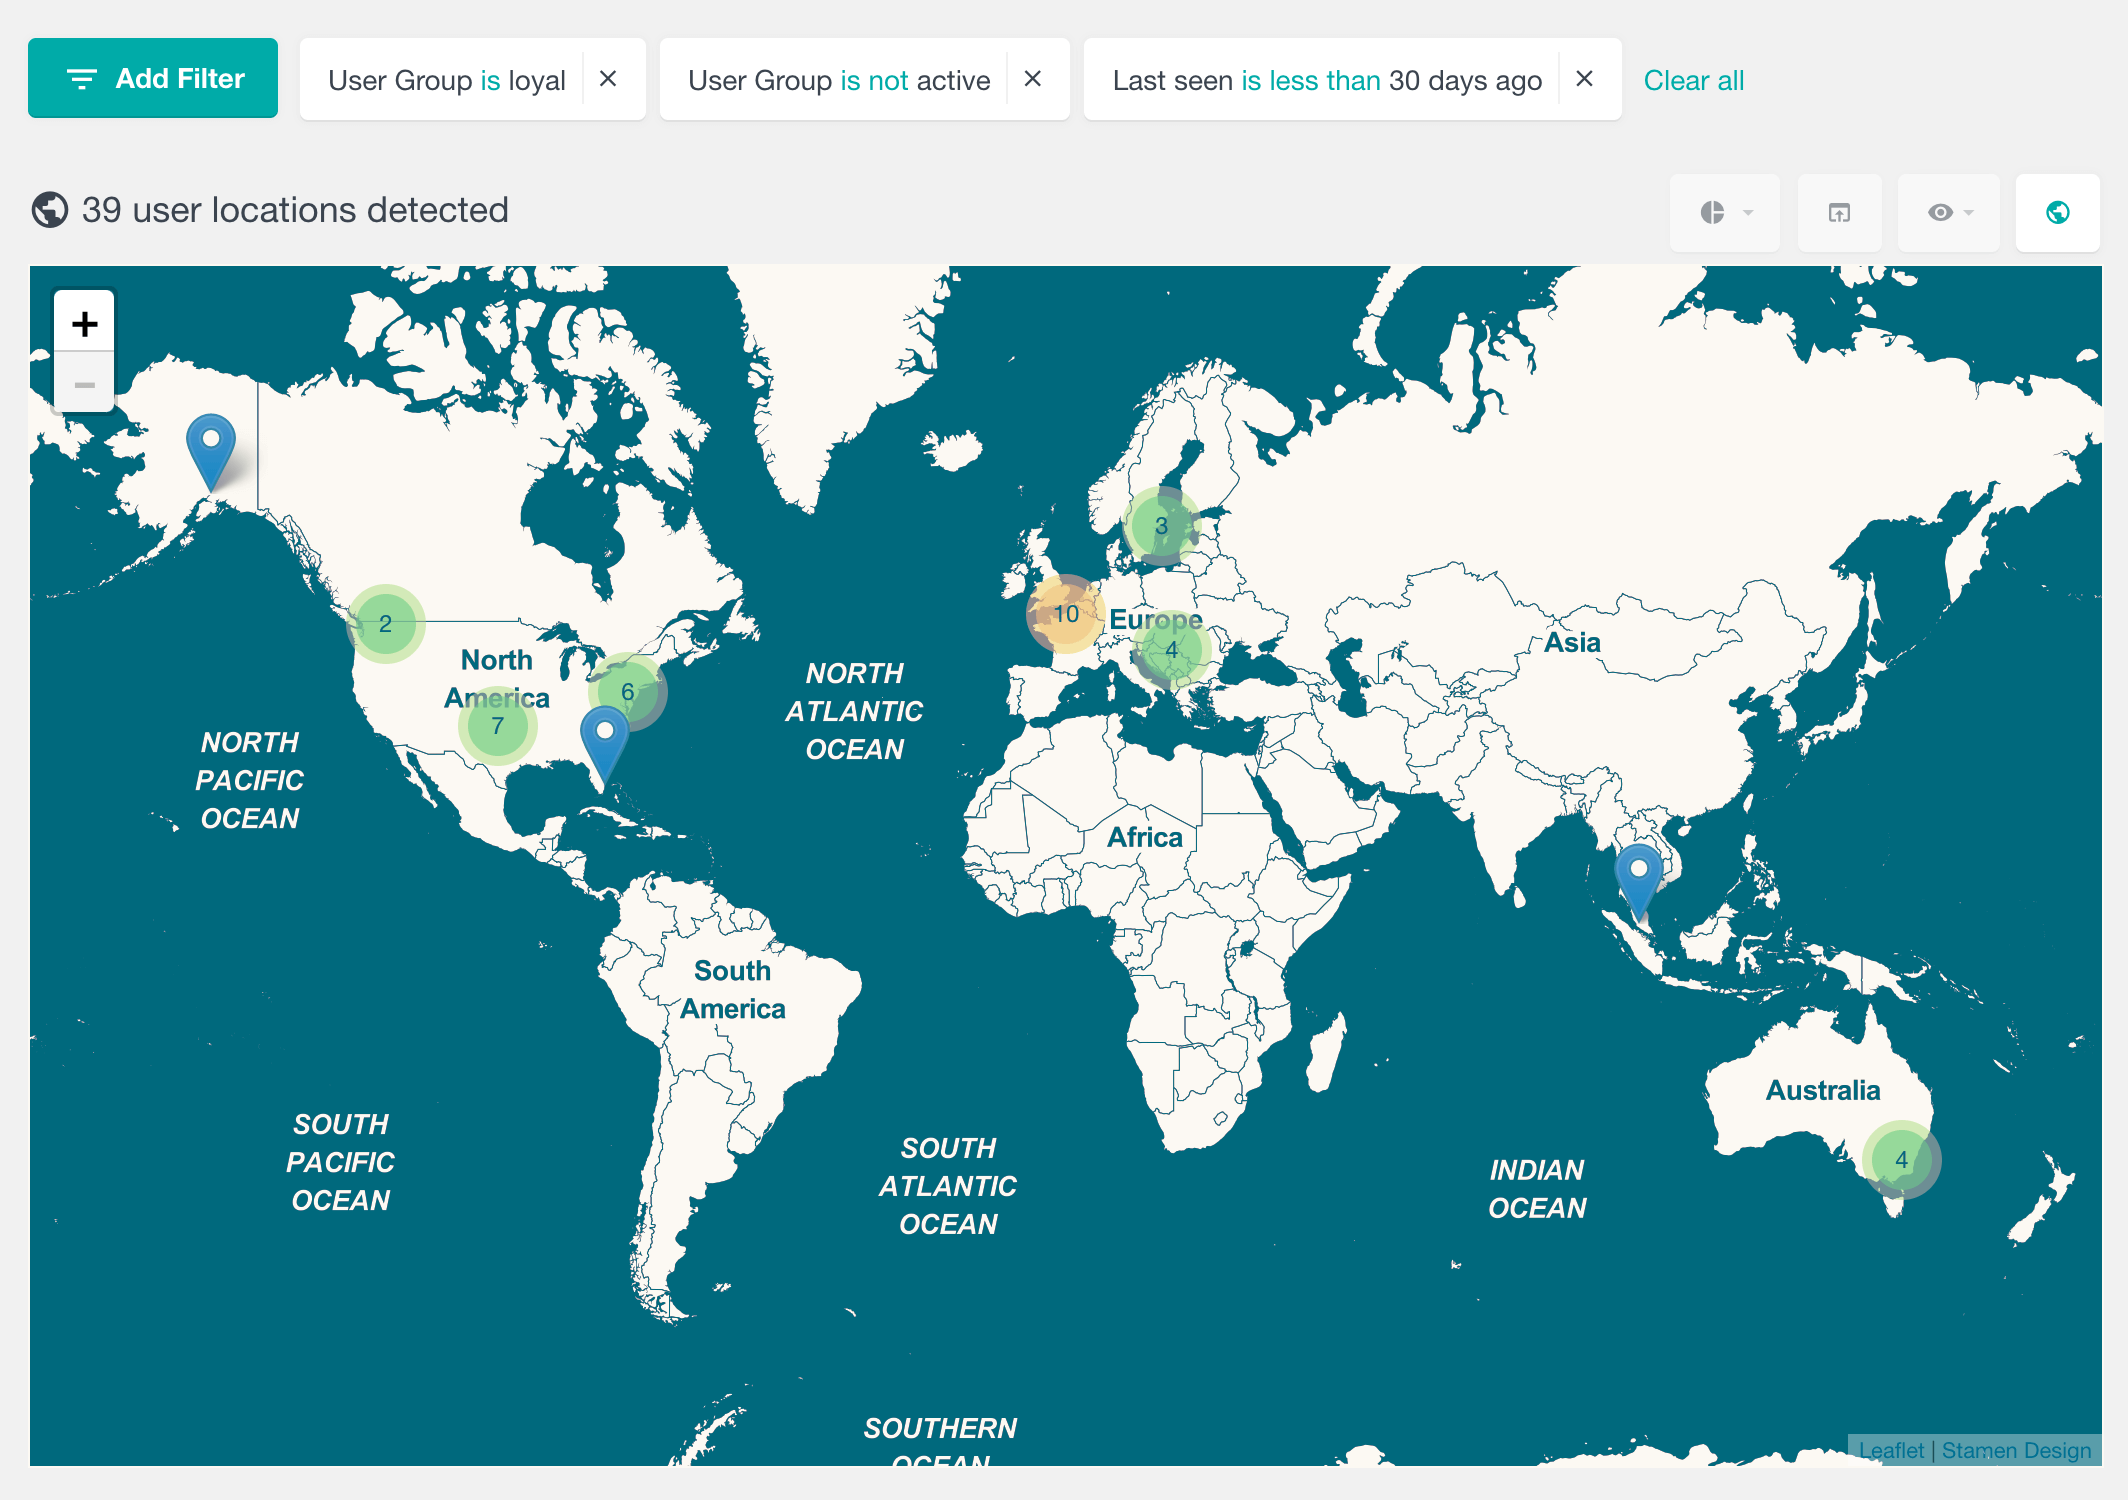
You can also use the Geolocation functionality to see the locations of your users on the map based on different group criteria. Here is an example showing the locations of the users on the map after applying group filters:
Additionally, you can export your users in CSV format with their group names and any other fields that you need. Before exporting them, you can filter the users by their groups and any other supported filters.
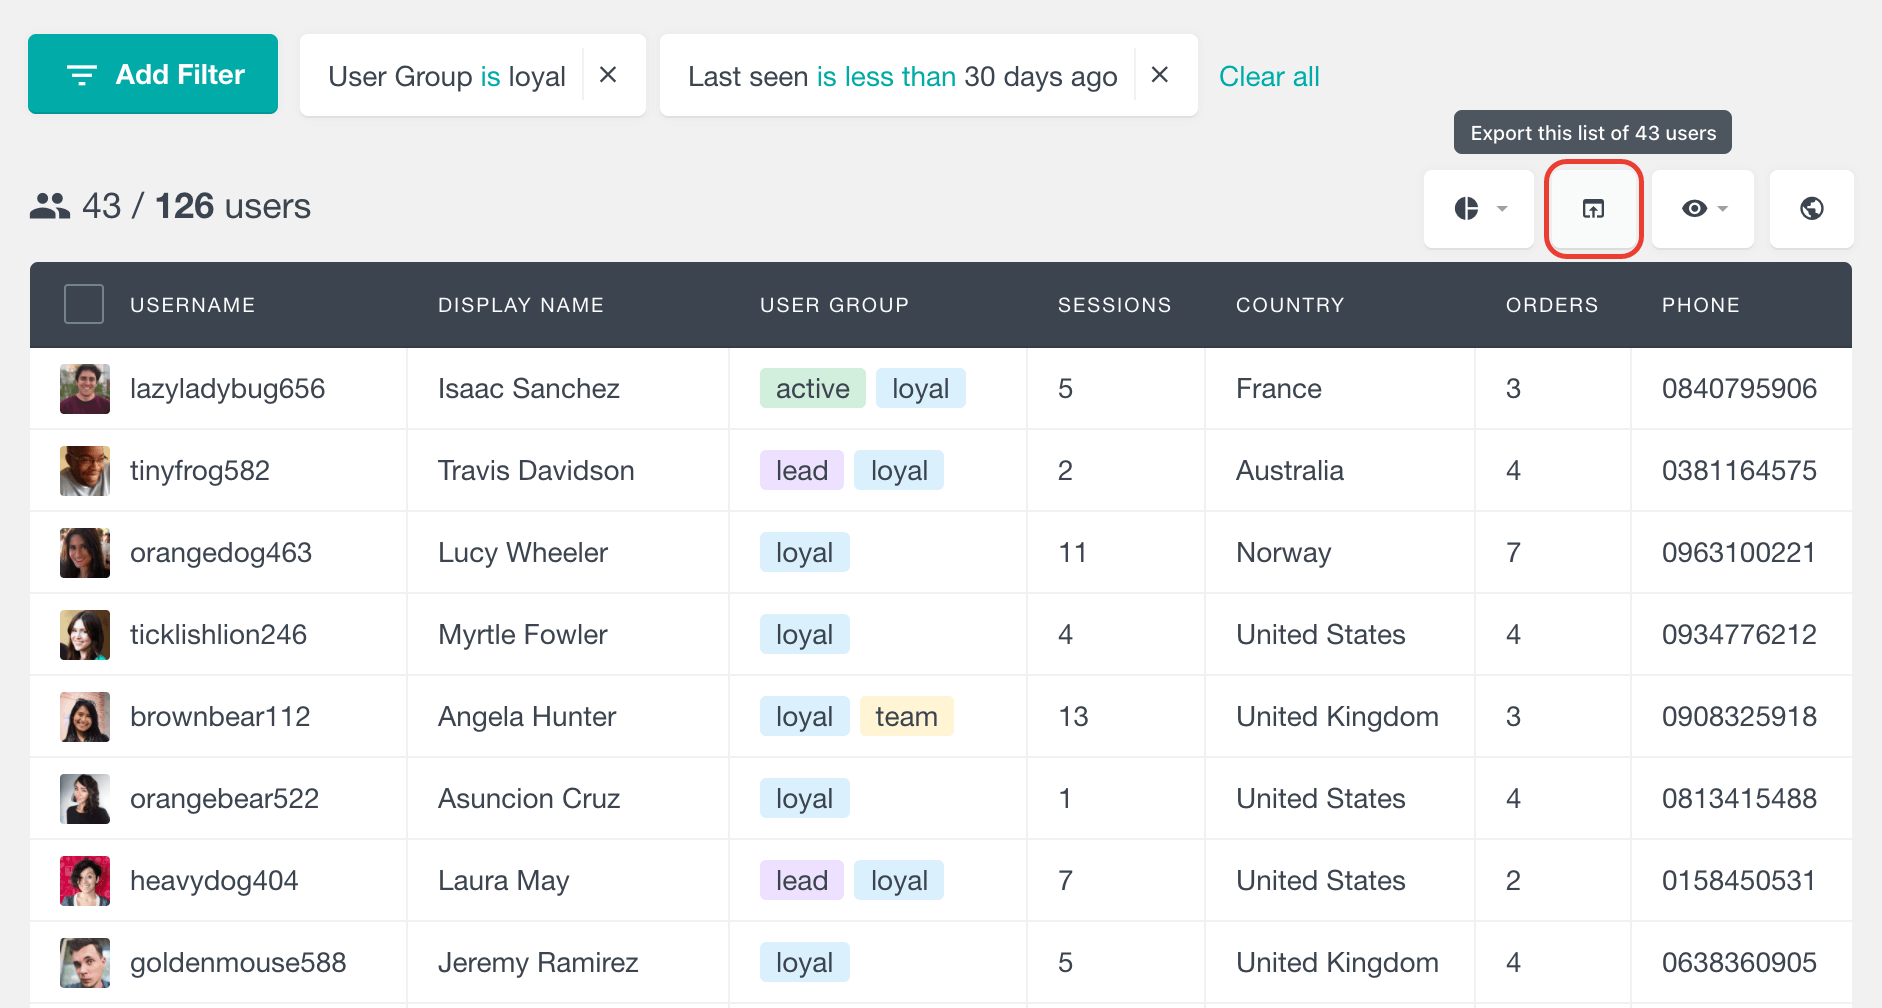
Here is an example of exporting all users from the “loyal” group who have visited our website in the past 30 days:
Here we have chosen to export the user’s name, number of sessions, country, orders and phone number. And this is how the exported data will look like: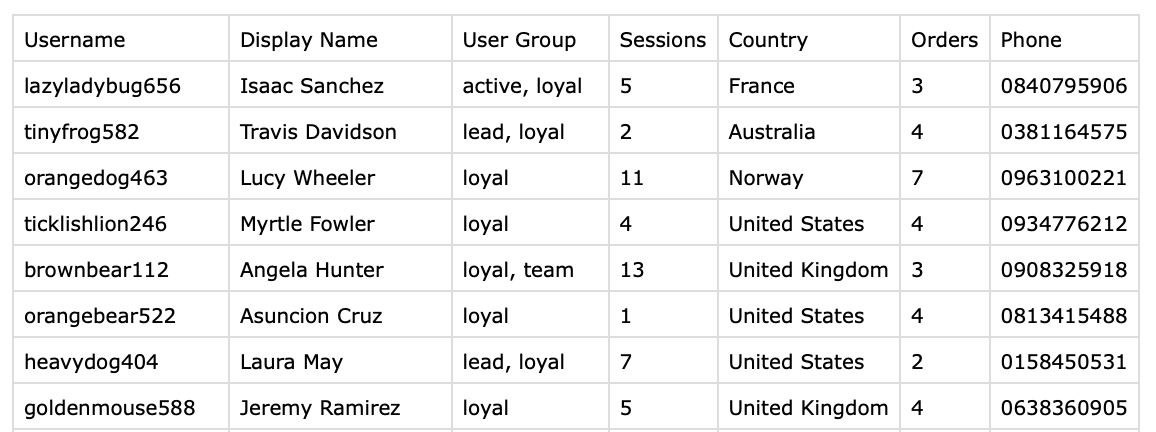
User Groups is a key CRM feature that can be helpful to better organize your WordPress users list. Being able to assign and explore the user groups can be beneficial to understand how the different types of users interact with your WordPress installation. It can also help you provide more customized services based on the group that each user belongs to.